5

12 Things I have Learned by Making All the Food In Disney Movies

I am postponing our Moana post until next week, so I can have time to do a proper “final” post. I put the word “final” in quotations for a reason that I’ll explain later.

These last two years have been crazy. There have been times where I wanted to throw in the towel, but I’m glad I kept on going. Looking back at this blog, I’m amazed at what was accomplished. I did a rough count of recipes and there were around 350. Thanks Walt for putting in so much food into your movies! haha. Its pretty crazy that next week, we’ll be all caught up. I won’t stop posting, but it won’t be as regular as I have been. I honestly need a little break!  

But don’t worry, I’ll definitely do posts after every Disney movie that comes out and I’ll start doing some random other animated movies here and there. I’m thinking of maybe doing some Ghibli films and maybe branching out and doing some live-action films like Harry Potter. I’m open to suggestions. So leave a comment, post on our FB page, tweet at us etc.

I never professed to be a professional chef, or anything close to it. But this blog really has really taught me a lot about cooking, and I definitely am a better cook than when I started. Here are some things I have learned along the way.

1.  Always add around 10 more minutes to a recipe’s total make time

I don’t know if I’m a slow chef or what, but my prep-times are always longer than what recipes . It is important to give yourself ample amount of time to cook, especially if you have company coming over or have a time-constraint. Always make time for the inevitable mishap.


2. Taste the food along the way

A painter will never focus 100% on her subject and never look at what she is painting until the very end. Likewise, when cooking, you shouldn’t throw everything in and hope for the best at the end. Granted, there are some recipes where it is hard to taste along the way, but many, especially stove-top dishes, you can taste as you put in ingredients to see how the flavor has changed. This will not only allow you to increase or decrease future ingredients, but it will give you a better understanding of how different substances affect the dish as a whole.


3. More spice isn’t necessarily always best

In the past, I would love to cook dishes and put in basil, paprika, parsley, salt, pepper, thyme, rosemary, lemon, mint, etc all at once. It definitely gave the food flavor, but I have found that many times, less spice is more. For instance, the best ribs I have ever made (the Christmas Ribs from Frozen) were only spiced with salt and pepper. No bbq sauce, no all-spice, just salt and pepper. Also, if you are cooking for people, it is smart to under-spice your food just a bit. Some people prefer less, some prefer more and you can always add table-salt.


4. Mix order and mix time is actually important while baking

It all gets mixed into the same goop, so why not just throw in all the ingredients at once? Well, in baking, order makes a difference. If you throw everything in at once, specific flavors don’t get mixed well, and consistency will change. Also, be sure to understand how long you should mix certain things. For example, when baking cookies, if you don’t over-beat the eggs (only beat for ~15 seconds), the cookies will turn out fluffier.


5. Even Rats can Make Fancy Food

There seems to be a misconception in society that restaurant food is better than home-cooked food. But just as Gusteau always says “Anyone Can Cook”, and fancy food isn’t too hard lots of the time. It all comes down to the ingredients used. Sometimes, it may be hard to get quality ingredients, but if you’re wanting to make a gourmet meal for someone special, it is worth it. Making fancy meals usually aren’t too much harder than following a recipe for any other meal. But make sure you take care when following the recipe.


6. Get a mandolin slicer

I can’t believe I never had one before a couple years ago. They are really cheap (I think I got mine for under $20) and they are so convenient for chopping veggies. With a mandolin slicer, you’re able to get equally sized veggies which is great because they cook more evenly. This is especially important if you want to make ratatouille. The days are gone when I would take a bite of food and have one zucchini be super mushy and another one be too thick and raw. Other important kitchen items would be: a kitchenaid mixer, a nice sharp knife, and a cast-iron pan


7. Smell is important

I have always had a horrible sense of smell. However, my sense of smell has been fine-tuned while I’m cooking. I am able to sense when food is done or on the verge of burning and even when different flavors are needed. Some may have this knack natively, but it may take some developing for others like me. It is important to use all your senses while cooking. The more senses you pay attention to while cooking, the better your food will turn out. Next time you’re having a good meal, examine what makes it good with all your senses. Is it golden brown? Does the crust make a nice crackling sound? Does it have a pleasant aroma? What about the texture makes it pleasing? How do the flavors play together in your mouth?


8. Presentation is hard, but important
This is definitely the biggest weakness I have. I am terrible at making food, especially baked food, looked good. I am constantly having to get my wife to decorate cakes for me and making dishes look good. While to a blind person, a ugly cake and a pretty cake may taste the same, to everyone else, seeing a badly presented dish creates a bias. Even when I am cooking for myself, if it looks bad, it never tastes as good. Conversely, if it looks amazing, it always tastes better than it should.


9.  Dishes suck

Ugh, this has been the bane of my last two years. It is an unavoidable downfall of cooking though, that is, unless you hire a cleaning guy or have an army of well-trained children that will jump at the opportunity to wash a dish.  It is the worst after making a huge meal, to see the piles of dishes in the sink and dreading what has to come next. Some may say that it is best to just suck it up and do the dishes right after dinner. I’m the opposite. I like to give myself a respite before jumping in. The bad part about my way, is that sometimes the dishes get put off for days  at a time.


10. Cooking is tiring

Going along with my last point, cooking is physically and mentally draining. There have been times where I have cooked for hours straight. At the end, my feet hurt, I’m sweating and have to fight staying awake when I finally sit down. It sure makes for a great presentation when I have guests over right after. I have gained a huge respect for those that make cooking their living. It is a tiring job, but a well-rewarding job.


11. There are so many different types of food out there

One of the greatest things this blog has done for me is opened my eyes to the wonderful world of food. There are so many different types of dishes out there. Many of which I have never heard of, but tasted amazing. There were times where I would be watching a Disney movie and have had no idea what the food shown was. I would do some research and find out that it was a old dish, native to the area of the movie. I would make it and be exposed to flavors I had never experienced before. I suggest that you stop the slow-cooker meat and potatoes, the spaghetti and tacos for a bit and branch out. Try to make some food from times and locations you have never thought of. It will expand your taste-buds and maybe even bring in some new regulars to your weekly meals.


12. Passion makes perfect

Above all, the best thing I have learned is that when I am passionate about making a dish good, it usually turns out good. There have been many times where I’ve been tired and kind of phoned-in a meal. When I’ve been apathetic like that, the meals have never turned out great. However, when I am truly excited to make a new dish, I put in the care and attention that is needed to make it great.


Overall, I have loved my experience of food-blogging. It has been very eye-opening and has increased my skill of cooking tenfold. If you have the opportunity to challenge yourself, whether it be make a new recipe a week or even incorporate a new spice into your cooking, I recommend you take it. 

Thank you to all of our followers who have supported us on this journey. We hope to continue baking with you as the years go on!

2

ComicCon Special Post – C2E2

So, this week, we’re doing something different. This last weekend, Disney Meals went to C2E2 here in Chicago. We got some great pictures of Disney cosplays and other cosplays.

0

DisneyMeals does Colombia – Arepas

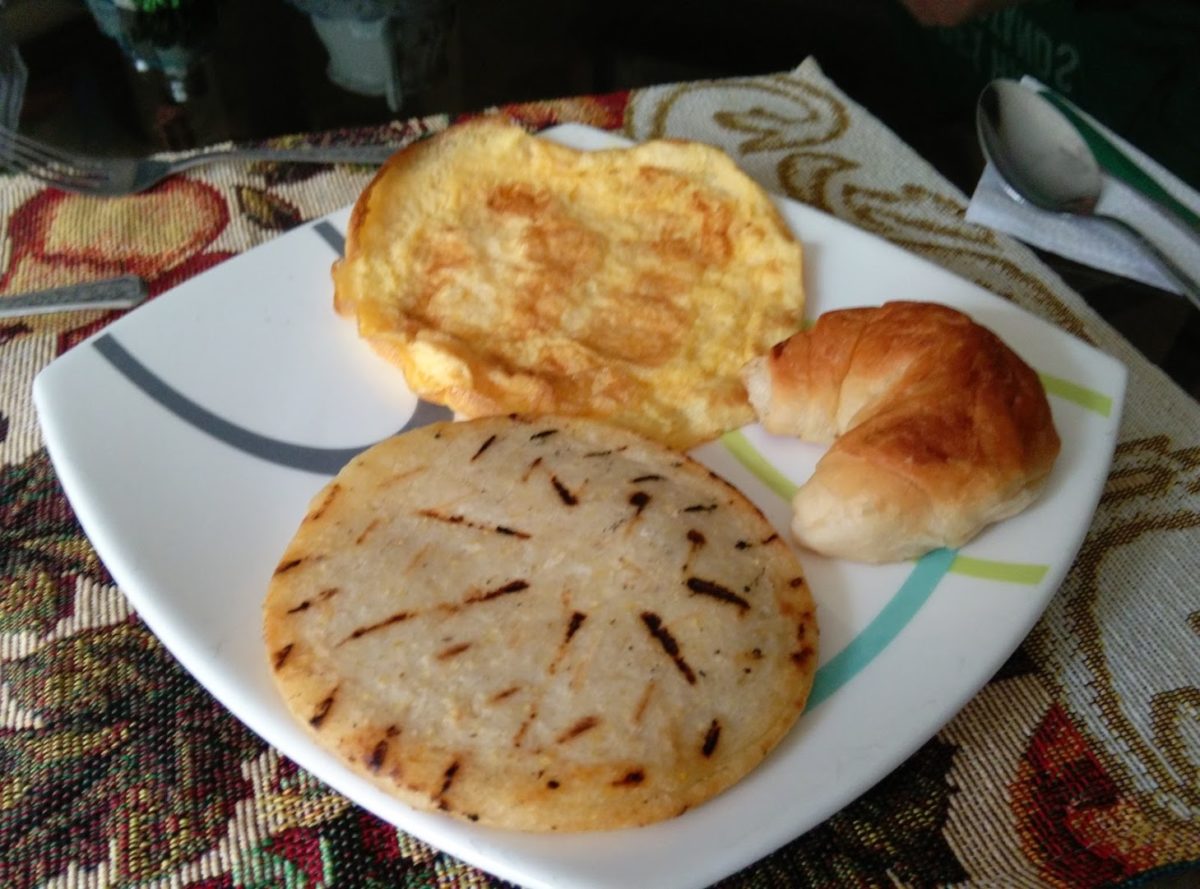
This week we’re doing something a little different because we’ve been traveling in Medellin, Colombia. We’ve eaten some amazing foods here, but the best have been Medellin’s own Arepas. You can check out some other yummy South American recipes in our Saludos Amigos and Three Cabelleros post.

1

Christmas Medley!

Quick links: Link 1 | Link 2Link 3 | Link 4 | Link 5 | Verdict


We’re doing a special recap of some of our favorite recipes that you can try for your Christmas feast! This will also be our last post of the year! So Merry Christmas and Happy New Year! See you in a couple weeks!


Christmas Goose from The Aristocats

Ingredients:
1 Red Bell pepper
1 Yellow Bell Pepper
1 tbs olive oil
1 Whole Goose/Duck
2 Onions (wedged)
2 Garlic Cloves (minced)
1 cup White Wine
1 small can tomato paste
1 can petite diced tomatoes
1 cup chicken stock
3/4 cup black olives (pitted)
1 cup chestnuts (or hazelnuts as a sub.)
1 stick butter (divided in half)
2 Slices of bread
  salt and pepper to taste
2 tsp crushed bay leaves
8 sprigs thyme
  1. Preheat the oven to 450F
  2. Boil some water and dump it over defrosted goose to tighten up the skin
  3. Rub 4 tbs butter over the entire goose
  4. Stick in a baking dish
  5. Place bell peppers on a baking sheet and roast them in oven for ~15 mins
  6. Place onion in a pan and cook, stirring occasionally over a medium-high, for 5 minutes or until golden.
  7. Add the garlic and cook for 2 minutes or until aromatic.
  8. Add the wine and cook for 2 minutes or until reduced by half.
  9. Add the bell peppers, tomato paste, diced tomatoes, bay leaves, stock and thyme.
  10. Season with salt and pepper.
  11. In a separate pot, melt 4 tbs butter.
  12. Add in chestnuts and 1/4 c. wine.
  13. Bring to boil and let simmer for 15 minutes, until the chestnuts start getting a little soft.
  14. Stir in the shredded bread and olives.
  15. Salt and pepper to taste.
  16. Place the chestnut mix inside the goose
  17. Pour sauce over goose
  18. Place the goose in the oven
  19. Cook for 1 hr 45min (or until goose is brown and meat thermometer reads 175F), flipping the goose over every 35 mins. You may baste the goose with white wine every 30 minutes as well.
  20. Keep covered for first 30 minutes and then only partially covered for the rest

IMG_20150614_182900


Holiday Ham from Pocahontas

Lime Glazed Ham w/ Blueberry Sauce
Write a review
Print
Prep Time
20 min
Cook Time
2 hr
Total Time
2 hr 20 min
Prep Time
20 min
Cook Time
2 hr
Total Time
2 hr 20 min
Ham
  1. 1 fully cooked bone-in ham (6 to 7 lb)
  2. 1 cup water
Glaze
  1. 1 cup packed brown sugar
  2. 1/2 cup Dijon mustard
  3. 1/3 cup Key lime juice
Blueberry Sauce
  1. 1/3 cup(s) preserves, apricot
  2. 1 tablespoon sugar, brown
  3. 2 tablespoon wine, dry red
  4. 4 tablespoon lemon juice
  5. 1 cup(s) blueberries
  6. 1 tablespoon cornstarch
  7. 1/3 cup(s) water
Instructions
  1. Heat oven to 325°F. If shallow roasting pan does not have rack, line with heavy-duty foil. Place ham, fat side up, on rack in pan or in foil-lined pan. Score ham diagonally at 1-inch intervals, cutting 1/4 inch deep; score in opposite direction to form diamond shapes. Pour water into pan. Bake 1 hour.
  2. Meanwhile, in medium bowl, mix glaze ingredients. Pour half of mixture into 1-quart saucepan; set aside for sauce.
  3. Remove ham from oven. Insert meat thermometer so bulb reaches center of thickest part of ham, but does not rest in fat or on bone. Brush ham with some of glaze in bowl.
  4. Bake 2 hours or until thermometer reads 140°F, brushing frequently with pan drippings and remaining glaze in bowl. Let ham stand in pan 15 minutes, spooning pan drippings frequently over top.
Blueberry Sauce
  1. In a small saucepan, combine the cornstarch or arrowroot powder and water.
  2. Stir in the apricot jam, brown sugar, wine, and lemon juice.
  3. Cook over medium-low heat for 5 to 6 minutes until the sauce is thickened and bubbly.
  4. Stir in the blueberries and cook 2 to 3 minutes.
  5. Spoon the sauce over the ham and serve.
DisneyMeals https://disneymeals.me/

Gingersnaps from The Rescuers

Penny's Gingersnaps
Serves 24
Write a review
Print
Prep Time
20 min
Cook Time
10 min
Total Time
3 hr 30 min
Prep Time
20 min
Cook Time
10 min
Total Time
3 hr 30 min
Ingredients
  1. 2¼ cups all-purpose flour
  2. 2 teaspoons ground ginger
  3. 1 teaspoon ground cloves
  4. 1½ teaspoons baking powder
  5. 1/8 teaspoon kosher salt
  6. ½ cup unsalted butter, at room temperature
  7. 1 cup sugar
  8. 1 Extra Large Egg
  9. 1/3 cup dark molasses
  10. 1 1/2 teaspoon vanilla extract
Make the dough (You can do this part up to three days in advance.)
  1. SIFT the flour, ginger, cinnamon, cloves, baking powder and salt together in a medium bowl. Set aside.
  2. PLACE the butter and sugar in the bowl of a stand mixer fitted with the paddle attachment. Beat on medium speed until the mixture is light and fluffy.
  3. SWITCH the mixer to low speed and gradually add the egg, molasses and vanilla extract. Increase the speed to medium and beat until smooth.
  4. SWITCH the mixer to low speed and add the dry ingredients in 3 additions, pulsing the mixer to incorporate each addition before adding the next one.
  5. TURN the dough out onto a lightly floured work surface. Knead a few times to incorporate any crumbs.
  6. DIVIDE the dough in half. Roll each half into a log about 1½ inches in diameter and 12 inches long. As you roll, gently push the ends toward the center to prevent air pockets and to keep the logs at an even thickness.
  7. WRAP the logs in plastic wrap and refrigerate until firm, at least 3 hours or up to 3 days.
Bake the cookies
  1. PREHEAT the oven to 400°F. Line the bottoms of two 12″ x 18″ sheet pans with parchment paper.
  2. REMOVE the logs from the refrigerator and unwrap them. Using a ruler and a sharp knife, cut each log into rounds ¼ inch thick. If the dough crumbles as you cut it, reshape each slice.
  3. PLACE the rounds on the prepared pans, spacing them 2 inches apart. Bake on the middle shelves of the oven, rotating the pans 180° halfway through the baking time, until the cookies are set but soft enough to hold a slight indentation when pressed with a fingertip (about 7 to 10 minutes).
  4. LET cool completely on the pans on wire racks. Store in an airtight container at room temperature for up to 1 week. Yield: 50-60 2-inch cookies.
Notes
  1. Source: http://www.thenibble.com/reviews/main/cookies/cookies2/ginger-snaps-recipe.asp
DisneyMeals https://disneymeals.me/

Pineapple Upside-down Cake from Nightmare Before Christmas

There are many other Christmas recipes you can find there too.

Pineapple Upside-down Cake
Write a review
Print
Prep Time
15 min
Cook Time
35 min
Total Time
50 min
Prep Time
15 min
Cook Time
35 min
Total Time
50 min
Ingredients
  1. 1 (18 ounce) box yellow cake mix
  2. 3 eggs (or as called for by your cake mix)
  3. 1⁄3 cup oil (or as called for by your cake mix)
  4. 1 1⁄3 cups water (or as called for by your cake mix)
  5. 1 cup dark brown sugar
  6. 1⁄4-1⁄2 cup butter
  7. 1 (20 ounce) can pineapple slices
  8. 1 (8 ounce) jar maraschino cherries (optional)
Instructions
  1. Follow instructions on cake box for making an oblong single layer cake.
  2. Prepare cake batter and set aside.
  3. Cut up butter in small pieces and place all over the bottom of the oblong pan specified on cake box.
  4. Sprinkle brown sugar generously over the butter.
  5. Place pan on the stove (or in the oven) and heat slowly until butter and sugar melt to a liquid then remove from heat.
  6. Evenly space the pineapple slices around the bottom of pan in the heated sugar and butter.
  7. Place the cherries and nuts between the pineapple slices (Tho the cherries and nuts look nice and taste great, they are optional).
  8. Pour cake batter on top of the pineapple/cherry/nut mixture.
  9. Place in oven and bake as directed on cake box.
  10. As soon as cake is done place a plate over the cake and turn upside down and carefully remove pan.
  11. If you wait too long the sugar will harden and be difficult to remove.
DisneyMeals https://disneymeals.me/

Plum Christmas Pudding from Make Mine Music

Ingredients:

Pudding

1 cup flour
3/4 teaspoon cloves
3/4 teaspoon nutmeg
1/2 teaspoon baking soda
1 teaspoon baking powder
1/2 teaspoon cinnamon
1/2 teaspoon salt
1 cup ground, raw potato (shredded works, too)
1 cup ground, raw carrot (again, shredded works)
1/2 cup raisins *gold or brown
1 cup mixed dried fruit *preferrably with plums
1/2 teaspoon lemon extract
3 tablespoons melted butter
   
1/4 cup sugar
1/4 cup flour
1/4 teaspoon salt
1 teaspoon vanilla extract or rum flavoring
  water
  butter or heavy cream

Sauce

   
1/4 cup sugar
1/4 cup flour
1/4 teaspoon salt
1 teaspoon vanilla extract or rum flavoring
  water
  butter or heavy cream
Pudding:
  1. Sift spices with flour and other dry ingredients.
  2. Add potatoes, carrots, raisins and mixed fruit, lemon extract, and butter.
  3. Mix well until batter is moistend through (this will take a few minutes).
  4. Put in buttered mold, fill about 2/3 full.
  5. Three 3″ fluted pans will hold the mixture.
  6. Steam for 3 hours.
  7. You can use a crockpot with steaming capabilities or put the molds in a larger baking dish, fill larger dish with boiling or very hot water, cover with foil and steam in the oven at about 300 degrees for 3 hours.
  8. Let sit 10 minutes before removing puddings from molds.
Sauce:
  1. Combine sugar, flour, salt, and vanilla/rum flavoring.
  2. Add enough cold water to make a thin paste.
  3. Cook over low heat until paste thickens up.
  4. Add butter or cream until desired thickness is reached.

IMG_20150315_185215


Will it Make you have a Merry Christmas?

I hope all you Disney Mealer’s out there have a great Christmas!


1

Special Independence Day Recipe – Bacon Wrapped Jalapeno Poppers


So I’m being a slacker again. I went out of town for the 4th of July, so I didn’t have time to do food from our next movie The Rescuers. But here’s a great non-Disney appetizer I made for our 4th of July BBQ. I’ll be back next week with food from Disney’s The Rescuers


Bacon Wrapped Jalapeno Poppers

Bacon Wrapped Jalapeno Poppers
Serves 12
Write a review
Print
Prep Time
15 min
Cook Time
35 min
Total Time
45 min
Prep Time
15 min
Cook Time
35 min
Total Time
45 min
Ingredients
  1. 12 Smallish Jalapenos
  2. 12 strips of bacon cut in half
  3. 1.5 boxes cream cheese
  4. 1-2 cloves Garlic
  5. 1 tsp chives
  6. salt and pepper to taste
Instructions
  1. Preheat the oven to 375F
  2. Cut the stems off the jalapenos and slice the peppers in half
  3. Cut out the middle meat of the peppers and deseed the peppers
  4. Mix the garlic, chives, salt and pepper in with the cream cheese
  5. Fill the centers of each half pepper with cream cheese mix
  6. Wrap each pepper with bacon. (if you want to use more than a half-strip per pepper, thats fine)
  7. Place on a cookie sheet lined with aluminum foil
  8. Bake for 30-40 minutes or until the bacon is a desired crispiness.
Notes
  1. Thanks for Betty Crocker for the image since I forgot to take one. See their similar take on the recipe here: http://www.bettycrocker.com/recipes/bacon-wrapped-jalapeno-poppers/e2d02568-8d4d-4072-b32a-8445e5558480
DisneyMeals https://disneymeals.me/
0

Memorial Day – No meal…but here are some ol’ favorites

Sorry, but because of Memorial Day weekend activities, I wasn’t able to do a blog post this week. But get ready for next week! It’s Sword and the Stone…and I’m going to eat a bug…blegh. In the mean time, here are a couple of my favorite recipes from the past. Merryweather Gingersnaps (Sleeping Beauty) Ichabod’s…
Continue reading »