1

Christmas Medley!

Quick links: Link 1 | Link 2Link 3 | Link 4 | Link 5 | Verdict


We’re doing a special recap of some of our favorite recipes that you can try for your Christmas feast! This will also be our last post of the year! So Merry Christmas and Happy New Year! See you in a couple weeks!


Christmas Goose from The Aristocats

Ingredients:
1 Red Bell pepper
1 Yellow Bell Pepper
1 tbs olive oil
1 Whole Goose/Duck
2 Onions (wedged)
2 Garlic Cloves (minced)
1 cup White Wine
1 small can tomato paste
1 can petite diced tomatoes
1 cup chicken stock
3/4 cup black olives (pitted)
1 cup chestnuts (or hazelnuts as a sub.)
1 stick butter (divided in half)
2 Slices of bread
  salt and pepper to taste
2 tsp crushed bay leaves
8 sprigs thyme
  1. Preheat the oven to 450F
  2. Boil some water and dump it over defrosted goose to tighten up the skin
  3. Rub 4 tbs butter over the entire goose
  4. Stick in a baking dish
  5. Place bell peppers on a baking sheet and roast them in oven for ~15 mins
  6. Place onion in a pan and cook, stirring occasionally over a medium-high, for 5 minutes or until golden.
  7. Add the garlic and cook for 2 minutes or until aromatic.
  8. Add the wine and cook for 2 minutes or until reduced by half.
  9. Add the bell peppers, tomato paste, diced tomatoes, bay leaves, stock and thyme.
  10. Season with salt and pepper.
  11. In a separate pot, melt 4 tbs butter.
  12. Add in chestnuts and 1/4 c. wine.
  13. Bring to boil and let simmer for 15 minutes, until the chestnuts start getting a little soft.
  14. Stir in the shredded bread and olives.
  15. Salt and pepper to taste.
  16. Place the chestnut mix inside the goose
  17. Pour sauce over goose
  18. Place the goose in the oven
  19. Cook for 1 hr 45min (or until goose is brown and meat thermometer reads 175F), flipping the goose over every 35 mins. You may baste the goose with white wine every 30 minutes as well.
  20. Keep covered for first 30 minutes and then only partially covered for the rest

IMG_20150614_182900


Holiday Ham from Pocahontas

Lime Glazed Ham w/ Blueberry Sauce
Write a review
Print
Prep Time
20 min
Cook Time
2 hr
Total Time
2 hr 20 min
Prep Time
20 min
Cook Time
2 hr
Total Time
2 hr 20 min
Ham
  1. 1 fully cooked bone-in ham (6 to 7 lb)
  2. 1 cup water
Glaze
  1. 1 cup packed brown sugar
  2. 1/2 cup Dijon mustard
  3. 1/3 cup Key lime juice
Blueberry Sauce
  1. 1/3 cup(s) preserves, apricot
  2. 1 tablespoon sugar, brown
  3. 2 tablespoon wine, dry red
  4. 4 tablespoon lemon juice
  5. 1 cup(s) blueberries
  6. 1 tablespoon cornstarch
  7. 1/3 cup(s) water
Instructions
  1. Heat oven to 325°F. If shallow roasting pan does not have rack, line with heavy-duty foil. Place ham, fat side up, on rack in pan or in foil-lined pan. Score ham diagonally at 1-inch intervals, cutting 1/4 inch deep; score in opposite direction to form diamond shapes. Pour water into pan. Bake 1 hour.
  2. Meanwhile, in medium bowl, mix glaze ingredients. Pour half of mixture into 1-quart saucepan; set aside for sauce.
  3. Remove ham from oven. Insert meat thermometer so bulb reaches center of thickest part of ham, but does not rest in fat or on bone. Brush ham with some of glaze in bowl.
  4. Bake 2 hours or until thermometer reads 140°F, brushing frequently with pan drippings and remaining glaze in bowl. Let ham stand in pan 15 minutes, spooning pan drippings frequently over top.
Blueberry Sauce
  1. In a small saucepan, combine the cornstarch or arrowroot powder and water.
  2. Stir in the apricot jam, brown sugar, wine, and lemon juice.
  3. Cook over medium-low heat for 5 to 6 minutes until the sauce is thickened and bubbly.
  4. Stir in the blueberries and cook 2 to 3 minutes.
  5. Spoon the sauce over the ham and serve.
DisneyMeals https://disneymeals.me/

Gingersnaps from The Rescuers

Penny's Gingersnaps
Serves 24
Write a review
Print
Prep Time
20 min
Cook Time
10 min
Total Time
3 hr 30 min
Prep Time
20 min
Cook Time
10 min
Total Time
3 hr 30 min
Ingredients
  1. 2¼ cups all-purpose flour
  2. 2 teaspoons ground ginger
  3. 1 teaspoon ground cloves
  4. 1½ teaspoons baking powder
  5. 1/8 teaspoon kosher salt
  6. ½ cup unsalted butter, at room temperature
  7. 1 cup sugar
  8. 1 Extra Large Egg
  9. 1/3 cup dark molasses
  10. 1 1/2 teaspoon vanilla extract
Make the dough (You can do this part up to three days in advance.)
  1. SIFT the flour, ginger, cinnamon, cloves, baking powder and salt together in a medium bowl. Set aside.
  2. PLACE the butter and sugar in the bowl of a stand mixer fitted with the paddle attachment. Beat on medium speed until the mixture is light and fluffy.
  3. SWITCH the mixer to low speed and gradually add the egg, molasses and vanilla extract. Increase the speed to medium and beat until smooth.
  4. SWITCH the mixer to low speed and add the dry ingredients in 3 additions, pulsing the mixer to incorporate each addition before adding the next one.
  5. TURN the dough out onto a lightly floured work surface. Knead a few times to incorporate any crumbs.
  6. DIVIDE the dough in half. Roll each half into a log about 1½ inches in diameter and 12 inches long. As you roll, gently push the ends toward the center to prevent air pockets and to keep the logs at an even thickness.
  7. WRAP the logs in plastic wrap and refrigerate until firm, at least 3 hours or up to 3 days.
Bake the cookies
  1. PREHEAT the oven to 400°F. Line the bottoms of two 12″ x 18″ sheet pans with parchment paper.
  2. REMOVE the logs from the refrigerator and unwrap them. Using a ruler and a sharp knife, cut each log into rounds ¼ inch thick. If the dough crumbles as you cut it, reshape each slice.
  3. PLACE the rounds on the prepared pans, spacing them 2 inches apart. Bake on the middle shelves of the oven, rotating the pans 180° halfway through the baking time, until the cookies are set but soft enough to hold a slight indentation when pressed with a fingertip (about 7 to 10 minutes).
  4. LET cool completely on the pans on wire racks. Store in an airtight container at room temperature for up to 1 week. Yield: 50-60 2-inch cookies.
Notes
  1. Source: http://www.thenibble.com/reviews/main/cookies/cookies2/ginger-snaps-recipe.asp
DisneyMeals https://disneymeals.me/

Pineapple Upside-down Cake from Nightmare Before Christmas

There are many other Christmas recipes you can find there too.

Pineapple Upside-down Cake
Write a review
Print
Prep Time
15 min
Cook Time
35 min
Total Time
50 min
Prep Time
15 min
Cook Time
35 min
Total Time
50 min
Ingredients
  1. 1 (18 ounce) box yellow cake mix
  2. 3 eggs (or as called for by your cake mix)
  3. 1⁄3 cup oil (or as called for by your cake mix)
  4. 1 1⁄3 cups water (or as called for by your cake mix)
  5. 1 cup dark brown sugar
  6. 1⁄4-1⁄2 cup butter
  7. 1 (20 ounce) can pineapple slices
  8. 1 (8 ounce) jar maraschino cherries (optional)
Instructions
  1. Follow instructions on cake box for making an oblong single layer cake.
  2. Prepare cake batter and set aside.
  3. Cut up butter in small pieces and place all over the bottom of the oblong pan specified on cake box.
  4. Sprinkle brown sugar generously over the butter.
  5. Place pan on the stove (or in the oven) and heat slowly until butter and sugar melt to a liquid then remove from heat.
  6. Evenly space the pineapple slices around the bottom of pan in the heated sugar and butter.
  7. Place the cherries and nuts between the pineapple slices (Tho the cherries and nuts look nice and taste great, they are optional).
  8. Pour cake batter on top of the pineapple/cherry/nut mixture.
  9. Place in oven and bake as directed on cake box.
  10. As soon as cake is done place a plate over the cake and turn upside down and carefully remove pan.
  11. If you wait too long the sugar will harden and be difficult to remove.
DisneyMeals https://disneymeals.me/

Plum Christmas Pudding from Make Mine Music

Ingredients:

Pudding

1 cup flour
3/4 teaspoon cloves
3/4 teaspoon nutmeg
1/2 teaspoon baking soda
1 teaspoon baking powder
1/2 teaspoon cinnamon
1/2 teaspoon salt
1 cup ground, raw potato (shredded works, too)
1 cup ground, raw carrot (again, shredded works)
1/2 cup raisins *gold or brown
1 cup mixed dried fruit *preferrably with plums
1/2 teaspoon lemon extract
3 tablespoons melted butter
   
1/4 cup sugar
1/4 cup flour
1/4 teaspoon salt
1 teaspoon vanilla extract or rum flavoring
  water
  butter or heavy cream

Sauce

   
1/4 cup sugar
1/4 cup flour
1/4 teaspoon salt
1 teaspoon vanilla extract or rum flavoring
  water
  butter or heavy cream
Pudding:
  1. Sift spices with flour and other dry ingredients.
  2. Add potatoes, carrots, raisins and mixed fruit, lemon extract, and butter.
  3. Mix well until batter is moistend through (this will take a few minutes).
  4. Put in buttered mold, fill about 2/3 full.
  5. Three 3″ fluted pans will hold the mixture.
  6. Steam for 3 hours.
  7. You can use a crockpot with steaming capabilities or put the molds in a larger baking dish, fill larger dish with boiling or very hot water, cover with foil and steam in the oven at about 300 degrees for 3 hours.
  8. Let sit 10 minutes before removing puddings from molds.
Sauce:
  1. Combine sugar, flour, salt, and vanilla/rum flavoring.
  2. Add enough cold water to make a thin paste.
  3. Cook over low heat until paste thickens up.
  4. Add butter or cream until desired thickness is reached.

IMG_20150315_185215


Will it Make you have a Merry Christmas?

I hope all you Disney Mealer’s out there have a great Christmas!


1

Hunchback of Notre Dame – Croissants, Sausages, Grapes and Cheese

Quick links: Croissant | SausagesGrapes and Cheese | Verdict


Food for a Guy Like You. Oh man, the music in Hunchback is amazing. The story is great, even though it is pretty dark, and Esmeralda is pretty sexy, haha. There are lots of french dishes shown, aka bread and cheese. But we did get to make homemade croissants! Yay! So ring some bells and eat some great food from Hunchback of Notre Dame.


Foods Shown

Ok, this is a new section. I want to start listing all the food shown in the movie. Sometimes I don’t list all the food shown. I exclude foods that are commonplace and don’t have recipes (like individual fruits and veggies) and/or foods that we’ve made before. But here are all the foods shown in Hunchback.


Quasi Croissant

Part of the Guy Like You song, the gargoyles mention that Quasimodo has the shape of a croissant.

(Credit: Disney)

(Credit: Disney)

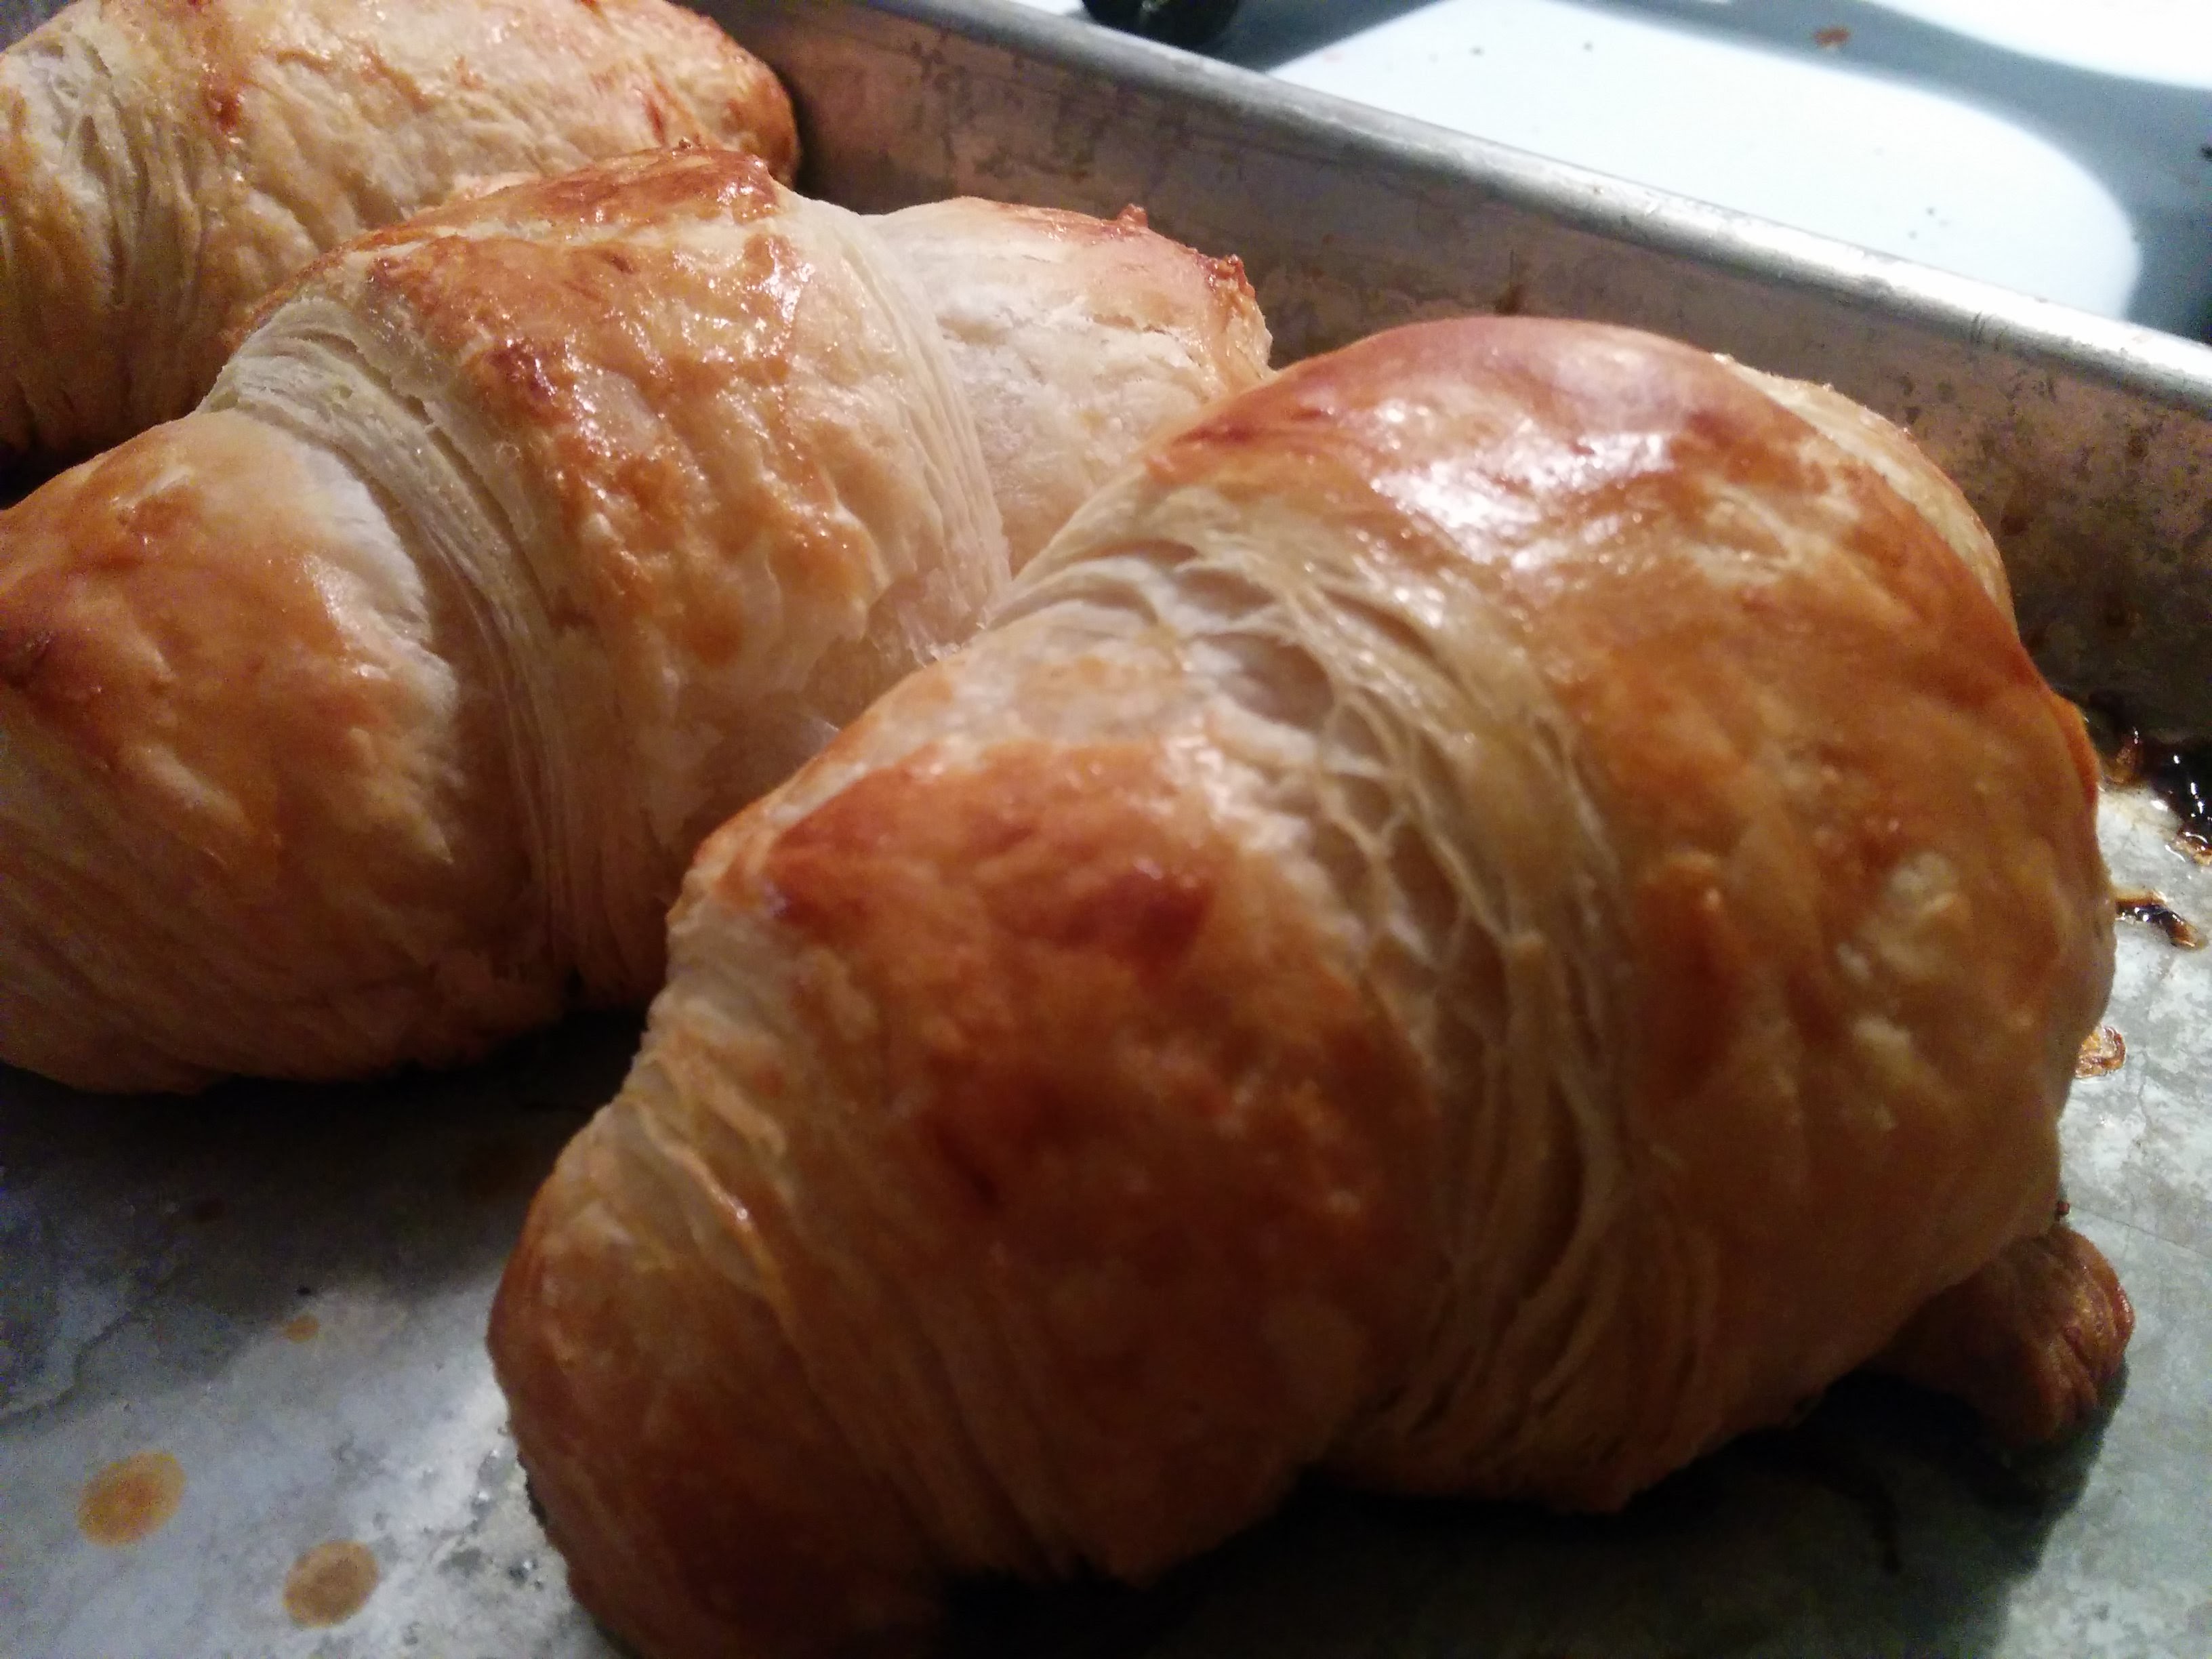
.I never have made croissants from scratch….and come to find out, its is pretty dang intense. It takes 3 days to make. I referenced this site for the recipe. I recommend checking it out for picture references. Sadly, when I was on the final rollout, somehow my dough got moist, even though I floured the counter…and the dough stuck to the counter…badly.  I managed to scrape a couple soggy croissants together, and they were still really really good. I just wish I would have found out what the perfect croissant was like.


Quasi Croissant
Yields 15
Write a review
Print
Prep Time
72 hr
Cook Time
20 min
Total Time
72 hr
Prep Time
72 hr
Cook Time
20 min
Total Time
72 hr
Ingredients for the Croissant Dough
  1. 500 g French Type 55 flour or unbleached all-purpose flour / plain flour (extra for dusting)
  2. 140 g water
  3. 140 g whole milk (you can take it straight from the fridge)
  4. 55 g sugar
  5. 40 g soft unsalted butter
  6. 11 g instant yeast
  7. 12 g salt
Other Ingredients
  1. 280 g cold unsalted butter for laminating
  2. 1 egg + 1 tsp water for the egg wash
Day 1
Making the Croissant Dough
  1. Combine the dough ingredients and knead for 3 minutes until the dough comes together and you’ve reached the stage of low to moderate gluten development. You do not want too much gluten development because you will struggle with the dough fighting back during laminating.
  2. Shape the dough like a disc, not a ball, before you refrigerate it, so it will be easier to roll it into a square shape the following day.
  3. Place the disc on a plate, cover with clingfilm and leave in the fridge overnight.
Day 2
Laminating the Dough
  1. Cut the cold butter (directly from the fridge) lengthwise into 1,25 cm thick slabs.
  2. Arrange the pieces of butter on waxed paper to form a square of about 15 cm x 15 cm.
  3. Cover the butter with another layer of waxed paper and with a rolling pin pound butter until it’s about 19 cm x 19 cm.
  4. Trim / straighten the edges of the butter and put the trimmings on top of the square.
  5. Now pound lightly until you have a final square of 17 cm x 17 cm.
  6. Wrap in paper and refrigerate the butter slab until needed.
  7. Use just enough flour on your work surface to prevent the dough from sticking.
  8. However keep the amount to a minimum, otherwise too much flour will be incorporated between the layers and this will show in the end result.
  9. Take the dough out of the fridge.
  10. With a rolling pin roll out the dough disc into a 26 cm x 26 cm square.
  11. Try to get the square as perfect as possible and with an even thickness.
  12. Get the slab of butter from the fridge.
  13. Place the dough square so one of the sides of the square is facing you and place the butter slab on it with a 45 degree angle to the dough so a point of the butter square is facing you.
  14. Fold a flap of dough over the butter, so the point of the dough reaches the center of the butter.
  15. Do the same with the three other flaps.
  16. The edges of the dough flaps should slightly overlap to fully enclose the butter.
  17. With the palm of your hand lightly press the edges to seal the seams.
  18. Now the dough with the sealed in butter needs to be rolled out.
  19. With a lightly floured rolling pin start rolling out, on a lightly flour dusted surface, the dough to a rectangle of 20 x 60 cm.
  20. Start rolling from the center of the dough towards the edges, and not from one side of the dough all the way to the other side. This technique helps you to keep the dough at an even thickness. You can also rotate your dough 180 degrees to keep it more even, because you tend to use more pressure when rolling away from you than towards yourself. You can use these techniques during all the rolling steps of this recipe. Aim at lengthening the dough instead of making it wider and try to keep all edges as straight as possible.
  21. Fold the dough letter style, cover with clingfilm and refrigerate for 30 minutes (fold one third of the dough on top of itself and then fold the other side over it).
  22. Repeat the rolling and folding two more times (ending up with 27 layers in total), each time rolling until the dough is about 20 cm x 60 cm.
  23. After each fold you should turn the dough 90 degrees before rolling again. The open ‘end’ of the dough should be towards you every time when rolling out the dough.
  24. After the second turn, again give it a 30 minute rest in the fridge.
  25. After the third turn you leave the dough in the fridge overnight until day 3, the actual croissant making day!
Summary
  1.  Roll out to 20 cm x 60 cm
  2.  Refrigerate 30 minutes
  3.  Rotate 90 degrees
  4.  Roll out to 20 cm x 60 cm
  5.  Refrigerate 30 minutes
  6.  Rotate 90 degrees
  7.  Roll out to 20 cm x 60 cm
  8.  Refrigerate until day 3
  9.  Rotate 90 degrees
  10.  Day 3 - Roll out to 20 cm x 110 cm
  11. Each laminating step should not take more than a few minutes.
  12. However if, due to initial inexperience for example, it should take you longer, you can fold your dough letter style, cover it and refrigerate it for 20 minutes and continue the rolling process after this rest. It is very important the butter stays solid.
Day 3 - Dividing the Dough
  1. Take the dough from the fridge.
  2. Lightly flour your work surface.
  3. Now very gently roll the dough into a long and narrow strip of 20 cm x 110 cm.
  4. If the dough starts to resist too much or shrink back during this process you can fold it in thirds and give it a rest in the fridge for 10 to 20 minutes before continuing.
  5. Do not fight the dough, when the dough refuses to get any longer, rest it in the fridge!
  6. It is such a shame to ruin two days of work. (Also, make sure that there is no moisture around. Error on too much flour on the surface instead of too little.)
  7. When your dough has reached its intended shape, carefully lift it a few centimeters to allow it to naturally shrink back from both sides. This way it will not shrink when you cut it. Your strip of dough should be long enough to allow you to trim the ends to make them straight and still be left with a length of about 100 cm.
Shaping the Croissants
  1. For the next stage you will need a tape measure and a pizza wheel.
  2. Lay a tape measure along the top of the dough.
  3. With the wheel you mark the top of the dough at 12,5 cm intervals along the length (7 marks total).
  4. Now lay the tape measure along the bottom of the dough and make a mark at 6,25 cm.
  5. Then continue to make marks at 12,5 cm intervals from this point (8 marks total). So the bottom and the top marks do not align with each other and form the basis for your triangles.
  6. Now make diagonal cuts starting from the top corner cutting down to the first bottom mark.
  7. Make diagonal cuts along the entire length of the dough.
  8. Then change the angle and make cuts from the other top corner to the bottom mark to create triangles.
  9. Again repeat this along the length of the dough. This way you will end up with 15 triangles and a few end pieces of dough.
  10. Using your pizza wheel, make 1.5 cm long notches in the center of the short side of each dough triangle.
  11. Now very gently elongate each triangle to about 25 cm.
  12. This is often done by hand, but we have found that elongating with a rolling pin, very carefully, almost without putting pressure on the dough triangle, works better for us.
  13. You can try both methods and see what you think gives the best result.
  14. After you cut a notch in the middle of the short end of the triangle, try and roll the two wings by moving your hands outwards from the center, creating the desired shape with a thinner, longer point. Also try and roll the dough very tightly at the beginning and put enough pressure on the dough to make the layers stick together (but not so much as to damage the layers of course).
Proofing and Baking
  1. Arrange the shaped croissants on baking sheets, making sure to keep enough space between them so they will not touch when proofing and baking.
  2. Combine the egg with a teaspoon of water and whisk until smooth.
  3. Give the croissants their first thin coating of egg wash.
  4. Proof the croissants draft-free at an ideal temperature of 24ºC to 26.5ºC (above that temperature there is a big chance butter will leak out!).
  5. The proofing should take about 2 hours.
  6. You should be able to tell if they are ready by carefully shaking the baking sheet and see if the croissants slightly wiggle. You should also be able to see the layers of dough when looking at your croissants from the side.
  7. Preheat the oven at 200 ºC / 390 ºF convection or 220 ºC / 430 ºF conventional oven.
  8. Right before baking, give the croissants their second thin coat of egg wash.
  9. We bake the croissants in our big convection oven for 6 minutes at 195ºC, then lowering the temperature to 165ºC, and bake them for another 9 minutes.
  10. Hamelman suggest baking the croissants for 18 to 20 minutes at 200ºC, turning your oven down a notch if you think the browning goes too quickly.
  11. But you really have to learn from experience and by baking several batches what the ideal time and temperature is for your own oven.
  12. Take out of the oven, leave for a few minutes on the baking sheet, then transfer to a cooling rack.
  13. Best eaten while warm and fresh of course. Croissant we don’t eat or share within a day we freeze. We put them in the preheated oven (180 ºC / 355 ºF) for 8 minutes straight from the freezer. Nothing wrong with that, croissants eaten nice and warm, almost as good as the fresh ones…almost!
DisneyMeals https://disneymeals.me/

Gargoyle Sausage

At the beginning of the the Guy Like You song, Hugo roasts a sausage over and open flame.

(Credit: Disney)

(Credit: Disney)

No recipe here, I just got some nice sausages and roasted them over the only open flame in my house, the gas stove. They still came out well.

IMG_20151201_174649

IMG_20151201_175111

Frolo’s Grapes and Cheese

Another no-recipe section. There is just a lot of grapes and cheese featured.

(Credit: Disney)

(Credit: Disney)

So go get some grapes, mind the seeds, and eat with some yummy cheese.

IMG_20151201_175908

Will it Make the Bells of Notre Dame Ring?

All of it was good. I wish that the croissants turned out better. It sucks to work at something for 3 days, only to have it get semi-ruined at the end. But don’t get me wrong, they were still really really good.

Verdict:

Croissants – 9/10

Sausage – 8/10

Grapes and Cheese – 8/10

3

Pocahontas – Lime Glazed Ham with Blueberry Sauce, Corn, Pumpkin Cornucopia Hardtack

Quick links: Ham | CornPumpkin Cornucopia | Hardtack | Verdict


So we changed up the list a little bit. Chronologically, Pocahontas came out before Toy Story, but we figured Pocahontas would be a great post for Thanksgiving. If you’re looking for some good Thanksgiving recipes, check this out. Some of the foods that were in the movie that we have eaten before are Drumsticks from Sword and the Stone and dog treats from 101 Dalmatians.


Ham

Ok, we have done ham a few times before. But we decided to do a recipe that you can use at Thanksgiving. We see Percy sitting next to some lime, blueberries and ham.

(Credit: Disney)

(Credit: Disney)

We made Lime Glazed Ham with blueberry sauce. It was better than gold.

Lime Glazed Ham w/ Blueberry Sauce
Write a review
Print
Prep Time
20 min
Cook Time
2 hr
Total Time
2 hr 20 min
Prep Time
20 min
Cook Time
2 hr
Total Time
2 hr 20 min
Ham
  1. 1 fully cooked bone-in ham (6 to 7 lb)
  2. 1 cup water
Glaze
  1. 1 cup packed brown sugar
  2. 1/2 cup Dijon mustard
  3. 1/3 cup Key lime juice
Blueberry Sauce
  1. 1/3 cup(s) preserves, apricot
  2. 1 tablespoon sugar, brown
  3. 2 tablespoon wine, dry red
  4. 4 tablespoon lemon juice
  5. 1 cup(s) blueberries
  6. 1 tablespoon cornstarch
  7. 1/3 cup(s) water
Instructions
  1. Heat oven to 325°F. If shallow roasting pan does not have rack, line with heavy-duty foil. Place ham, fat side up, on rack in pan or in foil-lined pan. Score ham diagonally at 1-inch intervals, cutting 1/4 inch deep; score in opposite direction to form diamond shapes. Pour water into pan. Bake 1 hour.
  2. Meanwhile, in medium bowl, mix glaze ingredients. Pour half of mixture into 1-quart saucepan; set aside for sauce.
  3. Remove ham from oven. Insert meat thermometer so bulb reaches center of thickest part of ham, but does not rest in fat or on bone. Brush ham with some of glaze in bowl.
  4. Bake 2 hours or until thermometer reads 140°F, brushing frequently with pan drippings and remaining glaze in bowl. Let ham stand in pan 15 minutes, spooning pan drippings frequently over top.
Blueberry Sauce
  1. In a small saucepan, combine the cornstarch or arrowroot powder and water.
  2. Stir in the apricot jam, brown sugar, wine, and lemon juice.
  3. Cook over medium-low heat for 5 to 6 minutes until the sauce is thickened and bubbly.
  4. Stir in the blueberries and cook 2 to 3 minutes.
  5. Spoon the sauce over the ham and serve.
DisneyMeals https://disneymeals.me/

Corn

Corn is shown a lot. Especially in the scene where Pocahontas thinks John Smith’s gold is corn.

(Credit: Disney)

(Credit: Disney)

No real recipe for this. But to make good corn, boil water that is enough to cover the corn. Once the water is boiling, place the corn in and wait for it to come back to a boil, place the lid on and wait for 2-5 minutes. Boom, perfect corn.

Pumpkin Cornucopia

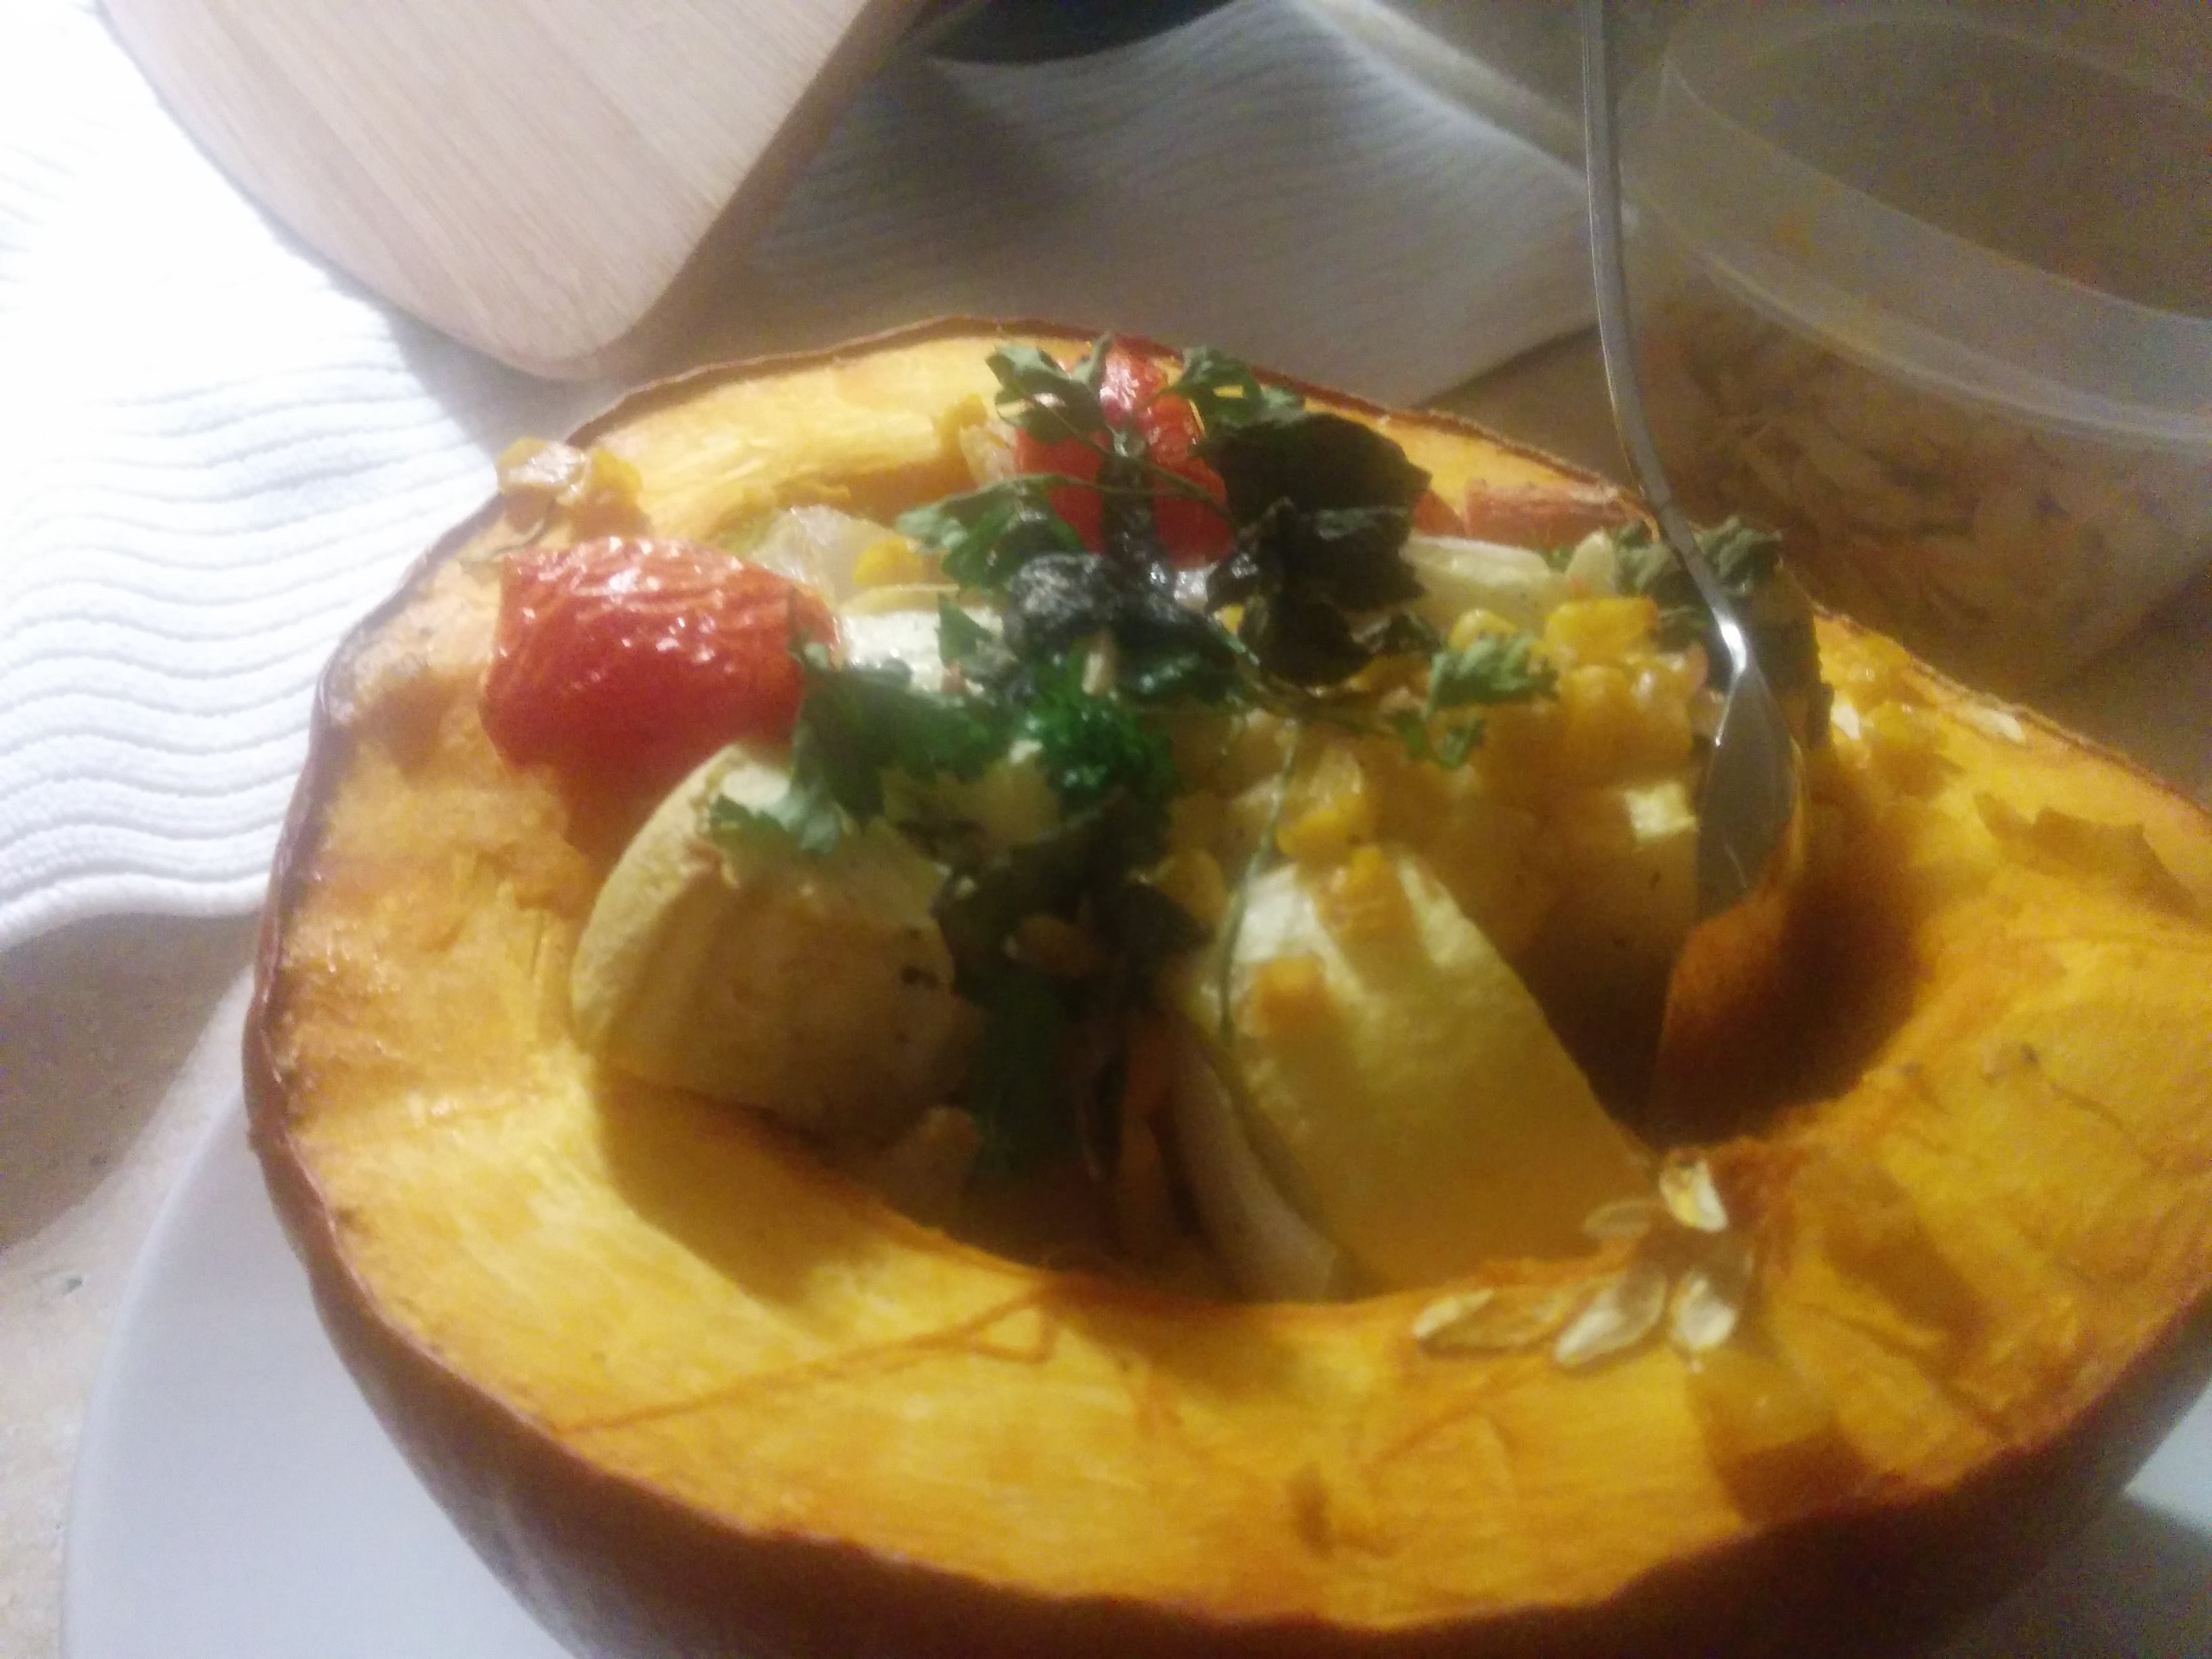
This is kinda an inspired recipe. At the end of the movie, the Native Americans bring a bunch of veggies. And veggies are shown a lot during the movie. This is a recipe of a veggie medley cooked in a pumpkin. 

Pumpkin Cornucopia
Write a review
Print
Prep Time
15 min
Cook Time
1 hr 30 min
Total Time
1 hr 45 min
Prep Time
15 min
Cook Time
1 hr 30 min
Total Time
1 hr 45 min
Ingredients
  1. 1 Pie Pumpkin
  2. 4 Carrots
  3. 1 Onion
  4. 3 Cloves of Garlic
  5. 1 Yellow Squash
  6. 1/3 head cabbage
  7. 1 can corn
  8. 1 Tomato
  9. 2 basil leaves
  10. 2 tbs butter
  11. Salt and pepper to taste
Instructions
  1. Preheat oven to 350F
  2. Cut a hole in the pumpkin (or cut it in half and use the two halves as bowls)
  3. Gut the pumpkin. Make sure to leave the meat.
  4. Fill the meat with all the veggies and top with basil
  5. Mix in salt and pepper
  6. Place the butter on top of everything and put in oven
  7. cook for 1h 30m or until the pumpkin is soft (a fork can slide through it easily)
  8. When serving, scrape the pumpkin meat along with the veggies.
DisneyMeals https://disneymeals.me/

Hardtack

Have you ever had hardtack? Well Meeko thinks it’s good.

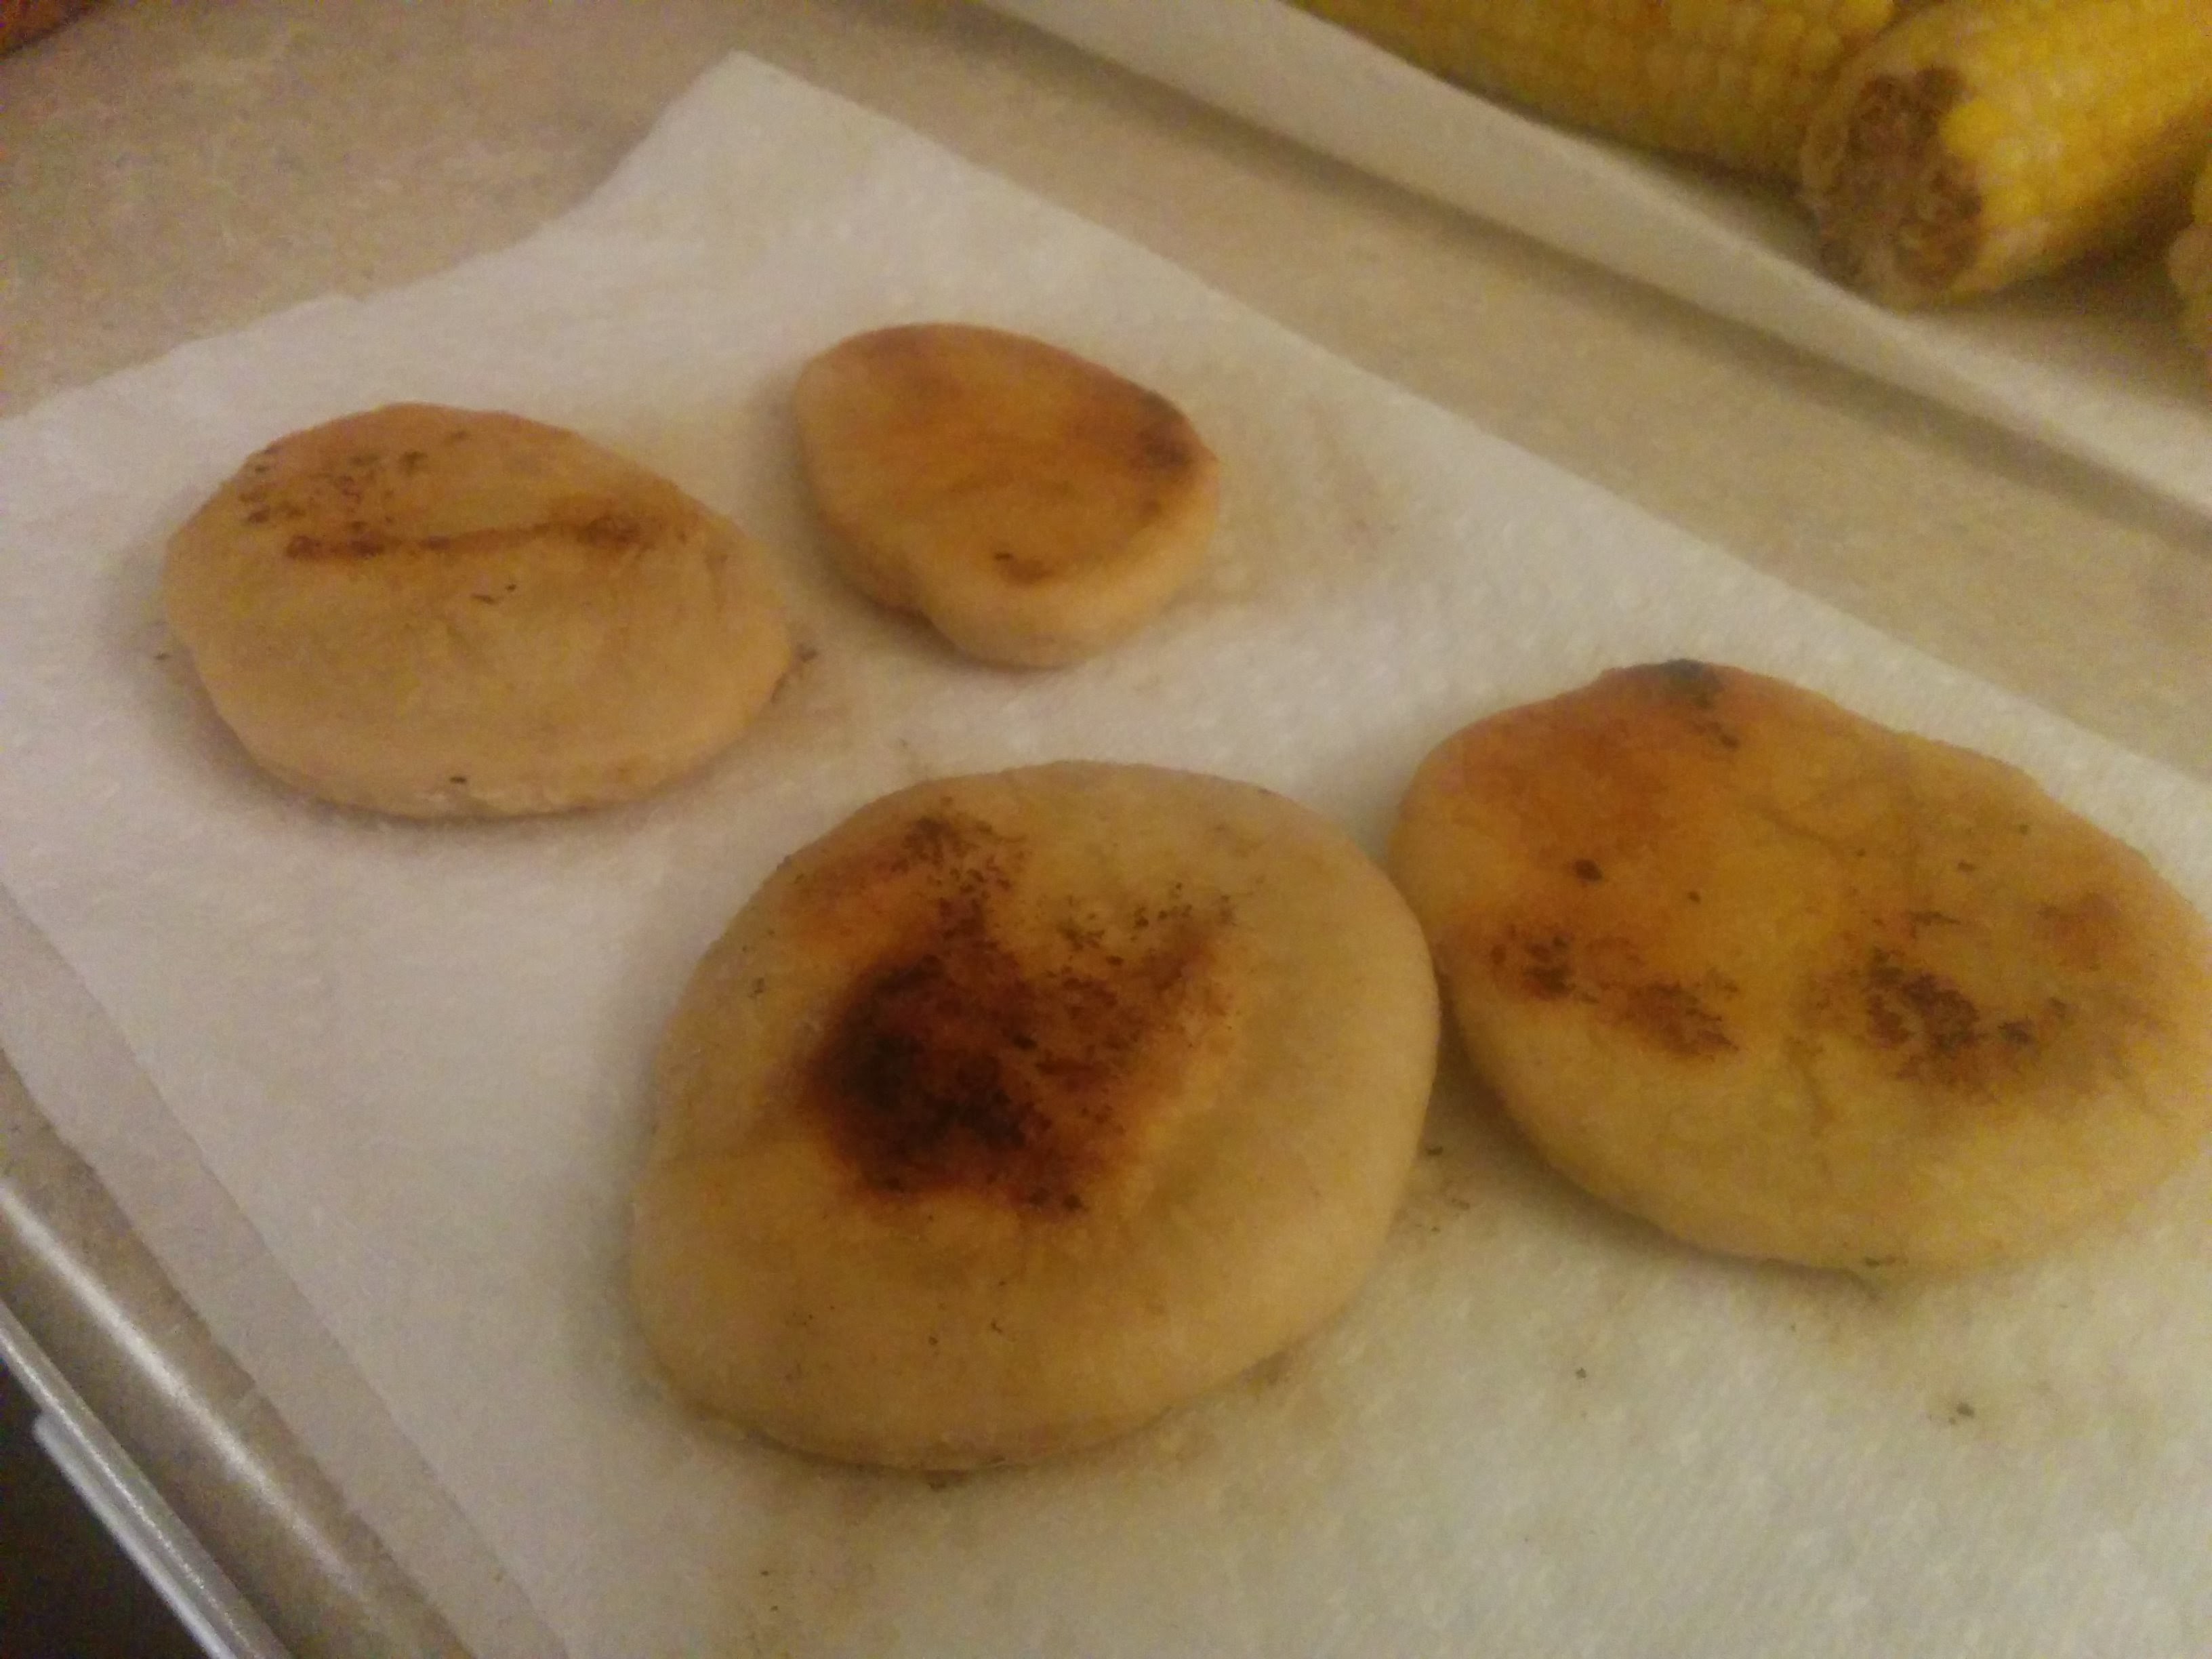
And actually, its not too bad.

Hardtack
Write a review
Print
Prep Time
5 min
Cook Time
1 hr
Total Time
1 hr 5 min
Prep Time
5 min
Cook Time
1 hr
Total Time
1 hr 5 min
Ingredients
  1. 2 cups flour
  2. 1 cup water
  3. 1.5 tsps salt
Instructions
  1. Preheat oven to 350F
  2. Mix the ingredients until well blended.
  3. Roll out until 1/2 inch thick.
  4. Cut into squares or cut into circles.
  5. Cook 30 minutes per side in oven.
  6. Let sit out in the open for a couple days until the hardtack has cured until the consistency of a brick.
  7. To prepare, soak in milk or water for 10-15 minutes and fry in butter.
DisneyMeals https://disneymeals.me/


Will it Make you Paint with All the Colors of the Wind?

All the food was really good, even the hardtack wasn’t too bad. I highly recommend the ham. It was sooo yummy.

Verdict:

Ham – 10/10

Corn – 7/10

Pumpkin cornucopia 6/10 (we undercooked ours sadly, would be better if it were more cooked)

Hardtack – 6/10

0

Toy Story – Pizza Planet Pizza, Alien Slime, Cool Ranch Doritos, Froot Loops and Poptarts

I love Toy Story. Love love love. I was super excited to rewatch the movie. I was amazed on how well the 3d animation still holds up. It makes me feel soooo good. So grab your favorite toy, and get ready for some great food.

5

Lion King – Zebra (kinda), Bug Grub (& Gummy Worms), Baobab Fruit, Hawaiian Pig

Quick links: Zebra | Bug GrubBaobab Fruit | Hawaiian Pig | Verdict


Lion King is my all-time favorite Disney movie. It is even in my top 5 movies of all time, any genre. That said, I was not super excited to eat the food from the movie. I don’t have the strong will that Simba has to slurp down a giant grub. But Hakuna Matata! I highly recommend everyone rewatching Lion King, even if it’s only been a week since your last viewing.
We also had to do some substitutions. Eating like a lion is fairly hard to do as a human and living in the United States. But I did eat bugs…oh did I eat bugs


Zebra (it’s actually beef because Zebra meat is expensive and illegal I think)

Too bad I don’t have my own personal Scar around to bring me Zebra meat like he did the hyenas.

(Credit: Disney)

(Credit: Disney)

It is surprisingly hard to come by in the USA, and I think it is illegal too.  So, I had to settle on regular ol’ beef. But I found a good Kenyan recipe called Nyama Choma. 

Nyama Choma
Write a review
Print
Prep Time
1 hr
Cook Time
10 min
Total Time
1 hr 10 min
Prep Time
1 hr
Cook Time
10 min
Total Time
1 hr 10 min
Ingredients
  1. 1 -2 kg beef (or zebra), suitable for roasting
  2. 2 garlic cloves, minced
  3. 1 -2 lemon, juice of
  4. curry powder, to taste
  5. turmeric, to taste
  6. coriander, to taste, fresh finely chopped
  7. paprika, to taste
  8. salt and black pepper, to taste
Instructions
  1. Combine the lemon juice, garlic and spices (to suit your taste) into a large glass dish and mix very well.
  2. Add the meat and stir to coat the meat with the marinade and allow to marinade for at least one hour.
  3. Preheat the oven to 450F
  4. Set meat on a hot pan over the stove and sear the outside. Do not cool long, maybe only 30 seconds to a minute each side.
  5. Transfer the meat to the oven.
  6. Cook the meat for 3 minutes, flip it and cook it for 3 more minutes.
  7. The meat should be done when it has a temp of 135F
DisneyMeals https://disneymeals.me/

Slimy, yet Satisfying Grub

I don’t get why Simba chose the biggest fattest bug in the pile. But I commend him for eating the bugs.

(Credit: Disney)

(Credit: Disney)

Also, I did it, I ate some bugs. I had some shipped from Thailand and I ate them just to appease all of you.  Spoiler: It wasn’t slimy OR satisfying.

IMG_20151018_151827 IMG_20151018_151732


But to further appease all of you, I made something that is actually slimy and satisfying. Some home-made gummy worms!

Slimy Yet Satisfying Gummy Worms
Write a review
Print
Prep Time
40 min
Total Time
3 hr 40 min
Prep Time
40 min
Total Time
3 hr 40 min
Ingredients
  1. 2 pkg 3 oz raspberry jello (or other flavored)
  2. 2-3 oz unflavored gelatin
  3. 3/4 c whipping cream
  4. 3 c boiling water
  5. 1 tbs lime juice
  6. 4 tbs sugar (divided)
  7. 1 tbs lemon rind (fine) (or 1 1/2 tsp lemon juice)
  8. 15 drops green food coloring
  9. 100ish flexible straws
  10. 1 tall container
Instructions
  1. Combine gelatin and 1 tbs sugar in bowl
  2. Add boiling water.
  3. Let it cool to lukewarm and then add the whipping cream, lime juice and 15 drops green food coloring.
  4. Flex out the straws and place them in a tall, tight container. It helps to place a rubber band around.
  5. Pour the gelatin mixture into the straws
  6. Refrigerate for 3+ hours
  7. Use a rolling pin to squeeze the gummy worms out, or you can try holding the straw under warm water.
  8. Once all worms have been taken out of the straws, place into a container.
  9. Mix the remaining sugar and lemon rind until they make a uniform mixture
  10. Sprinkle the worms
  11. Enjoy
DisneyMeals https://disneymeals.me/

Baobab Fruit (Pomegranate)

No recipe here, but just for your info, the fruit that Rafiki has is called a Baobab fruit.

(Credit: Disney)

(Credit: Disney)

I couldn’t come by one. So I ate pomegranate, because it looks similar to the fruit in the movie.
IMG_20151018_182336

Dress in Drag and do the Hula

Luau! If you’re hungry for hunk of fat and juicy meat,
Eat my buddie Pumbaa here cuz he is a treat! A hundred dollar dine, a tasty swine,
all you gotta do is get in line. Are ya achin’?
Yup Yup Yup
For some bacon?
Yup Yup Yup
He’s a big pig, You can be a big pig too! Oy!

This may be morbid, but I actually cooked some nice Hawaiian-style pork. No regrets. It was one of, if not the best meal that I’ve made.


Mr. Pig
Write a review
Print
Cook Time
4 hr 30 min
Total Time
4 hr 40 min
Cook Time
4 hr 30 min
Total Time
4 hr 40 min
Ingredients
  1. 1 bone-in pork shoulder butt roast (4-5 pounds)
  2. 4 teaspoons liquid smoke
  3. 4 teaspoons soy sauce
  4. 2 unpeeled ripe bananas
  5. 1/2 cup water
Instructions
  1. Place the roast on a 22x18-in. piece of heavy-duty foil;
  2. Sprinkle with liquid smoke and soy sauce.
  3. Wash bananas and place at the base of each side of roast.
  4. Pull sides of foil up round meat; add water.
  5. Seal foil tightly; wrap again with another large piece of foil.
  6. Place in a shallow baking pan; refrigerate overnight, turning several times.
  7. Place foil-wrapped meat in a roasting pan.
  8. Bake at 400° for 1 hour.
  9. Reduce heat to 325°; continue baking for 3-1/2 hours.
  10. Drain; discard bananas and liquid. Shred meat with a fork.
  11. Serve over rice
DisneyMeals https://disneymeals.me/


Will it Make you Part of the Circle of Life?

The recipes this week went all over the place. I had some of the best food and worst food and some medium food in there. I definitely don’t want to eat bugs again, but I’m sure there will come another movie with bugs. Sigh….

Verdict:

Nyama Choma – 7/10

Bugs – 1/10

Gummy Worms – 7/10

Hawaiian pork – 10/10

0

Aladdin [Part 2/2] – Cheesecake, Ful, Chicken Ala King, Alaskan King Crab, Caesar Salad, Kabobs, Persian Rolls

Quick links: Cheesecake | FulChicken ala King | Alaskan King Crab | Caesar Salad | Kabobs | Persian Rolls | Verdict


You’ll never have a meal like this. This is week 2/2 of Aladdin. This will cover some of Friend like Me and the rest of the movie.

We have some more great Arabic food and also some non-arabic food brought to you by the genie. 


Cheesecake

Try some of column A. The genie creates a bunch of food on this rising column.

(Credit: Disney)

(Credit: Disney)

There are a few different foods, on this. Some chicken, which you can see the recipe in our previous post. Theres also a pineapple, a celery, a mellon, some rolls (which are addressed later in this post), some mush (which is covered next) and some cheesecake. I love cheesecake, so I was happy to jump in on this recipe

Cheesecake
Write a review
Print
Prep Time
30 min
Cook Time
1 hr 30 min
Total Time
5 hr
Prep Time
30 min
Cook Time
1 hr 30 min
Total Time
5 hr
Crust
  1. 2 cups (475 ml) of Graham cracker crumbs (from a little less than 2 packages Graham crackers
  2. 2 Tbsp sugar
  3. Pinch salt
  4. 5 Tbsp (70 g) unsalted butter (if using salted butter, omit the pinch of salt), melted
Filling
  1. 2 pounds cream cheese (900 g), room temperature
  2. 1 1/3 cup granulated sugar (270 g)
  3. Pinch of salt
  4. 2 teaspoons vanilla
  5. 4 large eggs
  6. 2/3 cup sour cream (160 ml)
  7. 2/3 cup heavy whipping cream (160 ml)
Toppings
  1. 2 cups sour cream (475 ml)
  2. 1/3 cup powdered sugar (35 g)
  3. 1 teaspoon vanilla
  4. 12 ounces (340 g) fresh raspberries
  5. 1/2 cup granulated sugar (100 g)
  6. 1/2 cup water (120 ml)
Special equipment needed
  1. 9-inch, 2 3/4-inch high springform pan
  2. Heavy-duty, 18-inch wide aluminum foil
  3. A large, high-sided roasting pan
Instructions
  1. Prepare the springform pan so that no water leaks into it while cooking.
  2. Place a large 18-inch by 18-inch square of heavy duty aluminum foil on a flat surface.
  3. Place the springform pan in the middle of the foil.
  4. Gently fold up the sides of the foil around the pan.
  5. Make sure to do this gently so that you don't create any holes in the foil.
  6. If there are any holes, water will get into the pan and ruin the crust.
  7. Press the foil around the edges of the pan.
  8. Place a second large square of foil underneath the pan, and repeat, gently folding up the sides of the foil around the pan and pressing the foil against the pan.
  9. To be triply safe, repeat with a third layer of heavy duty foil.
  10. Gently crimp the top of the foil sheets around the top edge of the pan.
  11. Preheat oven to 350°F, with rack in lower third of oven.
  12. Pulse the graham crackers in a food processor or blender until finely ground. (Or use pre-crushed graham cracker crumbs)
  13. Put in a large bowl, and stir in the sugar and salt.
  14. Use your (clean) hands to stir in the melted butter.
  15. Put all but 1/4 cup of the graham cracker crumbs in the bottom of the springform pan. (Save the remaining 1/4 cup for if you happen to have any holes that need to be filled in, either while you are making the crust, or after the cake has cooked and you've unmolded it.)
  16. Gently press down on the crumbs using your fingers, until the crumbs are a nice even layer at the bottom of the pan, with maybe just a slight rise along the inside edges of the pan.
  17. Be careful as you do this, as not to tear the aluminum foil.
  18. Place in the oven for 10 minutes.
  19. Remove from the oven and let cool. Reduce the oven temperature to 325°F.
Make the filling
  1. Cut the cream cheese into chunks and place in the bowl of an electric mixer, with the paddle attachment. (We softened the cream cheese in the microwave at a low setting, stirring every 45 seconds)
  2. Mix on medium speed for 4 minutes until smooth, soft and creamy.
  3. Add the sugar, beat for 4 minutes more.
  4. Add the salt and vanilla, beating after each addition.
  5. Add the eggs, one at a time, beating for one minute after each addition.
  6. Add the sour cream, beat until incorporated.
  7. Add the heavy cream, beat until incorporated.
  8. Remember to scrape down the sides of the mixer bowl, and scrape up any thicker bits of cream cheese that have stuck to the bottom of the mixer that paddle attachment has failed to incorporate.
Cook the cheesecake
  1. Place the foil-wrapped springform pan in a large, high-sided roasting pan. (We didn't have a pan that big so we used a cookie sheet and a lot of aluminum foil to make walls)
  2. Prepare 2 quarts of boiling water.
  3. Pour the cream cheese filling into the springform pan, over the graham cracker bottom layer.
  4. Smooth the top with a rubber spatula.
  5. Place the roasting pan with the springform pan in it, in the oven, on the lower rack.
  6. Carefully pour the hot water into the roasting pan (without touching the hot oven), to create a water bath for the cheesecake, pouring until the water reaches halfway up the side of the springform pan, about 1 1/4 inches. (Alternatively you can add the water before putting the pan in the oven, whichever is easier for you.)
  7. Cook at 325°F for 1 1/2 hours.
  8. Turn off the heat of the oven.
  9. Crack open the oven door 1-inch, and let the cake cool in the oven, as the oven cools, for another hour.
  10. This gentle cooling will help prevent the cheesecake surface from cracking.
  11. Cover the top of the cheesecake with foil, so that it doesn't actually touch the cheesecake.
  12. Chill in the refrigerator for a minimum of 4 hours, or overnight.
Prepare sour cream topping
  1. Place sour cream in a medium sized bowl, stir in the powdered sugar and vanilla, until smooth.
  2. Chill until you are ready to serve the cake.
  3. Note that this recipe produces enough sour cream topping for a thick topping and some extra to spoon over individual pieces of cheesecake, if desired. If you would like a thinner layer of topping and no extra, reduce the sour cream topping ingredients in half.
Prepare the raspberry sauce
  1. Place raspberries, sugar, and water in a small saucepan.
  2. Use a potato masher to mash the raspberries.
  3. Heat on medium, whisking, about 5 minutes, until the sauce begins to thicken.
  4. Remove from heat. Let cool.
Prepare the cake to serve
  1. Remove the cake from the refrigerator.
  2. Remove the foil from the sides of the pan, and place the cake on your cake serving dish.
  3. Run the side of a blunt knife between the edge of the cake and the pan.
  4. You can use a hair dryer to heat the sides of the pan to make it easier to remove.
  5. Open the springform latch and gently open the pan and lift up the sides.
  6. Spread the top with the sour cream mixture.
  7. Serve plain or drizzled with raspberry sauce.
DisneyMeals https://disneymeals.me/

Ful

On that picture, you see some brown mush behind Aladdin. It probably wasn’t meant to be any food. But I looked online for some Persian/Arabic food that looked similar. I found a breakfast food called Ful. Our recipe turned out whiter than it should have because we used lima beans. We couldn’t find Fava beans.

Ful
http://www.tartqueenskitchen.com/?p=1864
Write a review
Print
Prep Time
5 min
Cook Time
20 min
Total Time
5 min
Prep Time
5 min
Cook Time
20 min
Total Time
5 min
Ingredients
  1. 1 can fava (or lima) beans, drained, liquid reserved
  2. 1/4 c. onion, finely minced
  3. 2 cl. garlic, minced
  4. 2 – 4 (depending on size and heat level) tabasco or pepperoncini peppers, minced
  5. 1/4 c. parsley, minced
  6. Salt and pepper to taste
  7. Lemon to taste
  8. Olive oil
  9. additional minced parsley for garnish, optional
Instructions
  1. In a small saucepan over medium-low heat, mix together the fava beans, onion, garlic, peppers, about 2 – 3 tablespoons of the reserved liquid from the beans, and a pinch of salt & pepper.
  2. Heat the mixture slowly, stirring occasionally.
  3. Cook about 20 minutes.
  4. Add more liquid if the beans become too dry.
  5. Once the mixture is cooked, taste it for seasoning and some lemon to taste.
  6. Remove the saucepan from the heat and mash the beans, leaving some texture.
  7. Place the ful on a plate, drizzle over some olive oil and additional parsley.
DisneyMeals https://disneymeals.me/

Chicken ala King

The next three recipes come from Genie’s own cookbook when he’s trying to find the recipe to make Aladdin a prince.

The first recipe is Chicken Ala King.

(Credit: Disney)

(Credit: Disney)

Chicken ala king is actually really good. I’m not a HUGE fan of mushrooms, but they totally work in this recipe.

Chicken Ala King
Write a review
Print
Prep Time
10 min
Cook Time
40 min
Total Time
50 min
Prep Time
10 min
Cook Time
40 min
Total Time
50 min
Ingredients
  1. 1 (4.5 ounce) can mushrooms, drained, liquid reserved
  2. 1 green bell pepper, chopped
  3. 1/2 cup butter
  4. 1/2 cup all-purpose flour
  5. 1 teaspoon salt
  6. 1/4 teaspoon ground black pepper
  7. 1 1/2 teaspoons chicken bouillon powder
  8. 1 1/2 cups milk
  9. 1 1/4 cups hot water
  10. 4 boneless chicken breast halves, chopped
  11. 4 ounces chopped pimento
Instructions
  1. Heat oil in a large pan. Cook the chicken until fully cooked. Set aside.
  2. Drain the pan and melt butter in the pan.
  3. Cook and stir drained mushrooms and green pepper in butter or margarine over medium heat for 5 minutes. Remove from heat.
  4. Blend in flour, salt, and pepper. Cook over low heat, stirring constantly, until mixture is bubbly. Remove from heat.
  5. Stir in instant bouillon, milk, water, and reserved mushroom liquid. Heat to boiling, stirring constantly. Boil and stir for 1 minute.
  6. Stir in chicken and pimiento. Heat through.
DisneyMeals https://disneymeals.me/

Sabastian King Crab

Alaskan King Crab is the second royal recipe thrown out by Genie. It features a cameo appearance by Sebastian from the Little Mermaid

(Credit: Disney)

(Credit: Disney)

We had a previous (bad) experience with crab when we were making food from the Little Mermaid. So we decided to go the easy route this time and just get frozen king crab legs.

Sebastian King Crab
Write a review
Print
Prep Time
10 min
Cook Time
25 min
Total Time
35 min
Prep Time
10 min
Cook Time
25 min
Total Time
35 min
Ingredients
  1. lbs king crab legs
  2. 1⁄2 cup butter (salted or unsalted)
  3. 1⁄2 head garlic, about 5 garlic cloves, minced pressed
  4. 1⁄2 lemon, juice of
  5. 1⁄2lime, juice of
  6. 1⁄8 cup extra virgin olive oil
  7. sea salt (optional)
  8. dried parsley (optional)
Instructions
  1. Preheat your oven to 375 degrees.
  2. On med low heat, melt the butter in a small saucepan. Add the garlic and LIGHTLY saute.
  3. Squeeze in the juice of the citrus of choice.
  4. Turn the heat to low and let those flavors mesh until the oven is nice and hot.
  5. Toss in as much salt (to taste) and a couple pinches of parsley.
  6. Then whisk in that olive oil with a fork. Remove from heat.
  7. Arrange your tasty crustaceans in a 9x13 baking dish, brushing each leg with the sauce.
  8. Pour any remaining sauce over the legs.
  9. Now toss the pan into the oven on the center rack.
  10. Bake your crabs for about 25 minutes or so (depending on how thick the legs you have are), brushing the sauce from the bottom of the pan onto the legs every 5-7 minutes.
  11. Remove from oven.
  12. Sprinkle with a few pinches o' parsley for garnish.
DisneyMeals https://disneymeals.me/

Et Tu Brute Caesar Salad

I never go the joke that went along with this recipe until recently. The hand comes out of the book.

(Credit: Disney)

(Credit: Disney)

And Genie says “Et Tu Brute?” referring to Shakespeare’s Julius Caesar. 

Caesar Salad is actually really easy. I don’t have a specific recipe, but a caesar salad consists of romaine lettuce, parmesan cheese, croutons, boiled egg, Worcestershire sauce, lemon juice, garlic, olive oil, and black pepper. You can add or subtract ingredients as you like. 

IMG_20151004_192016

Prince Ali Kabobs

There is some more food shown in the Prince Ali song (one of my favorites).

At the end it shows some lovely kabobs. They looked delicious.

(Credit: Disney)

(Credit: Disney)

I love kabobs. I found a recipe for a Persian style kabob.

Prince Ali Kabobs
Write a review
Print
Prep Time
25 min
Cook Time
25 min
Total Time
8 hr 50 min
Prep Time
25 min
Cook Time
25 min
Total Time
8 hr 50 min
For the meat
  1. 1 teaspoon ground saffron dissolved in 2 tablespoons hot water
  2. 1 cup fresh lime juice
  3. 2 tablespoons olive oil
  4. 2 large onions, peeled and thinly sliced
  5. 2 cloves garlic, peeled, and crushed
  6. 2 tablespoons zest of orange
  7. 2 tablespoons yogurt
  8. 2 teaspoons salt
  9. 2 teaspoons freshly ground black pepper
  10. 1.5 lbs chicken (diced into 1.5 in pieces)
  11. 1.5 lbs lamb or beef (diced into 1.5 in pieces)(if using beef find the tenderest cut possible)
  12. 5 medium tomatoes, halved
  13. 3 Green bell peppers
  14. 6 flat, swordlike skewers
For the baste
  1. Juice of 1 lime
  2. 1/4 cup butter, melted
  3. 1/2 teaspoon salt
  4. 1/2 teaspoon freshly ground black pepper
For the meat
  1. In a large bowl, combine half the saffron water and the lime juice, olive oil, onions, garlic, orange zest, yogurt, salt, and pepper.
  2. Beat well with a fork.
  3. Add the pieces of meat and toss well with marinade. Cover and marinate for at least 8 hours and up to 2 days in the refrigerator.
  4. Turn the meat twice during this period.
  5. Start a bed of charcoal 30 minutes before you want to cook and let it burn until the coals glow evenly. Or preheat an oven to 450F
  6. Skewer the meats and veggies in an alternating pattern (use the tomatoes, chopped bell peppers and the onions that were in the marinade)
For the baste
  1. Add the juice of 1 lime and the remaining saffron water to the melted butter. Add 1/2 teaspoon salt and 1/2 teaspoon pepper. Mix well and set aside.
  2. Paint the tomato and chicken with the basting mixture.
  3. Grill the meat and tomatoes 8 to 15 minutes, until done. Turn frequently and baste occasionally.
  4. If using the oven, place skewers on a cookie sheet.
  5. Cook for 10 minutes, turn the skewers over and cook for 10-15 minutes more.
DisneyMeals https://disneymeals.me/
 

Persian Rolls

Right after the kabobs, bakers with rolls pop up.

(Credit: Disney)

(Credit: Disney)

There are actually rolls shown a few times throughout the movie, I’m just lumping it all into one recipe. This is based on a Persian flat bread. They are the best rolls I have ever made. They were insanely delicious.

Persian Rolls
Write a review
Print
Prep Time
40 min
Cook Time
18 min
Total Time
4 hr 58 min
Prep Time
40 min
Cook Time
18 min
Total Time
4 hr 58 min
Ingredients
  1. 7 g fast action dried yeast
  2. 700 g strong white bread flour
  3. 2 heaped tbsp Maldon sea salt, crushed
  4. 75 ml olive oil
  5. 50 g salted butter
Instructions
  1. Dissolve the yeast in 50ml warm water, stir vigorously and then leave it to sit for a few minutes until fully dissolved.
  2. In a large mixing bowl, combine the flour and salt and then make a well in the centre.
  3. Pour in 450ml water, 50ml olive oil and the yeast and water mixture.
  4. Combine using your hands until a smooth dough is formed.
  5. If the dough is a bit too sticky, just add a little extra flour and if it is dry, add a splash of water.
  6. On a clean floured surface, need the dough for 5 minutes to activate the yeast and stretch the gluten in the dough.
  7. Allow the dough to rest for 10 minutes before kneading it again for 2 minutes.
  8. Repeat this process another 3 times and on the second kneading, incorporate the remaining 25ml olive oil.
  9. Once the bread has been kneaded 3 times, return the dough into the mixing bowl, covering it with a dry tea towel and allowing it to rest somewhere warm for 3 hours.
  10. Once the resting period is over, the dough will have tripled in size.
  11. Elongate the dough ball gently by stretching it from both ends and then using a knife, cut the dough into half.
  12. Form the dough into a roll shape.
  13. Repeat this with the other half of the dough and place each one onto an oven tray lined with baking paper and using a sharp knife or pizza cutter, make 2 long lengthways incision in the centre of the dough, just 2-3 inches away from each end.
  14. Finally cover each oven tray with clean tea towels and allow them to rise for a further 30 minutes.
  15. Preheat the oven to 220C fan/gas 6.
  16. Once the loaves have risen again, brush with melted butter.
  17. Bake each loaf in the oven for 16-18 minutes, until golden brown.
  18. The best way to check if they are cooked through is to tap the bottom of the loaf, if it sounds hollow it is cooked.
  19. Allow the bread to cool down for at least 30 minutes before serving.
DisneyMeals https://disneymeals.me/


Will it Make you Strong as 10 Regular Men Definitely?

All the food was really good. Aladdin as a whole had some amazing food. It is one of my favorite movies as a whole. 

IMG_20151004_193409

It also really made me miss Robin Williams.

Verdict:

Cheesecake – 9.5/10

Ful – 6.5/10

Chicken ala King – 8/10

Alaskan King Crab – 8.5/10

Caesar Salad – 7/10

Kabobs – 7.5/10 (would be higher if I chose better beef, I chose cheap stuff that was tough)

Persian Rolls – 10/10

2

Aladdin [Part 1/2] – French Fries, Taftoon French Bread, Crackers, Persian Chicken, Baklava

Quick links: French Fries | Taftoon French BreadCrackers | Persian Chicken | Baklava | Verdict


Open up the cave of wonders and check out these diamond in the rough recipes! We’re splitting the movie again so over the next 2 weeks, you’ll get a double dose of Aladdin, which is in my Top 5 Disney movies. Get ready for some great Arabic recipes! Also, these two posts are in memory of the great Robin Williams. He was one of my very favorite actors and comedians. His presence has been missed.
Actor Robin WIlliams from the film "World's Greatest Dad" poses for a portrait in Los Angeles on Friday, Aug. 14, 2009. (AP Photo/Matt Sayles)

(AP Photo/Matt Sayles)


French Fries in Agrabah? 

The shop keeper at the beginning of the movie (who might secretly actually be the genie. Look it up) tries to sell us a all-in-one coffee maker and french fry maker. 

(Credit: Disney)

(Credit: Disney)

I tried my hand at making some french fries. They turned out really good. My only wish was that they came out a bit crispier.

Agrabah Fries
Write a review
Print
Prep Time
20 min
Cook Time
30 min
Total Time
2 hr 50 min
Prep Time
20 min
Cook Time
30 min
Total Time
2 hr 50 min
Ingredients
  1. 5 pounds russet potatoes
  2. Vegetable or peanut oil, for frying
  3. Sea salt
  4. Celery Salt
Instructions
  1. Peel and rinse the potatoes. Then cut them into sticks by cutting the potato in 4 or 5 vertical pieces, and then cutting each piece into sticks.
  2. Place them in a large bowl and cover with cold water. Allow them to soak, 2 to 3 hours. (You can also stick them in the fridge and let them soak overnight.)
  3. When you're ready to make the fries, drain off the water and lay the potatoes on 2 baking sheets lined with paper towels. Blot with paper towels to dry them.
  4. Heat a few inches of oil in a heavy pot to 300 degrees F. In 3 or 4 batches, cook the potatoes until soft, 4 to 5 minutes per batch. They should not be brown at this point! You just want to start the cooking process. Remove each batch and drain on new/dry paper towels.
  5. Once all the potatoes have been fried at 300 degrees F, turn up the heat until the oil reaches 400 degrees F. When the oil's hot, start frying the potatoes in batches again, cooking until the fries are golden and crisp. Remove the potatoes from the oil and drain on paper towels.
  6. Sprinkle with sea salt and celery salt.
DisneyMeals https://disneymeals.me/
 

That Delicious Looking Bread Aladdin Give Away

This might be one of the pivotal Disney food moments. The bread that Abu bites into always looked soooo delicious. 

(Credit: Disney)

(Credit: Disney)

Then Aladdin, the good guy he is, gave away his half and Abu reluctantly followed. 

I looked all over for an Arabic bread that resembled the one shown, but I couldn’t find any middle eastern bread recipes that were loafs like that. The closest I found was Taftoon (or taftan). The bread shown resembled french bread mostly, so I came up with a combination recipe that actually tasted really good. Kinda like a sweeter french bread.


Abu's Bread
Write a review
Print
Prep Time
20 min
Cook Time
30 min
Prep Time
20 min
Cook Time
30 min
Ingredients
  1. 1 cups warm water
  2. 3/4 cup milk
  3. 1 tablespoon yeast
  4. 1 tablespoon vegetable oil
  5. 1 tablespoon sugar
  6. 1 tbs greek yogurt
  7. pinch saffron
  8. ¼ tsp cardamom powder
  9. 2 tbs ghee (regular butter can be substituted)
  10. 2 teaspoons salt
  11. 5 -5 1⁄2 cups bread flour
  12. Cornmeal
Instructions
  1. Dissolve yeast in warm water and sugar in large bowl. Let sit for 10 minutes to allow yeast to proof or foam
  2. Add salt, milk oil, yogurt, saffron, cardamom, and 3 cups flour; beat for 2 minutes.
  3. Stir in 2 cups flour to make a stiff dough. Add more milk or flour if needed.
  4. Knead until smooth and elastic, about 10 minutes.
  5. Place in oiled bowl, turn dough to coat all sides, cover and let rise until doubled.
  6. Punch down and divide in half.
  7. Shape dough into two long slender loaves.
  8. Grease and sprinkle with cornmeal either a french bread pan or large cookie sheet.
  9. Place loaves in pan and cut diagonal gashes on top of each loaf.
  10. Cover and let rise until doubled.
  11. Brush with a mixture of 2 tbs Ghee (or butter) and 1 tbs milk
  12. Bake at 375 degrees for about 30 minutes.
Notes
  1. To make ghee - http://www.epicurious.com/recipes/food/views/indian-clarified-butter-ghee-233032.
DisneyMeals https://disneymeals.me/
 

Polly wants a Cracker

Iago hates the Sultan’s crackers.

(Credit: Disney)

(Credit: Disney)

He calls them moldy and disgusting. 

I made some tasty crackers based on middle eastern lavash cracker bread. But I won’t be able to experience the disgusting crackers until I keep them in my pocket for a while until they start molding.


Lavash Crackers
Write a review
Print
Prep Time
25 min
Cook Time
7 min
Total Time
1 hr 55 min
Prep Time
25 min
Cook Time
7 min
Total Time
1 hr 55 min
Ingredients
  1. 1 cup lukewarm water
  2. 1/4 cup whole wheat flour
  3. 1 (.25 ounce) envelope active dry yeast
  4. 1 teaspoon salt
  5. 3 cups all-purpose flour
Instructions
  1. In a large bowl, stir together the water, whole wheat flour, and yeast until moistened.
  2. Mix in the salt and 1 cup of all-purpose flour.
  3. Gradually mix in the rest of the flour using a mixer with a dough hook attachment or wooden spoon.
  4. When the dough comes together, knead in your mixer or on a floured surface for 8 to 10 minutes to make an elastic ball.
  5. Add more flour or water if needed to keep dough from getting sticky or too stiff.
  6. Pour a little bit of oil in the bowl and turn the dough to coat.
  7. Cover and let rise in a warm place until doubled in size, about 1 hour.
  8. Punch down the dough and divide into balls about the size of a grape.
  9. Rolling the dough into a long log helps to divide it evenly.
  10. Roll each piece into a ball and cover with a damp kitchen towel for 30 minutes to rest.
  11. Preheat the oven to 500 degrees F (260 degrees C). Place a baking sheet on the center rack of the oven so it can preheat at the same time. Do not grease.
  12. Roll each ball into a circle about 8 inches across. The dough should be paper thin, almost translucent. If they are too thick, they will bubble up like pita breads.
  13. Pull out the oven shelf and place as many crackers on your baking sheet as you can fit, 2 or 3. Close the oven and bake for about 3 minutes. The crackers should be lightly browned on the top with small bubbles.
  14. You may have to adjust your thickness for the next batch.
DisneyMeals https://disneymeals.me/

Maitre’d Chicken

During the Friend Like Me song, the genie presents Al with a beautiful roasted chicken (or maybe turkey)

(Credit: Disney)

(Credit: Disney)

And then in normal genie fashion, transforms himself INTO the chicken.

(Credit: Disney)

(Credit: Disney)

I came up with a good Persian chicken dish. It was super moist, but lacked flavor sadly.

Genie Chicken
http://cooking.nytimes.com/recipes/9308-persian-fried-chicken?pagewanted=all
Write a review
Print
Prep Time
20 min
Total Time
3 hr
Prep Time
20 min
Total Time
3 hr
Ingredients
  1. ½ teaspoon saffron
  2. 2 cups plain whole-milk yogurt
  3. 1 tablespoon chopped garlic
  4. 1 whole chicken
  5. 1tbs flour
  6. 3 teaspoons paprika (divided)
  7. 1 tablespoon dried mint (divided)
  8. salt and black pepper to taste
  9. 1/3 cup melted butter
Instructions
  1. In a small bowl, combine saffron with 1 tablespoon water and let soak 10 minutes.
  2. Place in food processor with yogurt and garlic and purée until smooth and yellow.
  3. Place chicken in glass or ceramic bowl; pour yogurt mixture on top, turn to coat; cover and refrigerate at least 3 hours or overnight.
  4. Heat oven to 350F
  5. Remove chicken from bowl and place into a 9x13 pan lined with foil (or whatever size fits your chicken).
  6. Discard the extra yogurt mixture
  7. Sprinkle 2 tsp paprika, 1/2 tbs mint, salt and pepper over chicken
  8. Put in oven and partially cover with aluminum foil
  9. Mix the rest of the paprika and mint, plus some salt and pepper into the melted butter
  10. Brush the chicken periodically (every 20 mins or so) with butter mixture.
  11. Let cool for a few minutes after cooking
Notes
  1. 20 minutes of cook time per pound of chicken
DisneyMeals https://disneymeals.me/

How ’bout a little more baklava?

The last recipe we’re doing is midway through Friend Like Me where the genie says “How bout a little more baklava” and then fills up the screen with baklava.

(Credit: Disney)

(Credit: Disney)

I didn’t make quite that much Baklava, especially because this was my first time trying to make baklava. I made it the Arabic way as opposed to the Greek way, using rose water syrup instead of honey to sweeten the baklava. If you need a recipe for rose water look here and for rose water syrup, look here.

Baklava
Serves 18
Write a review
Print
Prep Time
25 min
Cook Time
50 min
Total Time
1 hr 15 min
Prep Time
25 min
Cook Time
50 min
Total Time
1 hr 15 min
Ingredients
  1. 1 (16 ounce) package phyllo dough
  2. 1 pound chopped nuts (pistachios, almonds, pecans)
  3. 1 cup butter
  4. 1 teaspoon ground cinnamon
  5. 1 cup water
  6. 1 cup white sugar
  7. 1 teaspoon vanilla extract
  8. 1/2 cup rose water syrup
Instructions
  1. Preheat oven to 350 degrees F(175 degrees C). Butter the bottoms and sides of a 9x13 inch pan.
  2. Chop nuts and toss with cinnamon. Set aside. Unroll phyllo dough. Cut whole stack in half to fit pan. Cover phyllo with a dampened cloth to keep from drying out as you work. Place two sheets of dough in pan, butter thoroughly. Repeat until you have 8 sheets layered. Sprinkle 2 - 3 tablespoons of nut mixture on top. Top with two sheets of dough, butter, nuts, layering as you go. The top layer should be about 6 - 8 sheets deep.
  3. Using a sharp knife cut into diamond or square shapes all the way to the bottom of the pan. You may cut into 4 long rows the make diagonal cuts. Bake for about 50 minutes until baklava is golden and crisp.
  4. Make sauce while baklava is baking. Boil sugar and water until sugar is melted. Add vanilla and rose water syrup. Simmer for about 20 minutes.
  5. Remove baklava from oven and immediately spoon sauce over it. Let cool. Serve in cupcake papers. This freezes well. Leave it uncovered as it gets soggy if it is wrapped up.
DisneyMeals https://disneymeals.me/

Will it take you to a Whole New World?

Oh man, it was such a good cook this week. The Baklava was AMAZING. Everyone that tried it loved it. Sadly, the worst dish was the chicken. But it was still really good. The chicken was super moist, just not super flavorful. The bread was ALMOST as good as Abu made it look. And the french fries, mmm, I usually don’t love french fries, but those turned out great.

Verdict:

French Fries – 8.5/10

Bread – 9/10

Crackers – 8.5/10

Chicken – 7/10

Baklava – 9.8/10

0

Jungle Book – Bare Necessity Fruit Salad, Pawpaw BBQ Sauce and ants

(Credit: Disney)

Baloo is one of the greatest Disney characters in my opinion. He’s just so chill. And boy, he knows how to eat. Almost all of the food mentioned in the movie comes from one song, Bare Necessities. There isn’t really a recipe, just lots of different fruits. So I did some fun things with them.

1

Cinderella – Porridge, Homemade Toast, Cream, Corn, Bonus 19th Century Hot Chocolate

Quick links: Cream | Corn | Porridge | Homemade Toast | Bonus: Hot Chocolate | Verdict

[twitter-follow screen_name=’DisneyMeals’]

A semi-timely post coinciding with the live-action Cinderella, which we watched as well! Unfortunately, we didn’t do any recipes from the live-action Cinderella…although the sweets that were shown at the ball were tempting. 
The animated Cinderella is a perfect breakfast movie, as all the food in the movie is breakfast food. So get that fire going, brush some cinders on your face and discover all the food from Cinderella.

Lucifer’s Cat Cream

Of course Lucifer gets the first food of the movie.

(Credit: Disney)

(Credit: Disney)

And on the subject of Lucifer, who would unironically name their cat after Satan? Why would Cinderella’s dad marry someone who unironically named their cat after the devil? Wouldn’t that raise some red flags? It’s not exactly subtle.

Lucifer's Cat Cream

  • Servings: 4
  • Difficulty: Easy
  • Print

Ingredients:
3/4 cup Whole Milk
1/3 cup Unsalted Butter
  1. Melt the butter in a saucepan over a medium heat (or in microwave) be sure not to let the butter boil
  2. Remove from heat
  3. Add in the milk
  4. Mix well for 2-3 minutes.

IMG_20150413_202446


Greedy Gus-Gus Corn

Are the chicken feed corn kernels really worth it? Are they Gus?!?!

(Credit: Disney)

(Credit: Disney)

I ate some corn, like Gus. I didn’t have to run away from a hungry cat while doing it though. There’s not really a recipe for this, just corn. You can steam it until it’s soft. Or let it go stale and eat it as chicken feed.IMG_20150413_212141

Drizella’s Porridge

Cinderella is shown taking some breakfast to her step-family. We wanted to be accurate with the type of breakfast she would be serving, seeing as this is supposed to take place in 19th-century France. However, it seems like the animators either didn’t see it as taking place in France, or just weren’t accurate with their French breakfasts. It looks like Cinderella is taking her family porridge and tea.

(Credit: Disney)

(Credit: Disney)

However, porridge isn’t a common French breakfast. They usually eat grains, coffee, and fruits. But because it really looks like porridge, we were true to the animation and made some porridge.

Drizella's Porridge

  • Servings: 1
  • Difficulty: Easy
  • Print

Ingredients:
50 grams porridge oats
350 milliliters milk or water or a mixture of the two
greek yogurt thinned with a little milk
clear honey to serve
  1. Put the oats in a saucepan, pour in the milk or water and sprinkle in a pinch of salt.
  2. Bring to the boil and simmer for 4-5 minutes, stirring from time to time and watching carefully that it doesn’t stick to the bottom of the pan.
  3. Or you can try this in a microwave. Mix the oats, milk or water and a pinch of salt in a large microwaveproof bowl, then microwave on High for 5 minutes, stirring halfway through
  4. . Leave to stand for 2 minutes before eating.
  5. To serve. Pour into bowls, spoon yogurt on top and drizzle with honey.

Source: bbcgoodfood.com
IMG_20150412_194201

Anastasia’s Toast

This is more accurate to France. Toward’s the end of the movie, Cinderella brings her step-family breakfast yet again. This time it’s toast.

(Credit: Disney)

(Credit: Disney)

We didn’t want to just buy some bread at the store and toast it, we make our own bread from scratch.

Anastasia's Toast

  • Servings: 20
  • Difficulty: medium-hard
  • Print
Ingredients:
4 cups bread flour divided
2 teaspoons active quick rising dry yeast
2 teaspoons salt
1 1/2 cups warm water
  1. Put 1/4 cup of bread flour on your clean counter top and reserve.
  2. Place remaining 3 3/4 cups bread flour in your mixer bowl.
  3. Spoon the yeast on one side of the bowl, and the salt on the other side.
  4. Pour in the warm water and with your regular mixer paddle, mix on low speed until the dough comes together in a mass.
  5. Switch to the dough hook. Mix on medium speed for 2 minutes. Dough should clear the sides but stick to the bottom. If it is too sticky, add 1 tablespoon of flour at a time. If too dry, add 1 tablespoon of water to dough to adjust.
  6. Let the dough rest for 5 minutes.
  7. Turn the mixer on again and mix for 3 minutes. (If mixing by hand, mix for 6 minutes, then let rest for 7 minutes and mix again for 7 minutes.)
  8. Take the dough out and place on the counter. Remember that 1/4 cup of flour that we reserved? We’ll use it now.
  9. As you knead the dough by hand, incorporate more flour as you need.
  10. Knead by hand until the dough is very satiny, smooth, tight and formed into a nice, compact ball.
  11. Place this dough in a large lightly oiled bowl
  12. Turn dough over so that all sides have a thin coating of oil.
  13. Cover with plastic wrap and set in warm place for 1 1/2 hours to let rest and rise.
  14. Dough should almost double in size.
  15. While the dough is rising, about 1 hour into the rising stage, preheat your oven to 450F and place your pizza stone, inverted baking sheet or covered cast iron pot into the oven to heat up.
  16. If you are using a loaf pan for steam, also place that into the oven, on the very bottom rack, off to one side of the oven.
  17. After the dough has risen fully, punch dough down and form back into a ball. Poke your finger on the surface – the dough should give into the pressure and slowly creep back up.
  18. Ok, here’s the fun part. Cut the dough into half – you’ll shape one half at a time (keep the other piece under wraps)
  19. Pick up the dough – stretch it out until it forms a big rectangle.
  20. Dust your work surface with flour and fold over the ends of the dough inwards in 3rds.
  21. Now do a little “karate chop” lengthwise down the middle of the bread and stretch out the long ends again.
  22. Fold over in half. The karate chop helps get the middle tucked inside.
  23. Pinch all sides shut. This is important – you want to make sure that all ends including the short ends are pinched tightly to create a seal. This allows the bread to rise & expand up and out evenly. If the bread looks a little lopsided, you can try to fix it by letting it rest 5 minutes and gently stretching it out again. Just don’t knead the dough again – you’ll pop all the beautiful gas that took 1.5 hours to create!
  24.  Turn the bread over so that it is seam side down.
  25. Cover the loaf with a damp kitchen towel. Repeat with the other dough ball.
  26. Leave the loaves to rest on your well-floured pizza peel or cutting board for 30 minutes.
  27. After bread is done rising, take a sharp paring knife and make 3-4 shallow, diagonal slashes on the surface of the loaf. This allows the steam in the bread to escape so that it expands evenly during the baking process.
  28.  When you are ready to bake, remove your baking vessel from oven. Carefully slide the gorgeous loaf into or onto your baking vessel.
  29. If you are using pizza stone or inverted baking sheet: You can probably fit both loaves on it at the same time, just leave at least 6-8″ of space between the loaves. -> Get a 1/2 cup of water ready next to the stove.
  30. Open the stove, put your bread in the oven and throw the water on the oven floor or in the pre-heated loaf pan.
  31. Immediately close the oven door. This creates your steam. -> Bake 20-25 minutes.
  32. Check temperature of the bread – internal temperature should read 190-200F.
  33. Remove and let cool before cutting into it.
  34. If you are using a long cast-iron pot or covered baker: -> Before closing the lid on your pot/baker, put 1/4 cup of water directly in the pot. Cover immediately.
  35. Put pot in oven. -> Bake 10 minutes.
  36. Remove lid of pot. Bake another 14 minutes.
  37. Check temperature of the bread – internal should be 190-200F. Remove and let cool before cutting into it.
  38. Repeat with other loaf. (For convection ovens- bake 8 min covered, 10-12 min uncovered. Check temperature of bread)
  39. To re-crisp the crust, put in 375F oven for 5 minutes.
  40. Cut the bread and toast  it!

Source: steamykitchen.com

IMG_20150412_194208


Bonus: 19th Century Hot Chocolate

It seems like she just has hot water in her tea kettle. But we didn’t feel like making tea. So even though it probably wasn’t hot chocolate, we found a great recipe for 19th century hot chocolate. Remember, sweet chocolate didn’t come to be until later.

19th Century Hot Chocolate

  • Servings: 1
  • Difficulty: Medium
  • Print

Ingredients:
1/2 pint water
1/2 pint milk
1 ounce bakers chocolate
  1. Scrape fine one square of Baker’s chocolate (which will be an ounce).
  2. Put it in a pint of boiling water and milk, mixed in equal parts.
  3. Boil ten minutes, and during this time mill it or whip it with a Dover egg-whip (one with a wheel), which will make it foam beautifully.
  4. Sweeten to the taste, at table.

Source: huntsville.about.com

IMG_20150412_194214


Is it a dream/a wish your heart makes?

Everything was alright. Nothing was blow-your-glass-slippers-off amazing. The best thing about the meal was the homemade toast. That was really good. The hot chocolate was kind of disappointing. Of course, I don’t love bitter chocolate, and it was pretty bitter.

IMG_20150412_194151

Verdict:

Cream – 6/10

Corn – 6/10

Porridge – 7/10

Toast – 10/10

Hot Chocolate – 7/10