0

Sleeping Beauty – Cake with no wands & Cake with wands, Strawberye, Bread Pudding, Gingersnaps, Hippocras (Spiced Wine), Brussel Sprouts, Sweet Potatoes, Almond Rolls with jelly, Pistachio-Almond Rice Pudding, Berry cake with Lemon Icing.

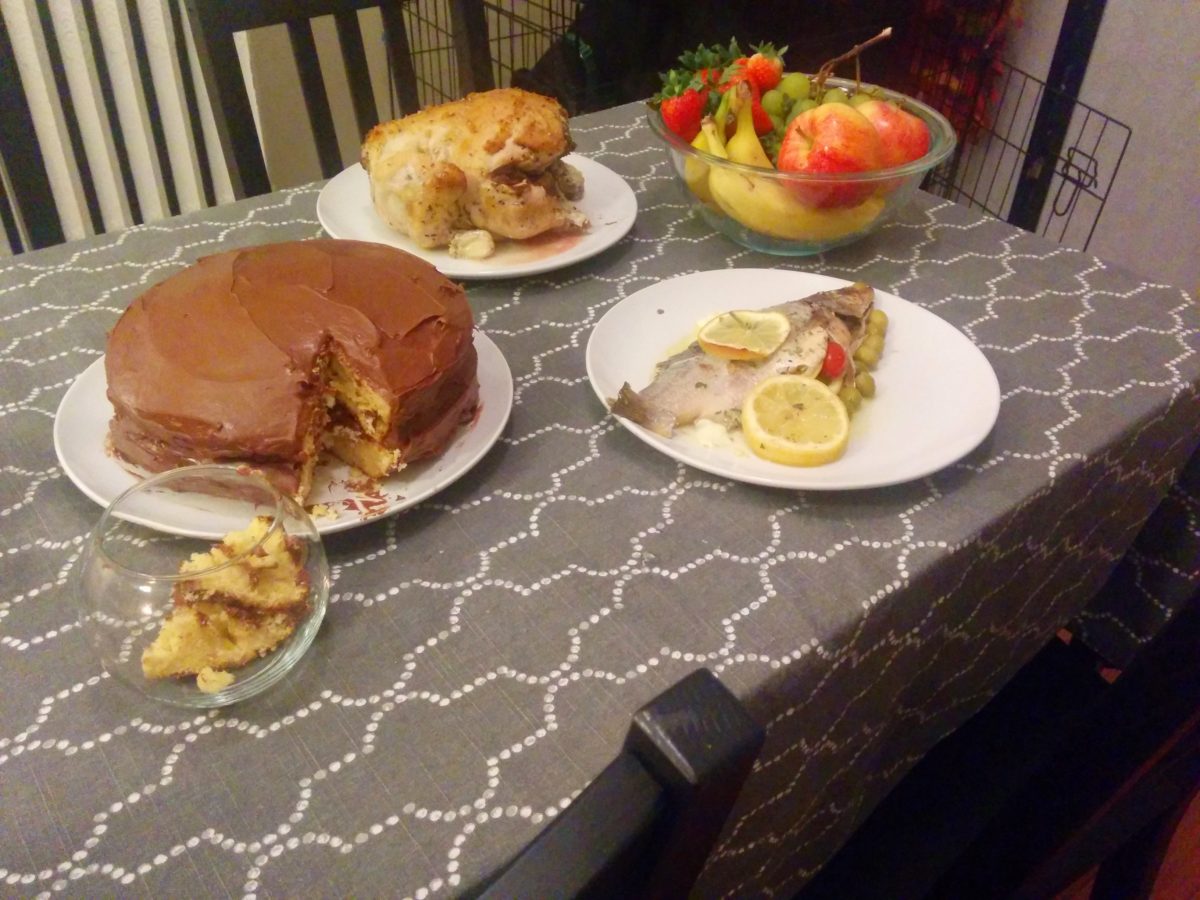
Food isn’t a huge part of this movie. The most notable food in sleeping beauty is the horrendous cake Fauna tried to make. However, you may remember the feast the kings stand by when they drink and sing their “Skumps” song. We skipped over the ham, fish and the turkey that was shown in that scene, for those recipes, see Adventures of Ichabod and Mr. Toad, Pinocchio, and Make Mine Music.

0

Lady and the Tramp – Spaghetti and Meatballs, Breadsticks, Donuts and Coffee, Rib-eye and Mushy Peas, and Wedding Cake

Quick links: Wedding Cake | DonutsRibeye and Mushy Peas | Spaghetti and Meatballs | Breadsticks | Verdict

[twitter-follow screen_name=’DisneyMeals’]

Probably one of the most famous Disney food scenes out of all of the animated movies. The spaghetti kiss. We tried recreating the famous scene, but our dog wasn’t as willing as Lady. All-in-all, Lady and the Tramp had a good haul of food. And our greyhound loved the food too.

IMG_20150506_092444 copy

Passed-up Wedding Cake (with fondant)

Toward the start of the movie, Tramp was looking for a good place to eat, before settling on Tony’s. One of the options is a cake shop.

(Credit: Disney)

(Credit: Disney)

We have made lots of cake throughout this blog, but never a wedding cake. So we made a delicious wedding cake, with fondant and everything

Wedding Cake and Fondant

  • Servings: 12
  • Difficulty: Medium-Hard
  • Print

Ingredients:

Cake

1 package (18 ounce) betty crocker white cake mix
1 cup all-purpose flour
1 cup granulated sugar
3 whole eggs (even for white cakes)
1 cup water
1 cup sour cream
1 teaspoon almond emulsion (stronger than flavoring) (or 2 teaspoons almond extract)
1 teaspoon vanilla extract

 Fondant

1 package (16 ounces) white mini marshmallows (use a good quality brand)
2 5 tablespoons water
2 pounds (about 8 cups) sifted confectioners’ sugar
1/2 cup solid vegetable shortening

Cake

  1. In a bowl, mix 1st 3 ingredients. (see notes below) Set aside.
  2. Place remaining ingredients in mixer bowl then add the dry.
  3. Mix on low speed for 30 seconds, until dry ingredients are incorporated; mix at medium 2 minutes.
  4. This makes 1 & 1/2 times the usual batter than a ‘straight’ cake mix. It will fill one of the following pans: 8″ sq; 12″ round; 9x13x2; OR one 10″ and 6″ round.
  5. Pour into pan(s) and bake as you usually do. I prefere to bake at 300 degrees F. for 20 minutes, then turn oven up to 325 degrees F. for an equal time OR until you can smell cake If it has pulled away from the edges of the pan it is *over done*. You should have a flat cake that won’t (usually) need leveling & is not sticky on the top when it cools.

Special NOTES:.

  1. There is NO oil, butter or margarine in this recipe.
  2. Use large eggs.
  3. If almond extract (not emulsion) is used, add 2 teaspoons or to taste.
  4. Can use ANY cake flavor.
  5. Flavorings can change depending on cake flavor you use. Try a combination of 1 part vanilla, 1/2 part butter flavoring and 1/4 part almond.
  6. It is important to mix the dry ingredients well especially if using a chocolate mix or you will have white spots in the finished cake. I use a wire whisk.

Fondant

  1. To make marshmallow fondant, place marshmallows and 2 tablespoons of water in a microwave-safe bowl. Microwave 30 seconds on high; stir until mixed well. Continue microwaving 30 seconds more; stir again. Continue until melted (about 2 1/2 minutes).
  2. Place 3/4 of the confectioners’ sugar on top of the melted marshmallow mixture. Fold sugar into marshmallow mixture. Flavoring can be added at this point if desired. Place solid vegetable shortening in easily accessed bowl so you can reach into it with fingers as you are working. Grease hands and counter GENEROUSLY; turn marshmallow mixture onto counter. Start kneading like you would dough. Continue kneading, adding additional confectioners’ sugar and re-greasing hands and counter so the fondant doesn’t stick. If the marshmallow fondant is tearing easily, it is too dry; add water (about 1/2 tablespoon at a time) kneading until fondant forms a firm, smooth elastic ball that will stretch without tearing, about 8 minutes.
  3. It’s best to allow Marshmallow Fondant to sit, double-wrapped, overnight. Prepare the fondant for storing by coating with a thin layer of solid vegetable shortening, wrap in plastic wrap and then place in resealable bag. Squeeze out as much air as possible. Marshmallow Fondant will keep well in refrigerator for several weeks.
  4. When not working with fondant, make sure to keep it covered with plastic wrap or in a bag to prevent it from drying out. When ready to use, knead fondant until smooth. Roll out fondant 1/8 in. thick.
  5. To color fondant: If you need to tint the entire batch of fondant, add a little icing color to the melted marshmallow mixture before adding confectioners’ sugar. For smaller amounts of tinted fondant, add icing color to portions of fondant as needed.

IMG_20150503_184033


Donuts and Coffee for your pooch

Disclaimer: DO NOT feed your dog donuts and coffee. Caffeine is toxic to dogs. But that didn’t stop Jim Dear. While having his morning coffee and donut, he decided to give Miss Lady some.

(Credit: Disney)

(Credit: Disney)

Even though it’s a bad breakfast for dogs, it’s a perfectly good breakfast for humans. We found a great donut recipe that fits the time period of the movie well.

Early 1900's Donuts

  • Servings: 12
  • Difficulty: Medium
  • Print

Ingredients:
1 egg
1 cup sugar
2 tablespoons butter
1 cup sweet (aka whole) milk
1 pinch salt
2 teaspoons baking powder
2 cups flour
1/2 teaspoon ginger
1/4 teaspoon nutmeg
lard or oil, for frying
extra flour
  1. One egg, one cup of sugar, two tablespoons of butter, beaten together till creamy.
  2. Add one cup of sweet milk, a pinch of salt, two teaspoons of baking powder stirred into two cups of flour*.
  3. Add one-half teaspoon of ginger and one-fourth teaspoon of nutmeg to the flour.
  4. Beat well, roll out about one-fourth of an inch thick.
  5. Cut out all the cakes before beginning to fry.
  6. Cook in deep fat that will fry a small walnut-sized ball of the dough in about sixty-five seconds.
  7. Do not let the fat get above that degree of heat.

*NOTE: I don’t know if I messed up the recipe or what, but I had to add about double the flour asked for. The dough was too sticky to shape so I just added more flour until I could shape the donuts to fry, which I used 2 different sized lids to make the circle shape and the circle hole.

IMG_20150505_210018


Lady’s Rib-eye Steak and Mushy Peas

:Poor Lady didn’t get a chance to eat the juicy steak she envisioned.

(Credit: Disney)

(Credit: Disney)

and instead got a face-full of mushy peas

(Credit: Disney)

(Credit: Disney)

Even though Lady wasn’t a fan of the peas, our greyhound loved them.

IMG_20150503_142119

For the Rib-eye steak. I salted the meat beforehand, and then threw it on the grill until I got a medium-rare cook.  The mushy peas recipe is as follows.

Mushy Peas

  • Servings: 4
  • Difficulty: Easy
  • Print

Ingredients:
1 (10-ounce) package frozen green peas
1/4 cup heavy cream
1 tablespoon butter
1/2 teaspoon salt
1/2 teaspoon freshly ground black pepper
  1. Bring a shallow pot of lightly salted water to a boil over medium-high heat.
  2. Add frozen peas, and cook for 3 minutes, or until tender.
  3. Drain peas, and transfer to a blender or large food processor.
  4. Add cream, butter, salt and pepper to peas, and process until blended, but still thick with small pieces of peas.
  5. Adjust seasonings to taste, and serve immediately.

IMG_20150503_141959

IMG_20150503_142116


Tony’s Famous Kissing Spaghetti and Meatballs

Now, the moment you’ve all been waiting for, the famous spaghetti and meatballs. Its such a beautiful scene on a bella notte.

(Credit: Disney)

(Credit: Disney)

We tried to recreate the scene with our dog, but Roxie wasn’t so sure about sitting at the table. We did manage to get a semi-decent picture.

Tony's Famous Spaghetti and Meatballs

  • Servings: 6
  • Difficulty: Easy-Medium
  • Print

Ingredients:
2 cans (28 ounces each) diced tomatoes undrained
1 can (12 ounces) tomato paste
1 1/2 cups 1-1/2 water divided
3 tablespoons grated onions
1 tablespoon sugar
1 1/2 teaspoons 1-1/2 dried oregano
1 bay leaf
1 1/4 teaspoons 1-1/4 salt divided
1 teaspoon minced garlic divided
3/4 teaspoon pepper divided
6 slices day-old bread torn into pieces
2 eggs lightly beaten
1/2 cup grated Parmesan cheese
2 tablespoons minced fresh parsley
1 pound ground beef
hot cooked spaghetti
additional parmesan cheese optional
  1. In a Dutch oven, combine the tomatoes, tomato paste, 1 cup water, onion, sugar, oregano, bay leaf and 1/2 teaspoon each of salt, garlic and pepper. (NOTE: I’d also add some crushed red peppers)
  2. Bring to a boil.
  3. Reduce heat and simmer, uncovered, for 1-1/4 hours.
  4. Meanwhile, soak bread in remaining water. Squeeze out excess moisture.
  5. NOTE: I’d skip on the soaked bread and add 2 cups of bread crumbs and 1/4 cup milk
  6. In a large bowl, combine the bread, eggs, Parmesan cheese, parsley and remaining salt, garlic and pepper. Crumble beef over mixture and mix well.
  7. Shape into thirty-six 1-1/2-in. meatballs.
  8. Place meatballs on a rack in a shallow baking pan.
  9. Bake, uncovered, at 400° for 20 minutes or until no longer pink; drain.
  10. Transfer to spaghetti sauce.
  11. Simmer, uncovered, until heated through, stirring occasionally.
  12. Discard bay leaf.
  13. Serve with spaghetti with additional Parmesan if desired.

IMG_20150502_213344


Tony’s Breadsticks

Accompanying the spaghetti is a bowl of breadsticks. Mary had made this recipe before, so we decided it would be good. However, when I made it, the bread turned out too sweet. I’m not sure why. So just a forewarning while making it, maybe add a little less sugar.

Tony's Bread Sticks

  • Servings: 8
  • Difficulty: Medium
  • Print

Ingredients:
1.5 cups Water
1 pkg. Yeast
1.5 Tbs Sugar
3 cups Flour
1/2 tsp Salt
  1. Mix ingredients
  2. Knead for 3 mins.
  3. Let raise for 10 mins
  4. Roll out on parchment paper to the size of a cookie sheet.
  5. Cut into 1.5 in strips
  6. Spread with butter
  7. add garlic, salt and Parmesan cheese on top
  8. Let rest for 10 mins
  9. Bake at 350F for 20 mins

IMG_20150502_213350


Will you call it a bella pasto (beautiful meal)?

Overall the recipes were good. I was a little tired and out of it when making the spaghetti and meatballs. I would have made the meatballs a bit spicier if I were on my game, and probably used bread crumbs as opposed to soggy bread. But they still turned out pretty good.

IMG_20150502_213356

The donuts and hot chocolate were a great pairing. Part of a balanced breakfast.

IMG_20150505_210107

And the cake was amazing. We got lots of compliments on that. I highly recommend it.

Verdict:

Wedding Cake – 10/10

Donuts – 8/10, Donuts dipped in hot chocolate 9/10

Rib-eye Steak – 9/10

Mushy Peas – 7/10

Spaghetti and Meatballs – 7/10

Breadsticks – 6/10

0

Alice in Wonderland – Drink Me (Layered Drink), Eat Me (Sugar Cookies), Bread and Butterflies, Oysters on the Half-shell, Unbirthday Cake, Edible Plate, Mushroom

Quick links: Drink Me | Eat Me | Bread and Butterfly | Oysters | Unbirthday Cake | Edible Plate | Mushroom | Verdict

[twitter-follow screen_name=’DisneyMeals’]

I’ve always wanted to eat a plate. This was my chance. There is tons of crazy food in Alice in Wonderland. And the best part is that, since it takes place in a “wonderland” there is no wrong way to make the food.  It was great fun experimenting how to do the Drink Me and finding a way to make an edible plate. Now, before you ask, we didn’t eat a clock. That is one of the most memorable things in the movie, but since it wasn’t prepared as a food, we didn’t make it. Sorry 🙁

I forgot how entertaining Alice in Wonderland is too. The last time I had watched it, I was a little kid and half the movie went right over my head while the other half scared me. Watching it as an adult was much more enjoyable.

Drink Me (Cherry Tart, Custard, Pineapple, Roast Turkey Drink)

So you fall down a rabbit hole and land in a mysterious place? What is the first thing you do? Well drink a strange drink sitting on a table of course.

(Credit: Disney)

(Credit: Disney)

(Credit: Disney)

(Credit: Disney)

She even examines it and notes that it might be poison, but downs it anyway.

Well it never really shows what is inside the “Drink Me” bottle, but she describes the flavors. At first it tastes like cherry tart, and then like custard, then pineapple, then roast turkey. That meant I got to make a multi-layered drink!

Drink Me

  • Servings: 6
  • Difficulty: Medium
  • Print

Ingredients:

Cherry Tart

1 pound red cherries
2 pounds sugar
1/2 pint water
3 bottles carbonated water (soda)


Custard

1.2 cups milk
1/4 cups cream
4 eggs yolks
2 Tbs sugar
2 tablespoons cornstarch
1 teaspoon vanilla extract

Pineapple

1 can Pineapple
1/4 c Sugar
1 tsp Lemon Juice

Roast Turkey

1/2 c Turkey
1/4 c Gravy
2 Tbs Cranberry Sauce
1/2 c Water
1/8 tsp Chicken Bouillon
Salt to Taste

Cherry Tart

  1. Put the clean, seedless cherries and sugar in a saucepan. If you want your cherries on the super-tart side, add less sugar.
  2. Cover the pan and leave at room temperature for 2 hours. The cherries need time to soak up the sweetness of the sugar. It’ll be so tangy that you’ll need the water to dilute it later.
  3. Add the 1/2 pint of water and stir until all the sugar dissolves. You’re looking for one mostly uniform consistency (the cherry chunks will keep it from being entirely uniform).
  4. Bring the contents up to a boil.
  5. Then reduce the heat and simmer for fifteen minutes. It should maintain a light bubble the entire time, reducing the liquid and turning almost syrupy.
  6. When finished, strain the mixture.
  7. Squeeze all the moisture from the cherries into a separate saucepan. Don’t just strain it — really squeeze out all the juices. Simmer the strained liquid until it thickens like maple syrup.
  8. Then take the pan off, let it cool to room temperature and move it to a sealed vessel for storage in a refrigerator
  9. Put one or two spoons of it into a glass of soda water. Sparkling water (or even just water) works, too.
  10. Feel free to experiment with the ratio to find your personal taste. It may take a try or two — but once you find the right combination, it’ll be easy.

Custard

  1. Bring milk and cream to a simmer slowly on low heat.
  2. Whisk the sugar and cornstarch together, add the egg yolks, combine well.
  3. Slowly whisk the warm milk into the egg mixture, whisking constantly. Add vanilla. Return to the saucepan and stir gently until thickened. Serve hot, or cool to use as a layer in trifles, or fill tart pans.
  4. Tip. If using it hot, it can be kept warm in a jug set in a pan of hot water with a bit of cling film on top to prevent a skin forming.

Source: food.com

Pineapple

  1. Put all ingredients into a blender
  2. Blend
  3. Chill

Roast Turkey

  1. Place all ingredients into a blender
  2. Blend
  3. The mixture should be thick, but still able to move when you tilt the container.

Layering

There are a couple ways to layer the drinks. The first way is the way I used for the tube. Tilt the container pour each of the liquids, starting with the bottom-most liquid, slowly into the container. The contents should slide down the side of the container and rest on top of each other.

For more open-faced containers, you can use the spoon method. Pour the first liquid into the bottom of the container. Then place a spoon upside-down and at an angle, so the tip of the spoon is resting just above the bottom layer, and pour the second layer onto the spoon slowly. Move the spoon to cover the whole first layer.

IMG_20150419_165029

Eat Me Sugar Cookies

After she foolishly drinks the luckily-not-poisoned, but enlarging drink, she goes on and eats some strange cookies that appear out of no where in the hopes that she will shrink back down.

(Credit: Disney)

(Credit: Disney)

These look like regular sugar cookies. We found a great recipe and whipped some up.

Eat Me Sugar Cookies

  • Servings: 4 dozen
  • Difficulty: Easy
  • Print

Ingredients:
2 3/4 cups all-purpose flour
1 teaspoon baking soda
1/2 teaspoon baking powder
1 cup softened butter
1 1/2 cups white sugar
1 egg
1 teaspoon vanilla extract
3 to 4 tablespoons buttermilk
sprinkles or colored sugar for decorating
  1. Preheat oven to 375 degrees F.
  2. In a small bowl, stir together flour, baking soda, and baking powder. Set aside.
  3. In a large bowl, cream together butter and sugar until smooth. Beat in the egg and vanilla. Gradually blend in dry ingredients. Add enough of the buttermilk to moisten the dough and make it soft, not wet.
  4. Roll rounded teaspoons of dough into balls and place on a ungreased cookie sheet. With a brush or fingers, moisten the top of each cookie with the remaining buttermilk and slightly flatten the top of each cookie. Sprinkle with raw sugar or colored sprinkles.
  5. Bake for 8 to 10 minutes or until slightly golden. Let stand for 2 minutes before removing to cool on a rack.

IMG_20150419_194438

Bread and Butterflies

Ok, so this one is a little out of place. I’m combining two recipes. In the Walrus and the Carpenter section, the Carpenter makes some bread to go with the oysters,

(Credit: Disney)

(Credit: Disney)

and later on, we see some wonderful, punny creatures, bread and butterflies. So here is the recipe for the bread, and then how to make the bread and butterflies. We weren’t exactly successful in making the bread and butterflies, but it was fun to try.

(Credit: Disney)

(Credit: Disney)

Bread and Butterflies

  • Servings: 10
  • Difficulty: Medium-Hard
  • Print

Ingredients:
4 cups white flour plus extra for dusting
7 grams fast-action dried yeast (one packet)
1 teaspoon salt
1.5 cups lukewarm water (give or take a little)
a little oil for greasing
  1. Make the dough by tipping the flour, yeast and salt into a large bowl and making a well in the middle.
  2. Pour in most of the water and use your fingers or a wooden spoon to mix the flour and water together until combined to a slightly wet, pillowy, workable dough – add a splash more water if necessary.
  3. Tip the dough onto a lightly floured surface and knead for at least 10 mins until smooth and elastic.
  4. This can also be done in a tabletop mixer with a dough hook.
  5. Place the dough in a clean oiled bowl, cover with cling film and leave to rise until doubled in size.
  6. Heat oven to 430F/220C/fan 200C/gas 7.
  7. Knock back the dough by tipping it back onto a floured surface and pushing the air out.
  8. Mould the dough into a football ball shape that will fit a 900g loaf tin and place in the tin.
  9. Cover with a clean tea towel and leave to prove for 30 mins.
  10. Dust the top of the loaf with a little more flour and slash the top with a sharp knife if you want.
  11. Bake the bread for 15 mins, then reduce the heat to 190C/fan 170C/gas 5 and continue to bake for 30 mins until the loaf sounds hollow when removed from the tin and tapped on the base.
  12. Leave the bread on a wire rack to cool completely.
  13. The loaf will stay fresh in an airtight container for 3 days or can be frozen for 1 month

Bread and Butterfly

  1. Get a pipe cleaner and fold it in half.
  2. Twist the ends together, but leave them seperated a bit to make antenna.
  3. Take a piece of bread and roll it over the pipe cleaner.
  4. Wet the edge of the bed so it sticks to itself in the roll.
  5. Slice 2 more pieces of bread for wings.
  6. Stick toothpicks in the bottom of the bread.
  7. Stick the wings into the body.
  8. Put honey at the top of the body and attach 2 googley eyes.
  9. Spread butter on the wings.

IMG_20150418_211812 IMG_20150418_214744_rewind

Little Oysters on a Half-shell

The Walrus and the Carpenter is a pretty messed up story. They eat little baby oysters. Now, people do that all the time, but these were cute anthropomorphic little oysters. The carpenter goes into what he’s putting into the sauce to eat with the oysters. It turns out he was probably describing a mignonette. So I found a good recipe and made it with the raw oysters. Both me and my wife aren’t fond of oysters, but we stomached them anyway.

Little Oysters on a Half-shell

  • Servings: 4
  • Difficulty: Easy
  • Print

Ingredients:

Oysters

10-20 Oysters
Crushed Ice or rock salt

Mignonette

1 tablespoon coarsely ground white or black peppercorn (vary amount according to taste)
1/2 cup white wine vinegar (I used red, but white would be more accurate)
2 tablespoons finely chopped shallots or sweet onions
1 tsp Ground mustard seed
salt to taste


Oysters

  1. Clean the oysters really well under running water with a course brush. Dirt is everywhere, so be sure to scrub, especially around the hinge
  2. Insert a butter knife as far into the hinge as possible.
  3. Rock the knife gently up and down as you push the knife further into the oyster
  4. The oyster will finally open.
  5. Detach it from the top and bottom of the shell, but leave it in the bottom.
  6. Place in crushed ice or rock salt.

Mignonette

  1. Combine all ingredients
  2. Chill for at least an hour.
  3. Serve with the Oysters


IMG_20150418_211759

A Mad Unbirthday Cake

This was another fun recipe. When Alice meets the Mad Hatter, he gives her an unbirthday cake.

(Credit: Disney)

(Credit: Disney)

We know what the outside looks like, but there was no way of knowing what the inside was because it explodes into a firework. So, it being wonderland, we had to do something interesting, so we made a multicolored cake!

A Mad Unbirthday Cake

  • Servings: 12
  • Difficulty: Medium
  • Print

Ingredients:
1 box white (vanilla) cake mix
food coloring
2 cartons pink frosting
water **according to cake package
egg white **according to cake package
oil **according to cake package
1 teaspoon vanilla extract
1 tablespoon milk
  1. Prepare cake mix according to package directions, add vanilla and milk.
  2. Blend well.
  3. Separate into 3 bowls.
  4. Dye each bowlful a different color.
  5. Pour batter into three 9″ cake pans that have been greased and floured.
  6. Bake at 350 for 20-25 minutes.
  7. Allow to cool completely.
  8. Cut into cakes with 3″ and 6″ rings starting in the center (this will make it look like a target).
  9. Take the largest ring of one color, the 6″ ring of another color, and the 3″ center piece of the last color and put them together.
  10. This creates a new bottom layer.
  11. Frost.
  12. Continue to do this for all 3 layers.
  13. When you cut into the cake it will make a checkered pattern.
  14. Use pink frosting and white icing. Put one “trick” candle on top.
  15. Merry Unbirthday!

IMG_20150419_214701

Edible White Chocolate Plate

Another fun recipe. We see the mad hatter dip his saucer into his tea and take a bite out of it.

(Credit: Disney)

(Credit: Disney)

(Credit: Disney)

(Credit: Disney)

Now, I wasn’t too keen on ingesting glass, so I decided to make an edible saucer. I went through a few different possibilities. I thought about making sugar glass, but I wasn’t sure how to make it white. Then I thought, why not make it out of white chocolate, that’s already white.

I found a tutorial on how to make a mold. And made one for a plate. Note: I didn’t use nearly enough silicone. I would say use between 20-30 oz, not 10 like I did.

Edible White Chocolate Plate

  • Servings: 1
  • Difficulty: Hard
  • Print

Ingredients:
1 Package white chocolate chips
 3 10oz tubes Silicone
1/2 c dish soap
 64 oz water
  1. Follow the instructions here to make a mold of a plate
  2. Melt the white chocolate chips either in the microwave, on the stove or double boiler.
  3. Pour the melted white chocolate into the mold.
  4. Chill for 1-2 hrs
  5. Remove from mold and there you have your saucer..


IMG_20150419_214456

Mushroom to Help you Grow Big and Strong

Another thing Alice eats on the trust of others. The caterpillar just tells her to eat a mushroom when around 50% are inedible, 20% are toxic and 1% are deadly (Not sure if this is a credible source).

(Credit: Disney)

(Credit: Disney)

(Credit: Disney)

(Credit: Disney)

But lucky Alice, she didn’t die, just grew really big again.

Mushroom to Help you Grow Big and Strong

  • Servings: 2
  • Difficulty: Easy
  • Print

Get a mushroom. Steam it in a steamer. Eat it. (You can put some salt or something on it)

IMG_20150421_191511


Will it Send you Down the Rabbit Hole?

Not the absolute tastiest movie, but one of the funnest cooks. I loved being able to try and figure out the different ways to make some of the stuff.

The Drink Me was interesting. It was fun being able to go through all the flavors. The cake and the cookies were probably the best part.

If you like oysters, then maybe you’ll like the oysters and mignonette, I dunno.

The edible plate was a good idea in concept, but for some reason, I couldn’t get the chocolate to melt right and I didn’t have enough silicone to make a full plate mold. If I had gotten it melted right, and had more silicone, I think it would have turned out better

IMG_20150419_214434

IMG_20150419_194433 IMG_20150419_194854

Verdict:

Drink Me – 7/10 (Cherry) 8/10 (Custard) 8/10 (Pineapple) 4/10 (Roast Turkey)

Eat Me Sugar Cookies – 9/10

Bread and Butterfly – 7/10

Oysters – 5/10 (Raw Oysters), 3/10 (Boiled Oysters) 7/10 (Mignonette)

Unbirthday Cake – 9/10

Edible Plate – 6/10

Mushroom – 6/10 (Would be better with seasoning)

1

Cinderella – Porridge, Homemade Toast, Cream, Corn, Bonus 19th Century Hot Chocolate

Quick links: Cream | Corn | Porridge | Homemade Toast | Bonus: Hot Chocolate | Verdict

[twitter-follow screen_name=’DisneyMeals’]

A semi-timely post coinciding with the live-action Cinderella, which we watched as well! Unfortunately, we didn’t do any recipes from the live-action Cinderella…although the sweets that were shown at the ball were tempting. 
The animated Cinderella is a perfect breakfast movie, as all the food in the movie is breakfast food. So get that fire going, brush some cinders on your face and discover all the food from Cinderella.

Lucifer’s Cat Cream

Of course Lucifer gets the first food of the movie.

(Credit: Disney)

(Credit: Disney)

And on the subject of Lucifer, who would unironically name their cat after Satan? Why would Cinderella’s dad marry someone who unironically named their cat after the devil? Wouldn’t that raise some red flags? It’s not exactly subtle.

Lucifer's Cat Cream

  • Servings: 4
  • Difficulty: Easy
  • Print

Ingredients:
3/4 cup Whole Milk
1/3 cup Unsalted Butter
  1. Melt the butter in a saucepan over a medium heat (or in microwave) be sure not to let the butter boil
  2. Remove from heat
  3. Add in the milk
  4. Mix well for 2-3 minutes.

IMG_20150413_202446


Greedy Gus-Gus Corn

Are the chicken feed corn kernels really worth it? Are they Gus?!?!

(Credit: Disney)

(Credit: Disney)

I ate some corn, like Gus. I didn’t have to run away from a hungry cat while doing it though. There’s not really a recipe for this, just corn. You can steam it until it’s soft. Or let it go stale and eat it as chicken feed.IMG_20150413_212141

Drizella’s Porridge

Cinderella is shown taking some breakfast to her step-family. We wanted to be accurate with the type of breakfast she would be serving, seeing as this is supposed to take place in 19th-century France. However, it seems like the animators either didn’t see it as taking place in France, or just weren’t accurate with their French breakfasts. It looks like Cinderella is taking her family porridge and tea.

(Credit: Disney)

(Credit: Disney)

However, porridge isn’t a common French breakfast. They usually eat grains, coffee, and fruits. But because it really looks like porridge, we were true to the animation and made some porridge.

Drizella's Porridge

  • Servings: 1
  • Difficulty: Easy
  • Print

Ingredients:
50 grams porridge oats
350 milliliters milk or water or a mixture of the two
greek yogurt thinned with a little milk
clear honey to serve
  1. Put the oats in a saucepan, pour in the milk or water and sprinkle in a pinch of salt.
  2. Bring to the boil and simmer for 4-5 minutes, stirring from time to time and watching carefully that it doesn’t stick to the bottom of the pan.
  3. Or you can try this in a microwave. Mix the oats, milk or water and a pinch of salt in a large microwaveproof bowl, then microwave on High for 5 minutes, stirring halfway through
  4. . Leave to stand for 2 minutes before eating.
  5. To serve. Pour into bowls, spoon yogurt on top and drizzle with honey.

Source: bbcgoodfood.com
IMG_20150412_194201

Anastasia’s Toast

This is more accurate to France. Toward’s the end of the movie, Cinderella brings her step-family breakfast yet again. This time it’s toast.

(Credit: Disney)

(Credit: Disney)

We didn’t want to just buy some bread at the store and toast it, we make our own bread from scratch.

Anastasia's Toast

  • Servings: 20
  • Difficulty: medium-hard
  • Print
Ingredients:
4 cups bread flour divided
2 teaspoons active quick rising dry yeast
2 teaspoons salt
1 1/2 cups warm water
  1. Put 1/4 cup of bread flour on your clean counter top and reserve.
  2. Place remaining 3 3/4 cups bread flour in your mixer bowl.
  3. Spoon the yeast on one side of the bowl, and the salt on the other side.
  4. Pour in the warm water and with your regular mixer paddle, mix on low speed until the dough comes together in a mass.
  5. Switch to the dough hook. Mix on medium speed for 2 minutes. Dough should clear the sides but stick to the bottom. If it is too sticky, add 1 tablespoon of flour at a time. If too dry, add 1 tablespoon of water to dough to adjust.
  6. Let the dough rest for 5 minutes.
  7. Turn the mixer on again and mix for 3 minutes. (If mixing by hand, mix for 6 minutes, then let rest for 7 minutes and mix again for 7 minutes.)
  8. Take the dough out and place on the counter. Remember that 1/4 cup of flour that we reserved? We’ll use it now.
  9. As you knead the dough by hand, incorporate more flour as you need.
  10. Knead by hand until the dough is very satiny, smooth, tight and formed into a nice, compact ball.
  11. Place this dough in a large lightly oiled bowl
  12. Turn dough over so that all sides have a thin coating of oil.
  13. Cover with plastic wrap and set in warm place for 1 1/2 hours to let rest and rise.
  14. Dough should almost double in size.
  15. While the dough is rising, about 1 hour into the rising stage, preheat your oven to 450F and place your pizza stone, inverted baking sheet or covered cast iron pot into the oven to heat up.
  16. If you are using a loaf pan for steam, also place that into the oven, on the very bottom rack, off to one side of the oven.
  17. After the dough has risen fully, punch dough down and form back into a ball. Poke your finger on the surface – the dough should give into the pressure and slowly creep back up.
  18. Ok, here’s the fun part. Cut the dough into half – you’ll shape one half at a time (keep the other piece under wraps)
  19. Pick up the dough – stretch it out until it forms a big rectangle.
  20. Dust your work surface with flour and fold over the ends of the dough inwards in 3rds.
  21. Now do a little “karate chop” lengthwise down the middle of the bread and stretch out the long ends again.
  22. Fold over in half. The karate chop helps get the middle tucked inside.
  23. Pinch all sides shut. This is important – you want to make sure that all ends including the short ends are pinched tightly to create a seal. This allows the bread to rise & expand up and out evenly. If the bread looks a little lopsided, you can try to fix it by letting it rest 5 minutes and gently stretching it out again. Just don’t knead the dough again – you’ll pop all the beautiful gas that took 1.5 hours to create!
  24.  Turn the bread over so that it is seam side down.
  25. Cover the loaf with a damp kitchen towel. Repeat with the other dough ball.
  26. Leave the loaves to rest on your well-floured pizza peel or cutting board for 30 minutes.
  27. After bread is done rising, take a sharp paring knife and make 3-4 shallow, diagonal slashes on the surface of the loaf. This allows the steam in the bread to escape so that it expands evenly during the baking process.
  28.  When you are ready to bake, remove your baking vessel from oven. Carefully slide the gorgeous loaf into or onto your baking vessel.
  29. If you are using pizza stone or inverted baking sheet: You can probably fit both loaves on it at the same time, just leave at least 6-8″ of space between the loaves. -> Get a 1/2 cup of water ready next to the stove.
  30. Open the stove, put your bread in the oven and throw the water on the oven floor or in the pre-heated loaf pan.
  31. Immediately close the oven door. This creates your steam. -> Bake 20-25 minutes.
  32. Check temperature of the bread – internal temperature should read 190-200F.
  33. Remove and let cool before cutting into it.
  34. If you are using a long cast-iron pot or covered baker: -> Before closing the lid on your pot/baker, put 1/4 cup of water directly in the pot. Cover immediately.
  35. Put pot in oven. -> Bake 10 minutes.
  36. Remove lid of pot. Bake another 14 minutes.
  37. Check temperature of the bread – internal should be 190-200F. Remove and let cool before cutting into it.
  38. Repeat with other loaf. (For convection ovens- bake 8 min covered, 10-12 min uncovered. Check temperature of bread)
  39. To re-crisp the crust, put in 375F oven for 5 minutes.
  40. Cut the bread and toast  it!

Source: steamykitchen.com

IMG_20150412_194208


Bonus: 19th Century Hot Chocolate

It seems like she just has hot water in her tea kettle. But we didn’t feel like making tea. So even though it probably wasn’t hot chocolate, we found a great recipe for 19th century hot chocolate. Remember, sweet chocolate didn’t come to be until later.

19th Century Hot Chocolate

  • Servings: 1
  • Difficulty: Medium
  • Print

Ingredients:
1/2 pint water
1/2 pint milk
1 ounce bakers chocolate
  1. Scrape fine one square of Baker’s chocolate (which will be an ounce).
  2. Put it in a pint of boiling water and milk, mixed in equal parts.
  3. Boil ten minutes, and during this time mill it or whip it with a Dover egg-whip (one with a wheel), which will make it foam beautifully.
  4. Sweeten to the taste, at table.

Source: huntsville.about.com

IMG_20150412_194214


Is it a dream/a wish your heart makes?

Everything was alright. Nothing was blow-your-glass-slippers-off amazing. The best thing about the meal was the homemade toast. That was really good. The hot chocolate was kind of disappointing. Of course, I don’t love bitter chocolate, and it was pretty bitter.

IMG_20150412_194151

Verdict:

Cream – 6/10

Corn – 6/10

Porridge – 7/10

Toast – 10/10

Hot Chocolate – 7/10

3

Make Mine Music/Fun and Fancy Free – Chocolate Pot-roast & Pistachio Gravy, Old Fashion Chicken, Coconut Cake, White Cake, Chocolate Cake, Plum Pudding, Raspberry Lemonade, Candied Beets, Ice Cream Boat, Fish Sandwich, Avocado Spread and Dumplings

Quick links: ‘Murican Ice Cream | Stacked Fish Sandwich & Avocado Spread | Luana’s White Cake | A Cricket’s Chocolate Delight Cake | Slim Bean Sandwich | Willie’s Medieval Chicken | Coconut cake | Raspberry Lemonade | Fe-fi-fo-plum Pudding | Candied Beets | Donald Duck Dumplings | MMM, Chocolate Pot-roast | Smishmashio Green(ish) Gravy |  Verdict [twitter-follow screen_name=’DisneyMeals’] “Fe-Fi-Fo-Fum I smell the blood of an anthropomorphic rodent!” – Willie the Giant (paraphrasing…kinda)….
Continue reading »

4

Saludos Amigos/Three Caballeros – Peruvian bread, Argentinian Asado (Steak and Sausage), Mate, Lemonade, Bahian Cookies (Quindins and Cocadas), and Cachaça

Quick links: Bread | Asado | Mate | Cachaça | Lemonade | Cocada | Quindins | Verdict [twitter-follow screen_name=’DisneyMeals’] Even being a huge Disney fanatic, I don’t know if I’ve ever seen Saludos Amigos or Three Caballeros. Maybe I watched them when I was really small at my grandparent’s house, but I’m not sure. It seems pretty common that these two movies get overlooked, that’s…
Continue reading »

5

Pinocchio – Lemon Roasted Fish, Yellow Cake, Roasted Chicken, Homemade Bread, and Strawberry Pie

Quick links: Figaro’s Fish | Princess Cleo’s Cake | Geppetto’s Chicken | Stromboli’s French Bread | Pleasure Island Pie | Verdict [twitter-follow screen_name=’DisneyMeals’] One of the saddest parts of Pinocchio is that Geppetto made a huge mouthwatering feast that no one got to eat! The Fish Figaro Failed to Eat So as it goes, Pinocchio gets turned into a living puppet that’s…
Continue reading »