4

Moana – Kalua Pork, Coconut, Mahi-Mahi

Quick links: Kalua Pork | CoconutMahi-mahi | Verdict


It has all come down to this. Its so crazy that we’re all caught up on Disney movies now. Its been a great journey. But remember, this isn’t the end. We will still be doing posts from time to time, it just won’t be as frequent for a while. So be sure to check back every now and again for new stuff! 

Moana is such a great movie, even though I agree with the academy and am glad Zootopia won best picture. We had a party here and made tons of pork and fish for friends to celebrate. Make these foods at home for a real treat!


Foods Shown

  • Mango
  • banana
  • Pork
  • Coconut
  • Mahi Mahi


Moana’s Favorite Pork

When Moana fixes the roof, one of the villagers comes in with a bowl of pork.

I love Kalua pork so I was super excited to make this. I even went out and got legit Hawaiian sea salt for this dish. Believe me, it’s worth it. This is the most authentic I could get without digging a fire pit in the back of my apartment.

Moana Kalua Pork
Write a review
Print
Prep Time
15 min
Cook Time
18 hr
Total Time
18 hr 15 min
Prep Time
15 min
Cook Time
18 hr
Total Time
18 hr 15 min
Ingredients
  1. 6 -8 lbs pork butt (shoulder)
  2. 2 tbs + 1tsp Hawaiian sea salt
  3. 1 tbs + 1tsp liquid smoke
  4. 1 teaspoon pepper
Instructions
  1. Mix 2 tbs salt, 1 tbs liquid smoke and the pepper together
  2. Using a fork, make punctures all around the pork
  3. Rub the mixture all over the pork
  4. Over a hot pan, sear the outside of the pork
  5. Place the pork inside a slow cooker and cook for 16-18hrs
  6. Drain the juice, but reserve it. Then shred the pork.
DisneyMeals https://disneymeals.me/

Coconut

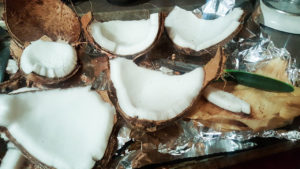
In the song “Where you Are,” it talks about how they use all the parts of the coconut. It shows them cooking coconut over a fire inside of coconut leaves. 

I tried the same thing, but in an oven. It is actually an easy way to open up a coconut too! 

Coconut
Write a review
Print
Total Time
30 min
Total Time
30 min
Ingredients
  1. 2 coconuts
  2. banana leafs (or corn husks)
Instructions
  1. Preheat oven to 400F
  2. Cover coconuts in Banana leafs
  3. Bake for 30 minutes until the coconuts crack
DisneyMeals https://disneymeals.me/


Mahi-mahi

We never see anyone actually eating fish in the movie, but we see a bunch of villagers come back with fish to cook.

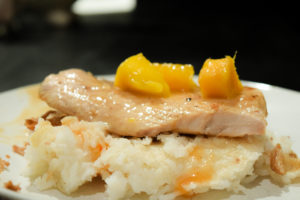
I assumed it was mahi-mahi, because those are common fish to the area. Here’s a recipe for some delicious islander mahi-mahi 

Mahi Mahi
Write a review
Print
Prep Time
30 min
Cook Time
15 min
Total Time
45 min
Prep Time
30 min
Cook Time
15 min
Total Time
45 min
Marinade
  1. 1 Small Red Chile, minced or tabasco sauce to taste
  2. 1 Tbsp Cilantro
  3. 2 tsp Lime Zest
  4. Reserved Juice of Grilled Fish
Sauce
  1. 14 1/2 ounces can Coconut Cream, unsweetened
  2. Sea Salt & Fresh Ground Pepper, to taste
  3. 3 Tbsp Chopped Fresh Cilantro, reserve 1 tbsp for sauce and remainder for garnish
  4. 2 Tbsp Minced Shallot, reserve 1 tbsp for sauce
  5. 2 Tbsp Olive Oil
  6. Juice of 1 Lime, reserve zest for sauce
  7. Sea Salt & Fresh Ground Black Pepper, to taste
  8. 1 lb Mahi Mahi, 4 oz per serving
Fish and Marinade
  1. Salt and pepper fish fillets on both sides. Place on a glass plate. Combine remaining marinade ingredients in a small bowl. Pour 1/2 of marinade over fish and distribute evenly. Turn and repeat. Cover and marinate for 30-40 minutes in the refrigerator. Grill 6 inches from flame for 3 minutes each side, or until it flakes with a fork. Remove from grill and keep warm. Reserve the juice from the fish for the sauce. To serve, make a puddle of sauce on each plate, top with grilled fish, then garnish with lime slices and cilantro.
Sauce
  1. Pour 1 cup coconut cream into a small sauce pan over medium heat. Bring to a low boil, lower heat to a simmer and reduce until slightly thickened. Add juice from fish, lime zest, cilantro, chile, salt and pepper. Simmer for 5-6 minutes. Taste and adjust seasoning.
DisneyMeals https://disneymeals.me/


You’re Welcome!

I’m not a huge fan of coconut meat plain, but other than that, the rest of the food was so good. I have tons of pork leftovers for the next few meals!

Verdict:

Kalua Pork – 9/10

Coconut – 5/10

Mahi-Mahi – 9/10


Thank You!

A big thank you to our Patrons (http://www.patreon.com/disneymeals)
DeAnna
Barbara
Aly (http://www.dreamstobecome.com)

5

12 Things I have Learned by Making All the Food In Disney Movies

I am postponing our Moana post until next week, so I can have time to do a proper “final” post. I put the word “final” in quotations for a reason that I’ll explain later.

These last two years have been crazy. There have been times where I wanted to throw in the towel, but I’m glad I kept on going. Looking back at this blog, I’m amazed at what was accomplished. I did a rough count of recipes and there were around 350. Thanks Walt for putting in so much food into your movies! haha. Its pretty crazy that next week, we’ll be all caught up. I won’t stop posting, but it won’t be as regular as I have been. I honestly need a little break!  

But don’t worry, I’ll definitely do posts after every Disney movie that comes out and I’ll start doing some random other animated movies here and there. I’m thinking of maybe doing some Ghibli films and maybe branching out and doing some live-action films like Harry Potter. I’m open to suggestions. So leave a comment, post on our FB page, tweet at us etc.

I never professed to be a professional chef, or anything close to it. But this blog really has really taught me a lot about cooking, and I definitely am a better cook than when I started. Here are some things I have learned along the way.

1.  Always add around 10 more minutes to a recipe’s total make time

I don’t know if I’m a slow chef or what, but my prep-times are always longer than what recipes . It is important to give yourself ample amount of time to cook, especially if you have company coming over or have a time-constraint. Always make time for the inevitable mishap.


2. Taste the food along the way

A painter will never focus 100% on her subject and never look at what she is painting until the very end. Likewise, when cooking, you shouldn’t throw everything in and hope for the best at the end. Granted, there are some recipes where it is hard to taste along the way, but many, especially stove-top dishes, you can taste as you put in ingredients to see how the flavor has changed. This will not only allow you to increase or decrease future ingredients, but it will give you a better understanding of how different substances affect the dish as a whole.


3. More spice isn’t necessarily always best

In the past, I would love to cook dishes and put in basil, paprika, parsley, salt, pepper, thyme, rosemary, lemon, mint, etc all at once. It definitely gave the food flavor, but I have found that many times, less spice is more. For instance, the best ribs I have ever made (the Christmas Ribs from Frozen) were only spiced with salt and pepper. No bbq sauce, no all-spice, just salt and pepper. Also, if you are cooking for people, it is smart to under-spice your food just a bit. Some people prefer less, some prefer more and you can always add table-salt.


4. Mix order and mix time is actually important while baking

It all gets mixed into the same goop, so why not just throw in all the ingredients at once? Well, in baking, order makes a difference. If you throw everything in at once, specific flavors don’t get mixed well, and consistency will change. Also, be sure to understand how long you should mix certain things. For example, when baking cookies, if you don’t over-beat the eggs (only beat for ~15 seconds), the cookies will turn out fluffier.


5. Even Rats can Make Fancy Food

There seems to be a misconception in society that restaurant food is better than home-cooked food. But just as Gusteau always says “Anyone Can Cook”, and fancy food isn’t too hard lots of the time. It all comes down to the ingredients used. Sometimes, it may be hard to get quality ingredients, but if you’re wanting to make a gourmet meal for someone special, it is worth it. Making fancy meals usually aren’t too much harder than following a recipe for any other meal. But make sure you take care when following the recipe.


6. Get a mandolin slicer
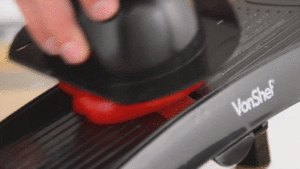
I can’t believe I never had one before a couple years ago. They are really cheap (I think I got mine for under $20) and they are so convenient for chopping veggies. With a mandolin slicer, you’re able to get equally sized veggies which is great because they cook more evenly. This is especially important if you want to make ratatouille. The days are gone when I would take a bite of food and have one zucchini be super mushy and another one be too thick and raw. Other important kitchen items would be: a kitchenaid mixer, a nice sharp knife, and a cast-iron pan


7. Smell is important

I have always had a horrible sense of smell. However, my sense of smell has been fine-tuned while I’m cooking. I am able to sense when food is done or on the verge of burning and even when different flavors are needed. Some may have this knack natively, but it may take some developing for others like me. It is important to use all your senses while cooking. The more senses you pay attention to while cooking, the better your food will turn out. Next time you’re having a good meal, examine what makes it good with all your senses. Is it golden brown? Does the crust make a nice crackling sound? Does it have a pleasant aroma? What about the texture makes it pleasing? How do the flavors play together in your mouth?


8. Presentation is hard, but important
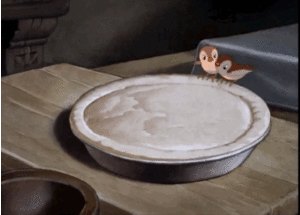
This is definitely the biggest weakness I have. I am terrible at making food, especially baked food, looked good. I am constantly having to get my wife to decorate cakes for me and making dishes look good. While to a blind person, a ugly cake and a pretty cake may taste the same, to everyone else, seeing a badly presented dish creates a bias. Even when I am cooking for myself, if it looks bad, it never tastes as good. Conversely, if it looks amazing, it always tastes better than it should.


9.  Dishes suck

Ugh, this has been the bane of my last two years. It is an unavoidable downfall of cooking though, that is, unless you hire a cleaning guy or have an army of well-trained children that will jump at the opportunity to wash a dish.  It is the worst after making a huge meal, to see the piles of dishes in the sink and dreading what has to come next. Some may say that it is best to just suck it up and do the dishes right after dinner. I’m the opposite. I like to give myself a respite before jumping in. The bad part about my way, is that sometimes the dishes get put off for days  at a time.


10. Cooking is tiring

Going along with my last point, cooking is physically and mentally draining. There have been times where I have cooked for hours straight. At the end, my feet hurt, I’m sweating and have to fight staying awake when I finally sit down. It sure makes for a great presentation when I have guests over right after. I have gained a huge respect for those that make cooking their living. It is a tiring job, but a well-rewarding job.


11. There are so many different types of food out there

One of the greatest things this blog has done for me is opened my eyes to the wonderful world of food. There are so many different types of dishes out there. Many of which I have never heard of, but tasted amazing. There were times where I would be watching a Disney movie and have had no idea what the food shown was. I would do some research and find out that it was a old dish, native to the area of the movie. I would make it and be exposed to flavors I had never experienced before. I suggest that you stop the slow-cooker meat and potatoes, the spaghetti and tacos for a bit and branch out. Try to make some food from times and locations you have never thought of. It will expand your taste-buds and maybe even bring in some new regulars to your weekly meals.


12. Passion makes perfect

Above all, the best thing I have learned is that when I am passionate about making a dish good, it usually turns out good. There have been many times where I’ve been tired and kind of phoned-in a meal. When I’ve been apathetic like that, the meals have never turned out great. However, when I am truly excited to make a new dish, I put in the care and attention that is needed to make it great.


Overall, I have loved my experience of food-blogging. It has been very eye-opening and has increased my skill of cooking tenfold. If you have the opportunity to challenge yourself, whether it be make a new recipe a week or even incorporate a new spice into your cooking, I recommend you take it. 

Thank you to all of our followers who have supported us on this journey. We hope to continue baking with you as the years go on!

0

Finding Dory – Fish Bites

Quick links: Fish Bites | Verdict


I finally got to see Finding Dory. I sadly didn’t get to see it in theaters. Luckily, it was released on Netflix right before doing this post. I thought it was a good sequel, but not better than the first. Sadly, it didn’t show much food at all. 
Its kinda crazy that this is the second to last post before we’re all caught up. Sorry it isn’t a huge post, and Moana won’t be huge either, but it will at least be fun.
Also, if you have enjoyed this blog, be sure to check out our patreon! www.patreon.com/disneymeals


Foods Shown


Fish Bites

These were consumed by Hank when he and Dory were waiting in the stroller for the signal.

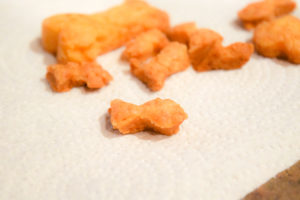
They are one of our favorite type of cracker and they were really fun to make. I did accidentally overcook them a bit and didn’t have a fish-shaped cutter, but other than that, they were great.

Fish Bites
Yields 7
Write a review
Print
Prep Time
20 min
Cook Time
15 min
Total Time
35 min
Prep Time
20 min
Cook Time
15 min
Total Time
35 min
Ingredients
  1. 8 ounces, Shredded Sharp Cheddar Cheese
  2. 4 Tablespoons Butter, Cut Into Cubes
  3. 1 cup Flour
  4. ¾ teaspoons Salt
  5. 2 Tablespoons Water
  6. Recommended: A small fish-shaped cookie cutter
Instructions
  1. Pulse everything (except water) together in the food processor until the dough resembles coarse sand.
  2. Pulse in water, 1 tablespoon at a time.
  3. Remove dough from the processor, wrap in plastic, and chill for 20 minutes.
  4. Roll out the dough and cut fish shapes. You can use a toothpick to make the eyes and smile if desired.
  5. Place on a parchment paper lined cookie sheet.
  6. Bake at 350 degrees F for about 12-15 minutes, or until crispy.
DisneyMeals https://disneymeals.me/


Will it Help You Find Your Family?

I was amazed of how similar the Fish Bites tasted to Gold Fish crackers. They were delicious and pretty easy to make.

Verdict:

Fish Bites – 8/10


Thank You!

A big thank you to our Patrons (http://www.patreon.com/disneymeals)
DeAnna
Barbara
Aly (http://www.dreamstobecome.com)

1

Zootopia – Carrots on a Stick, Juice Bar, Jumbo Pop, and Italian Wedding Cake

Quick links: Carrot on a Stick | Juice Bar Juices | Jumbo Pop | Italian Wedding Cake | Verdict   Wow, we’re almost done. This is the third to last Disney movie that we’re going to be doing before we’re caught up. Zootopia is such an amazing movie that touches on so many great and important issues. It also is set in…
Continue reading »

0

Good Dinosaur – Dinosaur Corn

Quick links: Dino Corn | Verdict


Good Dinosaur is by far the most disappointing Disney/Pixar movie for me. I LOVE dinosaurs and have since I was little. When I heard that they were making a movie starring dinosaurs, and answering the question “What if the meteor never hit,” my mind raced with all the awesome possibilities this movie could contain.  And then the movie came out…and it was a sloppy, generic boy and “dog” movie with dinosaurs for some reason. The fact that they were dinosaurs didn’t really even show in the movie. They could have been gorillas and the movie would have been the same. 

That all said, it wasn’t a HORRIBLE movie, but I’d actually say its on par with Home on the Range.


Foods Shown


Cowboy Dinosaur Corn

So, they don’t actually show the dinosaurs eat their harvest.

But here’s a Good Dinosaur inspired recipe. Cowboy Dinosaur Corn

Cowboy Dinosaur Corn
Write a review
Print
Prep Time
10 min
Cook Time
20 min
Total Time
30 min
Prep Time
10 min
Cook Time
20 min
Total Time
30 min
Ingredients
  1. 4 slices of bacon
  2. 3 tablespoons of unsalted butter
  3. 16 oz Corn
  4. 1/2 c flour
  5. 1 egg
  6. Up to 1/2 cup of whole milk
  7. Fresh cracked black pepper, to taste
  8. Kosher salt to taste
  9. 1/4 tsp chili powder
  10. Fresh herbs, such as parsley, to garnish, optional
Instructions
  1. Cook the bacon in a large skillet.
  2. Remove the bacon, but leave the drippings
  3. Crumble the bacon and set aside.
  4. Mix the eggs, flour, salt, pepper and milk
  5. Mix in the corn until well mixed
  6. Melt the butter in the drippings
  7. Drop in the battered corn and fry until golden brown, flip to fry the other side
  8. Break up the golden corn inside the skillet (it usually will just stick together)
  9. Add the bacon and cook for a bit longer on a lower heat before serving.
DisneyMeals https://disneymeals.me/


Will it Make the Movie Better?

The corn was pretty good. Nothing amazing, but a good side.

Verdict:

Dino Corn – 6.8/10


Thank You!

A big thank you to our Patrons (http://www.patreon.com/disneymeals)
DeAnna
Barbara
Aly (http://www.dreamstobecome.com)

0

Inside Out – Imagination Land Cupcakes, Gluten-free pizza with Broccoli, Broccoli and beef, Blue slushie

Quick links: Imagination Land Cupcakes | Gluten-Free San Fran PizzaBroccoli and Beef | Blue Slushie | Verdict


I love love love Inside Out. It is probably the Disney/Pixar movie with the heaviest themes. It has so many layers. It has some fun foods in it, like broccoli pizza!


Foods Shown


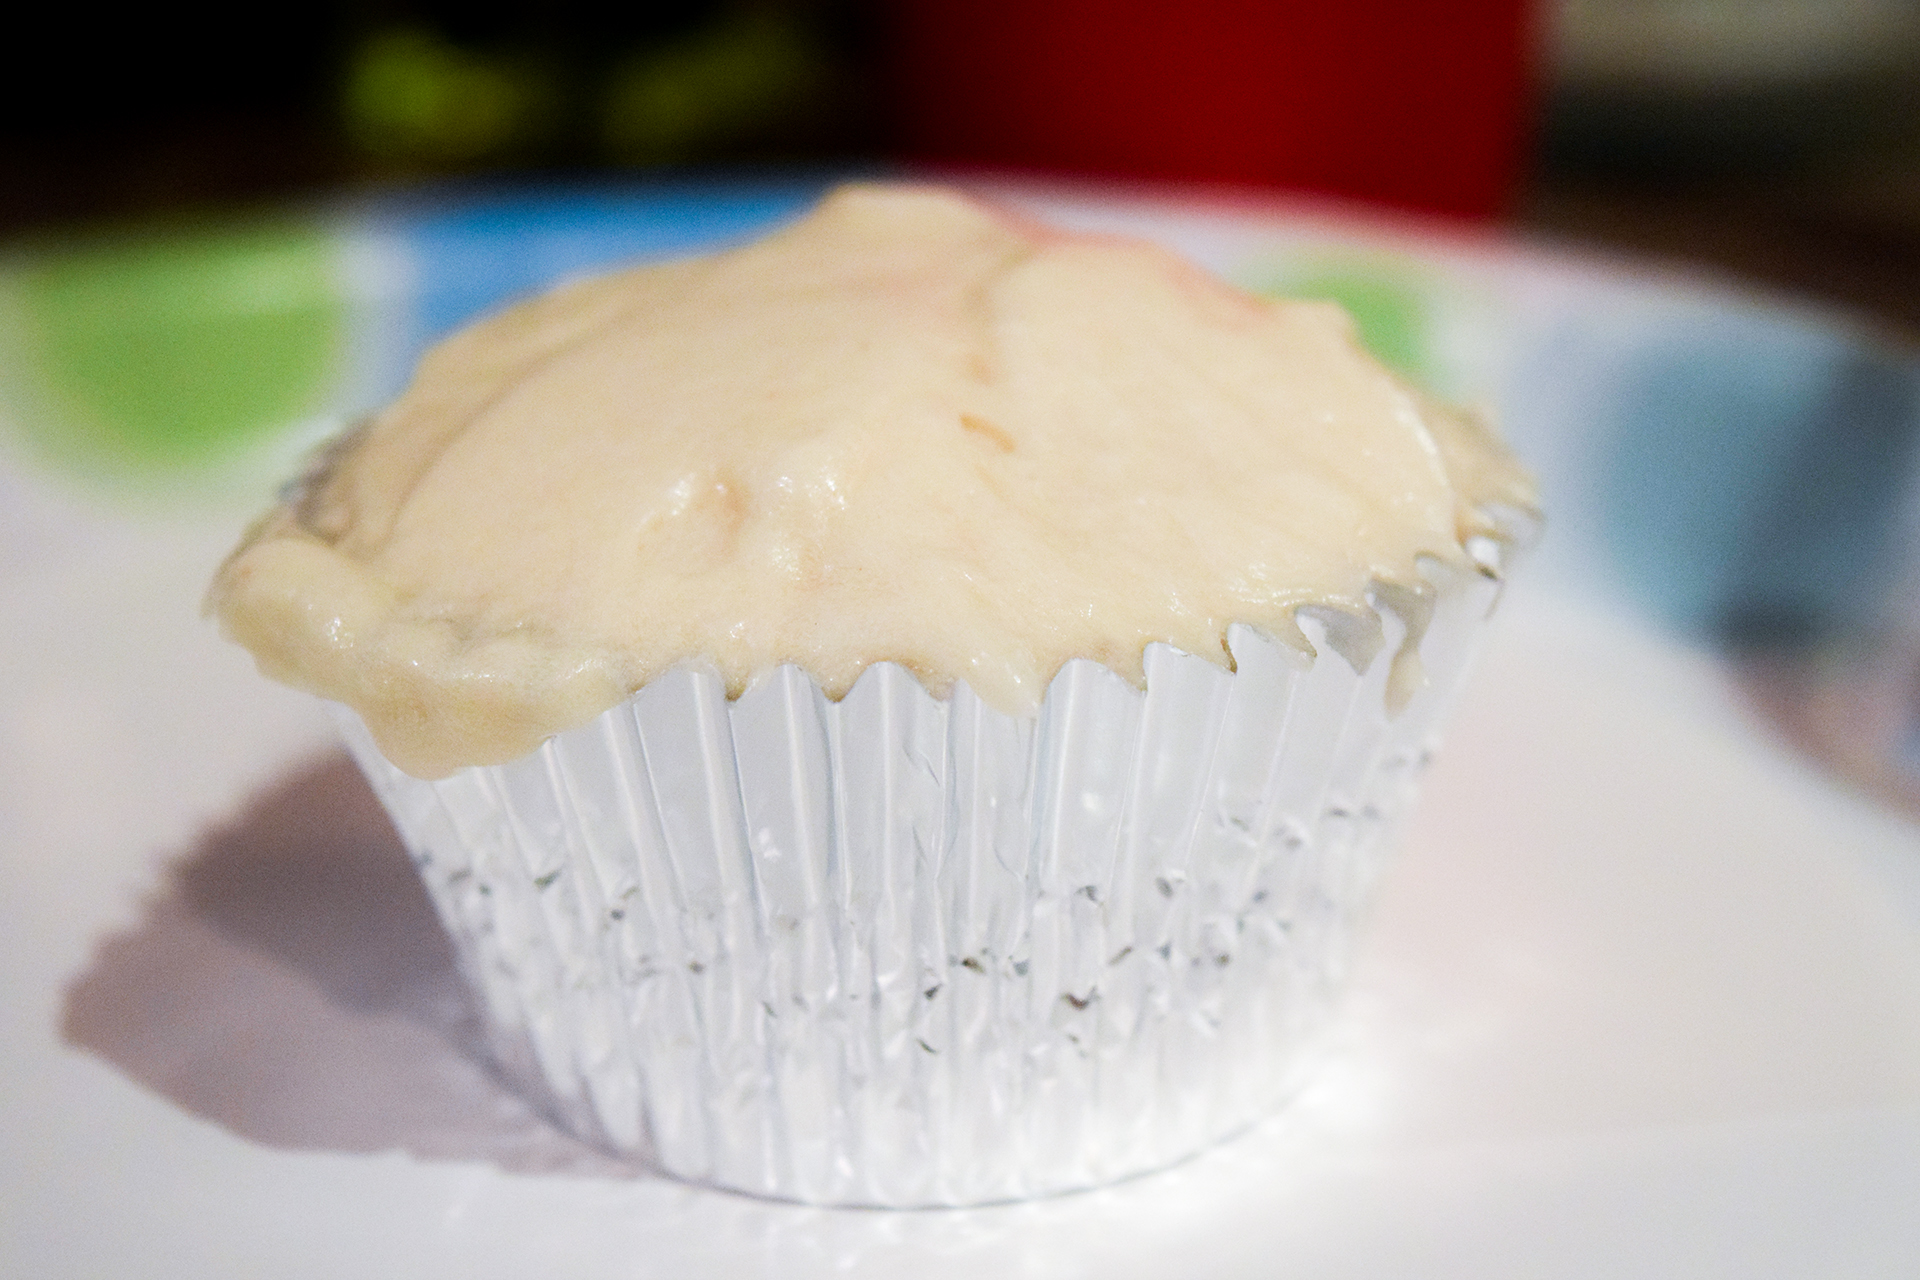
Imagination Land Cupcakes

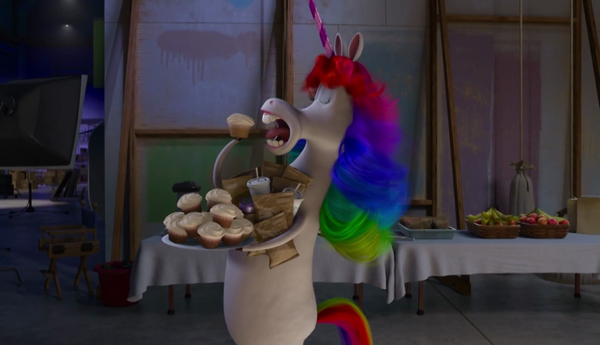
In the butchered dream sequence, the dream is failing and the camera pans around to see the Unicorn eating cupcakes.

Ok, we’ve done cake and cupcakes a lot. Normally we would have just linked to another recipe, but we had some friends come over for a baking night and we had to make some yummy treats, so my wife found this great recipe with some really good frosting.

Imagination Land Cupcakes
Write a review
Print
Prep Time
15 min
Cook Time
30 min
Total Time
45 min
Prep Time
15 min
Cook Time
30 min
Total Time
45 min
Cupcakes
  1. 1 1/4 cups (296 ml.) vegetable oil
  2. 1 3/4 cups (373 g.) white granulated sugar
  3. 4 eggs
  4. 1 Tablespoon pure vanilla extract
  5. 1 1/2 tsp. pure almond extract
  6. 2 1/4 cups (340 g.) all purpose flour
  7. 1/2 cup (68 g.) cornstarch
  8. 1 Tablespoon baking powder
  9. 1 tsp. salt
  10. 1 1/2 cups (366 g.) full fat sour cream OR full fat yogurt or full fat Greek yogurt
Frosting
  1. 1 1/2 cups (322 g.) white granulated sugar
  2. 3/4 cups (113 g.) all purpose flour
  3. 1/4 tsp. salt
  4. 2 1/4 cups (532 ml.) whole milk
  5. 1 1/2 cups (3 sticks) (339 g.) unsalted butter at room temperature
  6. 1 to 1 1/2 Tablespoons pure vanilla extract (depending on your taste) or 1 Tablespoon vanilla and 1/2 tsp almond extract
Instructions
  1. Preheat oven to 350 degrees Fahrenheit, 180 degrees Celsius, Gas Mark 4. Put oven rack on the bottom third of the oven. In my oven I bake these in the second rack from the bottom. (I found that with this recipe when the cupcakes were baked in the upper racks they got too brown for my liking.)
  2. Start by making the base for the frosting. (It needs to cool down before using, this part of the frosting could also be made a day or 2 ahead.) In a large saucepan on medium heat, whisk together the sugar, flour and salt, and slowly add the milk. Cook, whisking frequently, really almost constantly so it doesn't scorch, until it comes to a boil. Once it starts boiling, turn down the heat to medium low, and cook for 3-4 minutes, whisking constantly, this is to cook the flour taste out. Mixture will be very thick. Remove from heat and add 1 tablespoon vanilla extract. Transfer this mixture to another bowl and let cool in the fridge.
  3. Start making the cupcakes.
  4. Line muffin tins with cupcake liners (greaseproof are best) and set aside.
  5. In a large bowl with a hand mixer, or in the bowl of a stand mixer, add the oil and the sugar. Beat them together for 2 minutes or so, so they are mixed well and the sugar has dissolved somewhat. Add the eggs and both extracts and beat again for another 2 or 3 minutes, until the mixture is smooth and creamy looking.
  6. In another medium bowl, whisk together the flour, cornstarch, baking powder and salt. Add the dry ingredients to the egg mixture and beat on medium low speed just until it's incorporated, don't over beat. Scrape down the sides of the bowl with a rubber spatula. Add the sour cream and beat on medium low speed just until the sour cream is mixed in well. Scrape down the sides of the bowl again and beat again just for about 20 seconds to make sure it's all mixed well.
  7. With a spoon or a scoop, fill the cupcake liners slightly over half full. Bake in the preheated oven for 18-22 minutes, until a toothpick inserted into the center comes out clean. (Start checking after 17 minutes.)
  8. Cool on a wire rack. When they have cooled enough to handle, remove from muffin tins and let cool on racks. Let cool completely before frosting cupcakes.
  9. While cupcakes are baking finish making the frosting. Make sure the base in the fridge is completely cool. If it's warm at all, it's going to melt the butter. If it's very cold in the fridge it may very firm. Don't worry, it's fine.
  10. In a stand mixer or in a large bowl with a hand mixer, beat the butter for 2 minutes, scrape down the sides of the bowl and beat again for another minute or so, until it's nice and light and fluffy. With the mixer going on medium - medium high, gradually add the cooled frosting base, about a "scoop" (a large spoonful) at a time. After each scoop, let it mix until it's fully incorporated. Keep adding and letting it mix together until it's all been used. Scrape down the sides of the bowl and beat for another few minutes until it's super light and fluffy. Taste it and see if you think it needs a little more vanilla extract, or you can add another extract or flavoring at this time.
  11. Frost cupcakes. Refrigerate any leftover frosting. If you aren't serving these right away, keep them refrigerated but let them come to room temperature before serving. If you have refrigerated the frosting, you'll need to beat it again before using. The good thing about this frosting is that it doesn't totally harden in the fridge like a typical buttercream does, (since butter solidifies when cold.)
DisneyMeals https://disneymeals.me/

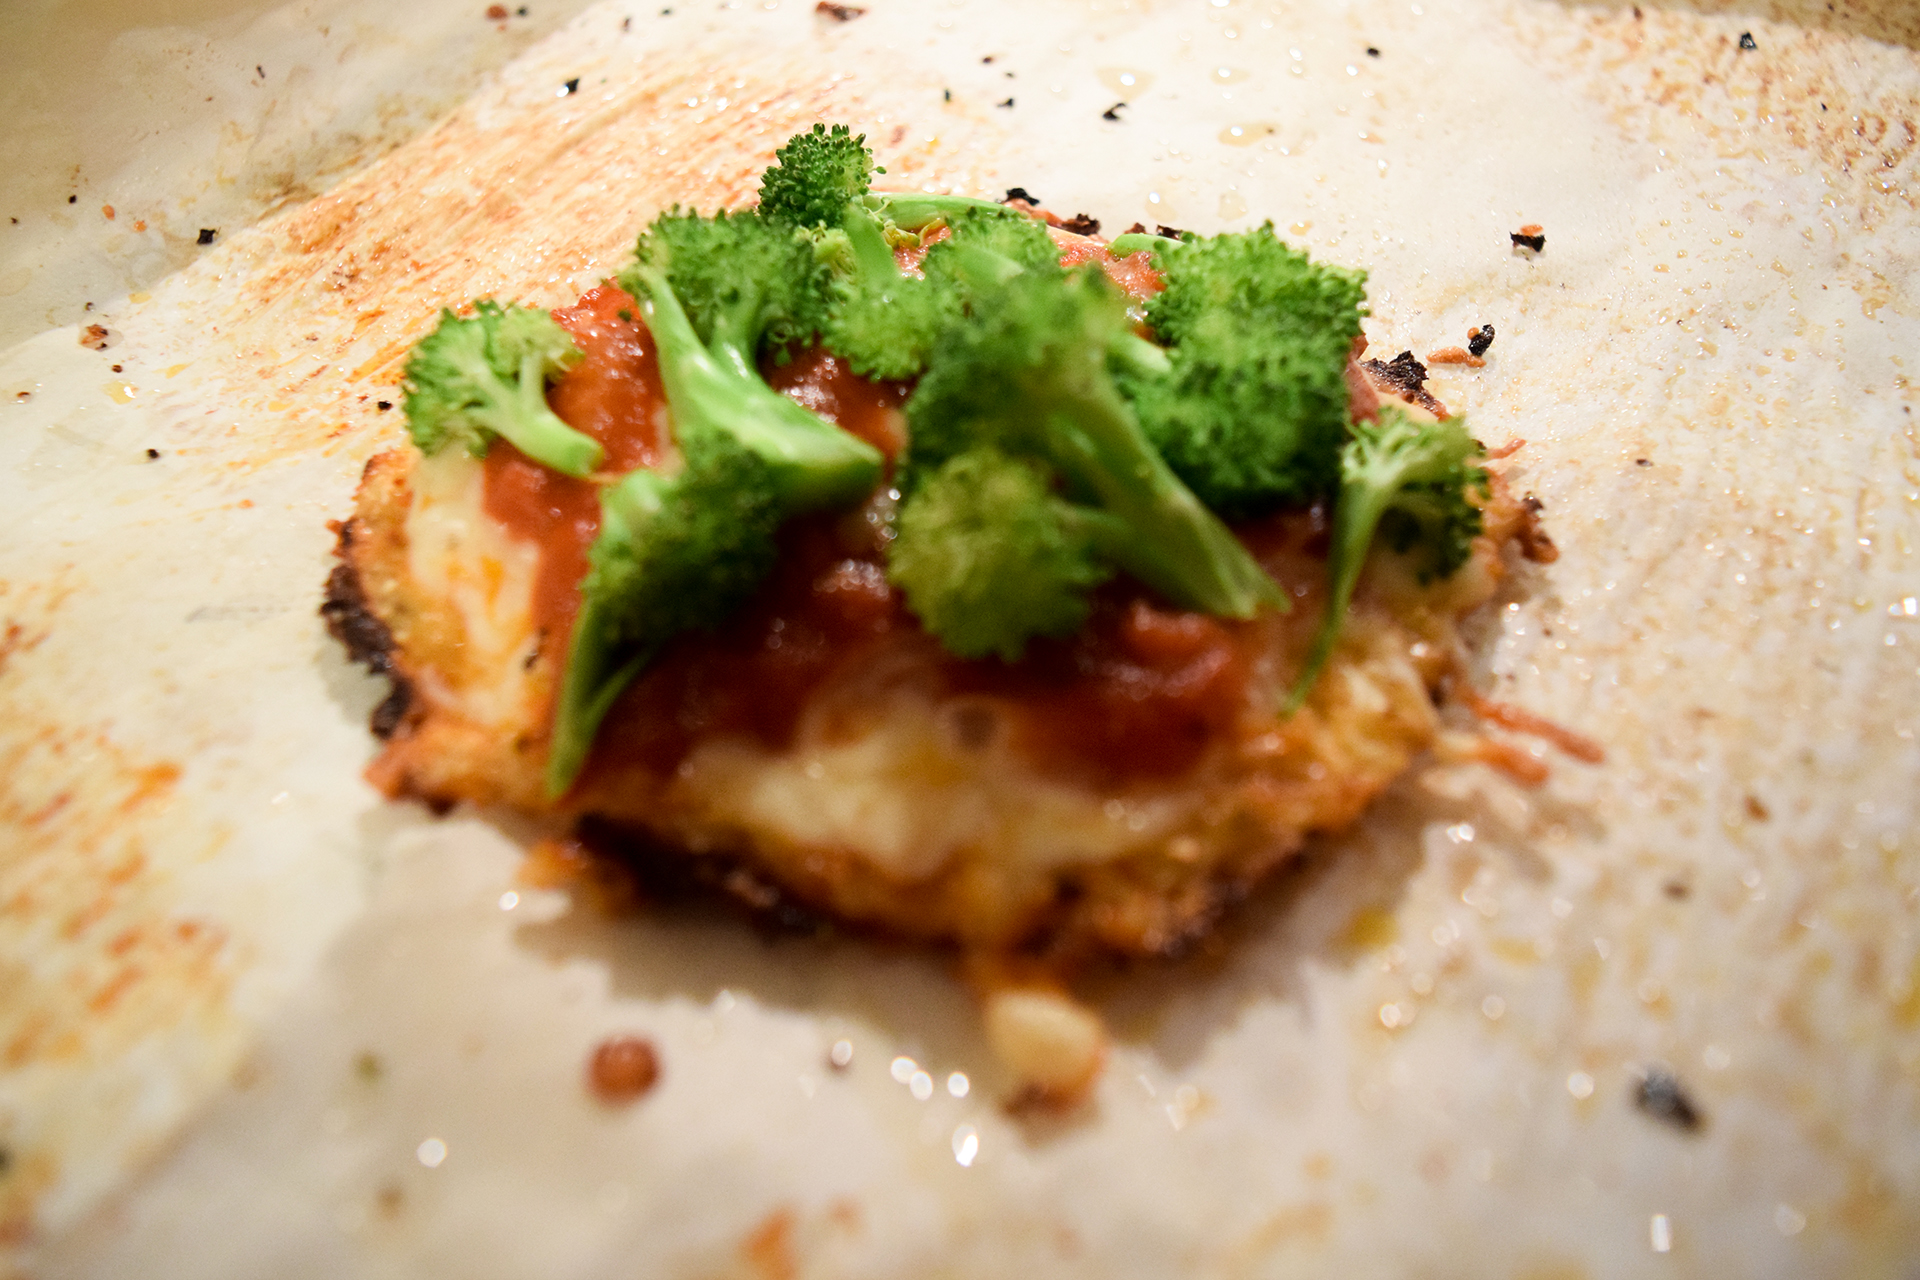
Gluten-free Broccoli Pizza

Congratulations San Francisco, you’ve ruined pizza. 

We’ve made pizza before, but since this is San Francisco, we had to make a gluten-free option. It actually turned out really well.

San Francisco Broccoli Pizza
Write a review
Print
Prep Time
15 min
Cook Time
20 min
Total Time
35 min
Prep Time
15 min
Cook Time
20 min
Total Time
35 min
Ingredients
  1. 1 small head cauliflower, chopped (5 to 6 cups)
  2. 1 cup grated Parmesan
  3. 1/2 teaspoon dried Italian seasoning
  4. 1 clove garlic, minced
  5. 1/2 teaspoon kosher salt
  6. Freshly ground black pepper
  7. 1 egg
  8. 1 1/2 cups shredded low-moisture mozzarella
  9. 1/2 cup marinara sauce
  10. Broccoli to top
Instructions
  1. Place a pizza stone or rimless baking sheet in the oven; preheat to 475 degrees F.
  2. Add the cauliflower to a food processor; pulse until finely ground, about the consistency of couscous. Pour the cauliflower onto a clean kitchen towel (I like flour sack towels for this) and squeeze out as much liquid as possible.
  3. To a large bowl, add the cauliflower, Parmesan, Italian seasoning, garlic, salt, some black pepper and the egg. Mix until the mixture holds together when pinched.
  4. Line a pizza peel or a second rimless baking sheet with parchment paper; liberally brush with olive oil. Spread the cauliflower mixture into a 12-inch-wide circle on the parchment. Slide the parchment onto the preheated pizza stone or baking sheet. Bake until the cauliflower crust is barely golden and darker at the edges, about 15 minutes.
  5. Remove the crust from the oven, sprinkle with the mozzarella and spread the marinara sauce over the top (this keeps the crust dry), then add broccoli on top. Slide the pizza back onto the pizza stone or baking sheet and bake until bubbly and browned in spots, about 4 minutes.
DisneyMeals https://disneymeals.me/

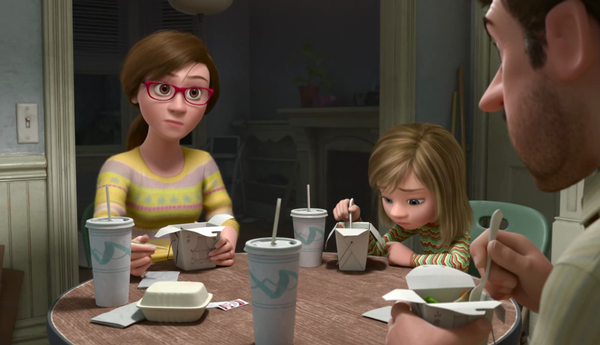
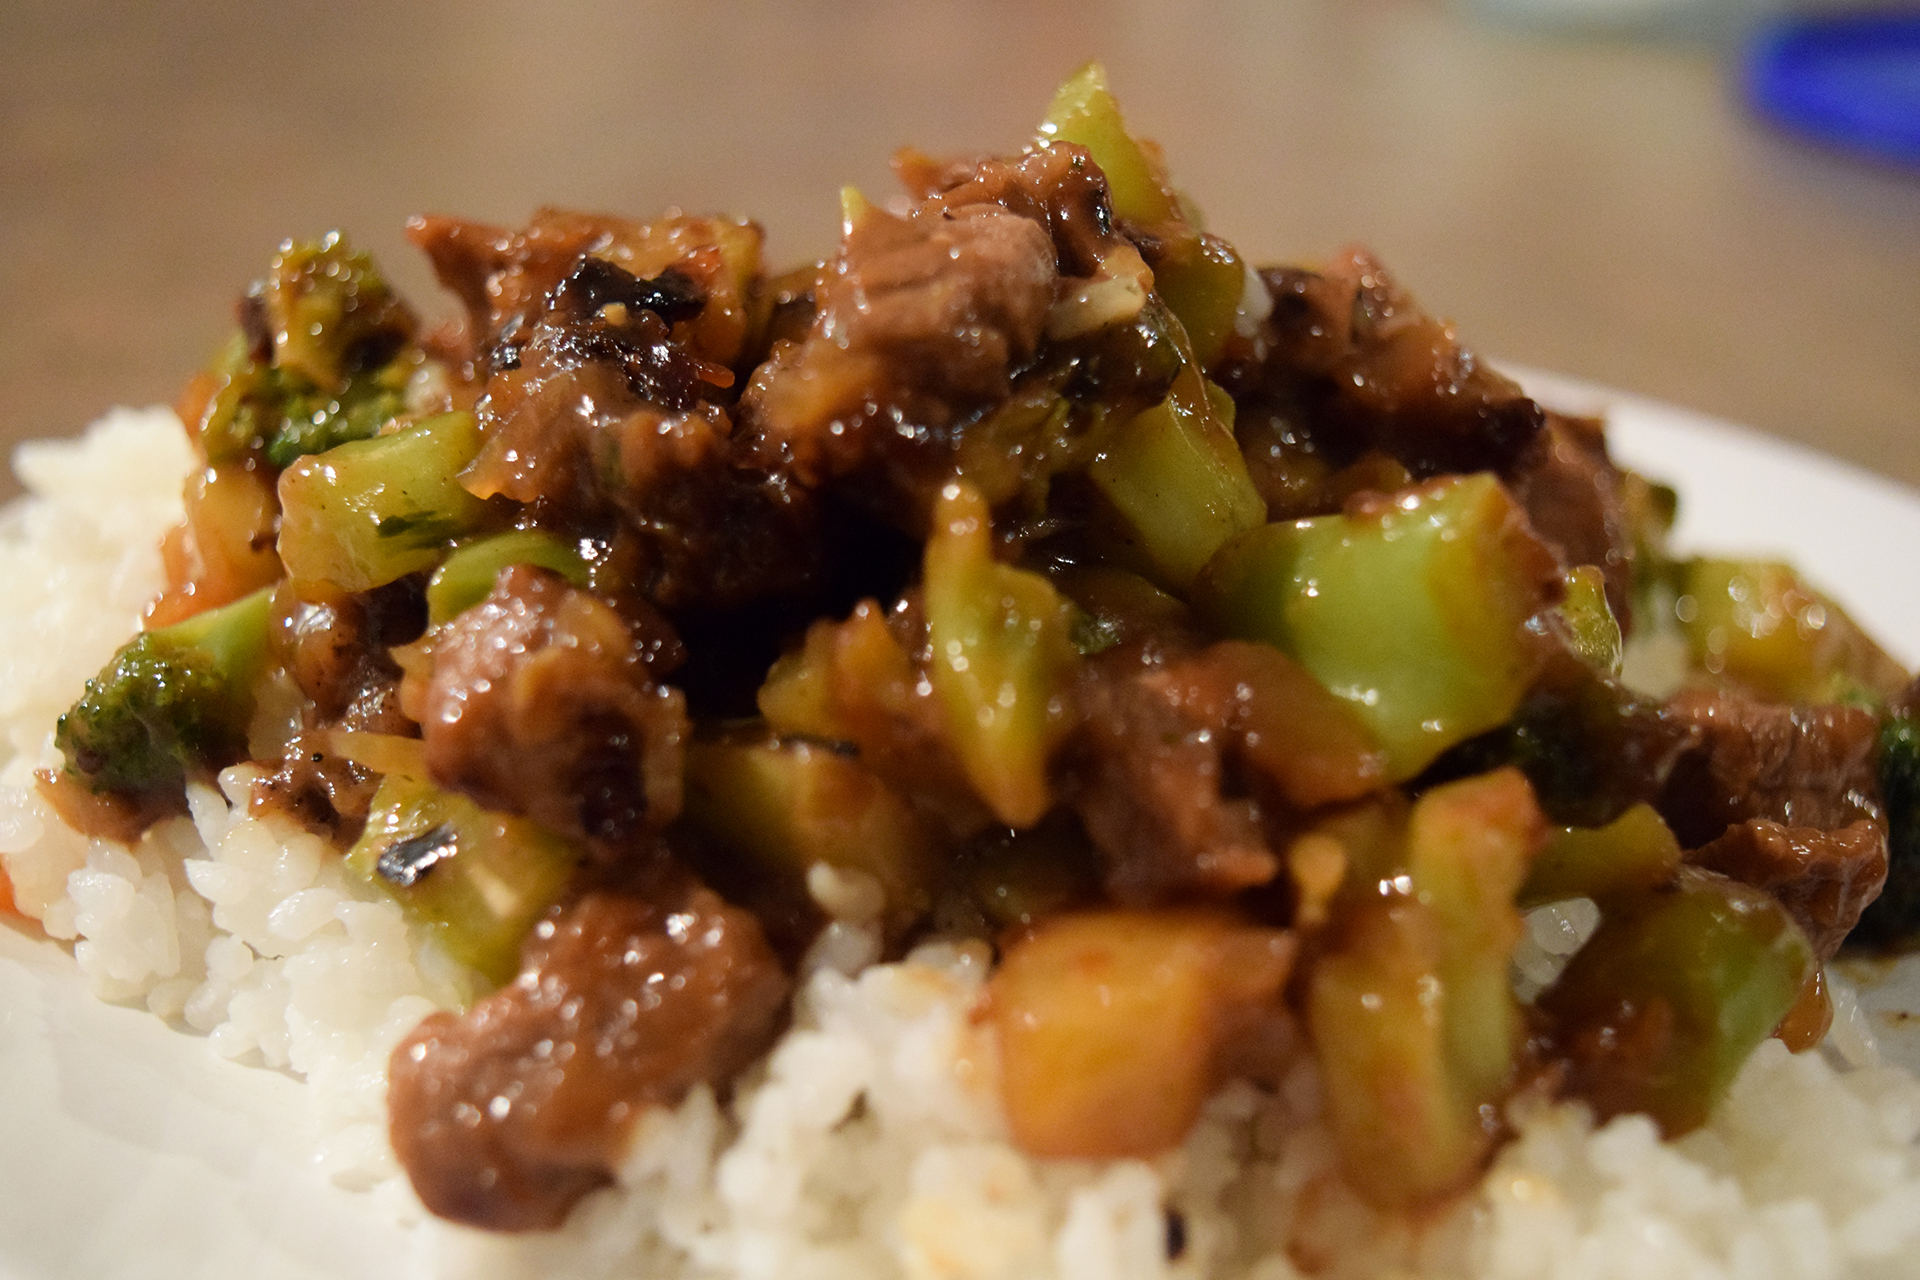
Broccoli and Beef

The family gets Chinese take out. It is hard to see what exactly they’re eating, but there are some greens you can see. 

Broccoli is a theme of the movie, so why couldn’t it be beef and broccoli? 

Broccoli and Beef
Write a review
Print
Prep Time
15 min
Cook Time
10 min
Total Time
25 min
Prep Time
15 min
Cook Time
10 min
Total Time
25 min
Ingredients
  1. 3 tablespoons cornstarch, divided
  2. 1⁄2 cup water, plus
  3. 2 tablespoons water, divided
  4. 1⁄2 teaspoon minced garlic
  5. 1⁄2 teaspoon oyster sauce
  6. 1 lb boneless round steak or 1 lb charcoal chuck steak, cut into thin 3-inch strips
  7. 2 tablespoons vegetable oil, divided
  8. 4 cups broccoli florets
  9. 1 small onion, cut into wedges
  10. 1⁄3 cup reduced sodium soy sauce
  11. 2 tablespoons brown sugar
  12. 1 teaspoon ground ginger
Instructions
  1. In a bowl, combine 2 tablespoons cornstarch, oyster sauce, 2 tablespoons water and garlic until smooth.
  2. Add beef and toss.
  3. In a large skillet or wok over medium high heat, stir-fry beef in 1 tablespoon oil until beef is done; remove and keep warm.
  4. Stir-fry broccoli and onion in remaining oil for 4-5 minutes.
  5. Return beef to pan.
  6. Combine soy sauce, brown sugar, ginger and remaining cornstarch and water until smooth; add to the pan.
  7. Cook and stir for 2 minutes.
  8. Serve over rice.
DisneyMeals https://disneymeals.me/

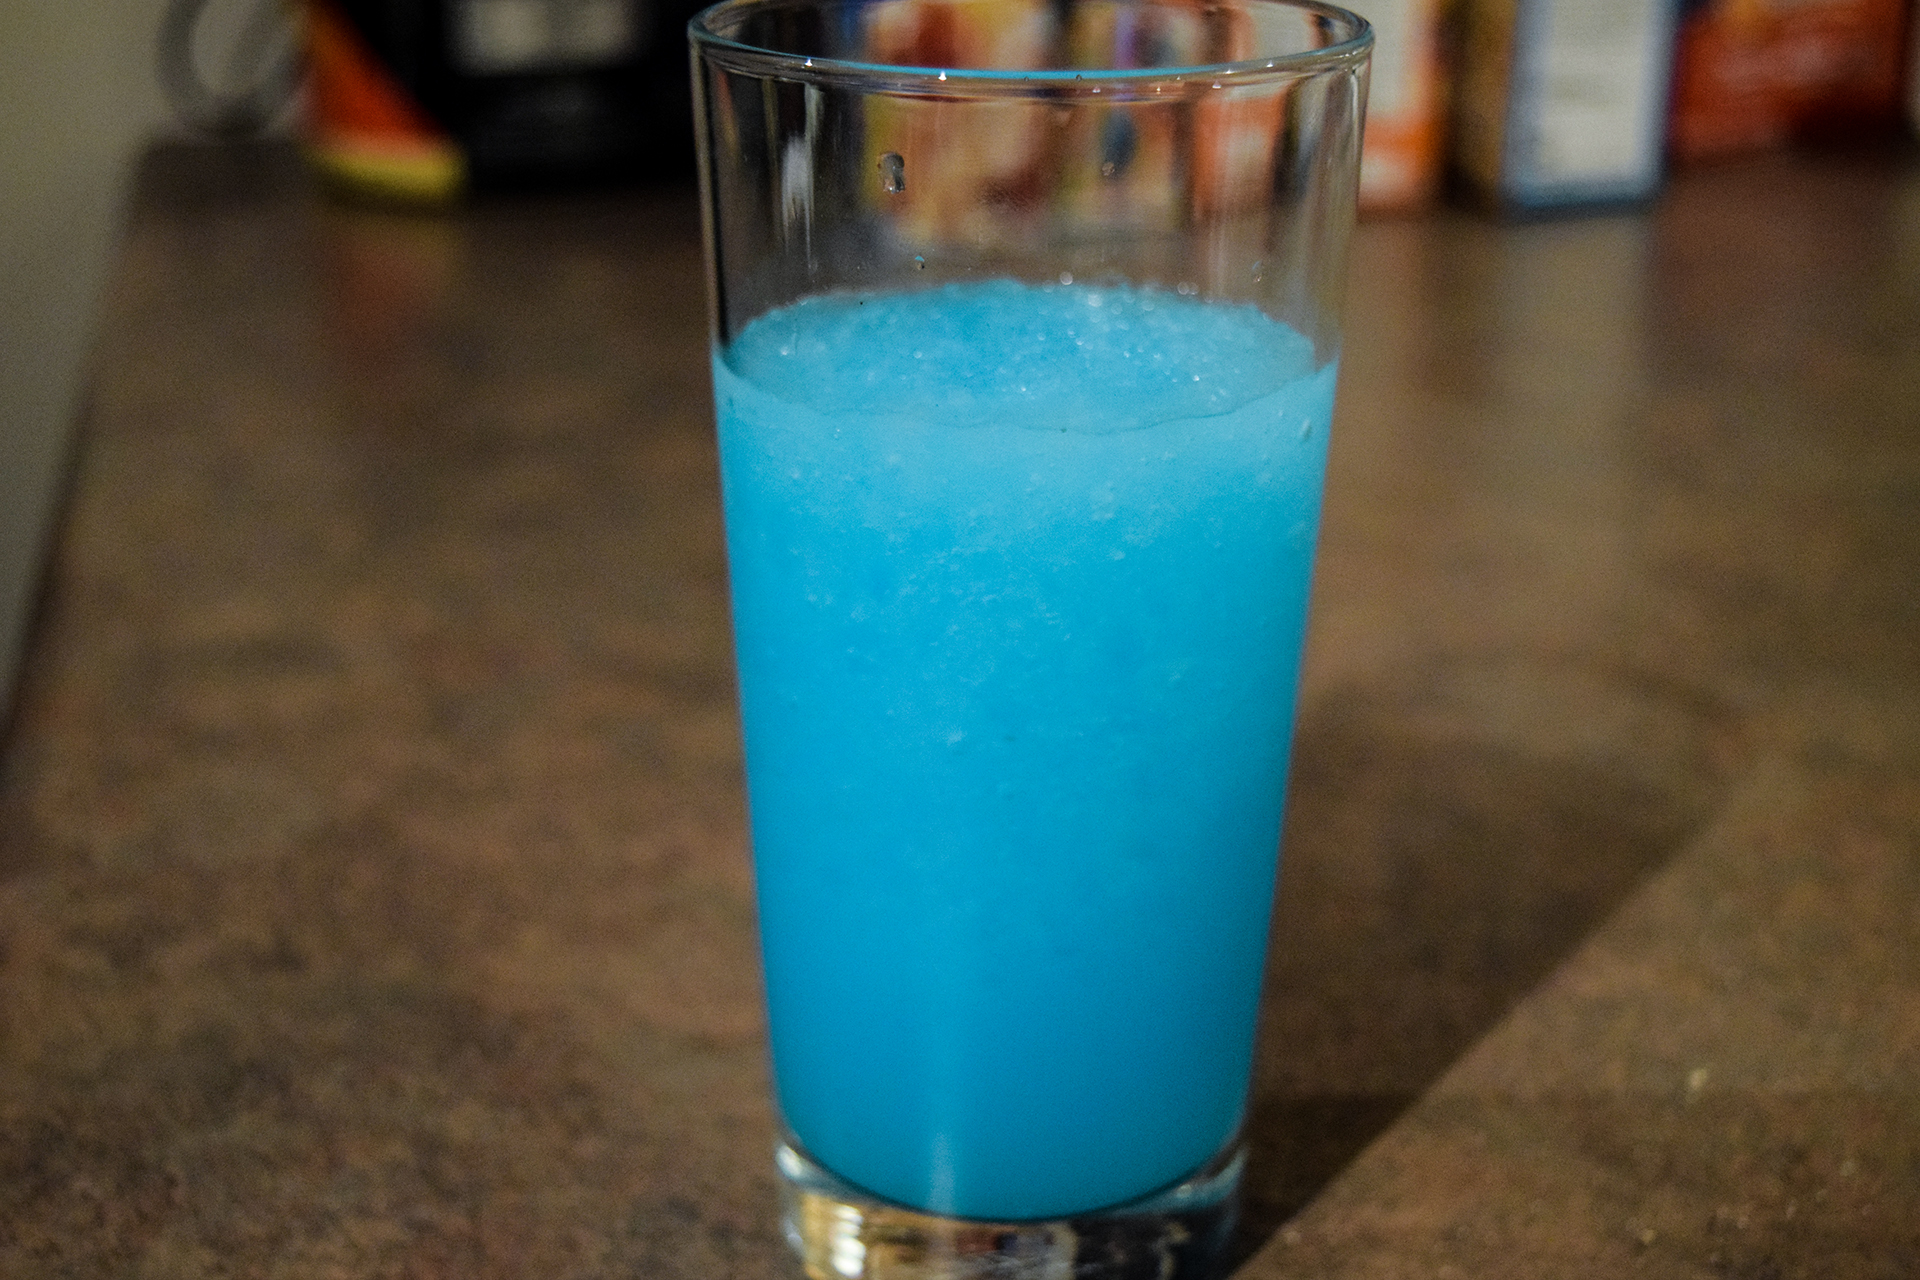
Blue Sushie

BRAIN FREEZE!

Here’s a recipe for a blue slushie to give you your own brain freeze.

Brain Freeze Slushie
Write a review
Print
Prep Time
5 min
Total Time
5 min
Prep Time
5 min
Total Time
5 min
Ingredients
  1. 1 packet blue Kool-aid drink mix
  2. 1/2 cup Sugar
  3. 2 cups Ice water
  4. 4 cups Or 1 full tray of ice cubes
Instructions
  1. Blend all together
  2. Use more ice or less water for a thicker slushie
DisneyMeals https://disneymeals.me/


Will it make you Joyful? Sad? Angry? Disgusted? Fearful?

You should definitely eat your broccoli. I didn’t have high hopes for the broccoli pizza, but it wasn’t bad. I don’t think San Francisco ruined it THAT much.

Verdict:

Imagination Cupcakes – 9/10

Gluten-free Pizza – 8/10

Broccoli and Beef – 8/10

Blue Slushie – 7.5/10


Thank You!

A big thank you to our Patrons (http://www.patreon.com/disneymeals)
DeAnna
Barbara
Aly (http://www.dreamstobecome.com)

0

Big Hero 6 – Ramen, Muffins, Hot Wings, Nigiri

Quick links: Ramen | MuffinsHot Wings | Nigiri | Verdict


When I first saw Big Hero 6, I came out of it and said, “If I were 10 years old, that movie would be my favorite movie of all time times infinity.” I absolutely love Big Hero 6. Watching it again made me love it even more. It has to be in my top 10 favorite Disney movies of all time. One of my favorite things about it is the setting, San Fransokyo.  I was excited to make some yummy Japanese foods. I was going to make some mochi, but I couldn’t get Azuki beans in time. I might make a special one-off post just for that though.


Foods Shown

  • Bread bowl with fruitloops
  • Crab bento
  • Ramen with eggs (credits)
  • Croissant
  • Nigiri
  • Gummy bears and other vending machine
  • Soda
  • Japanese mineral water
  • Hot Wings and rice
  • Fruits
  • Veggies
  • Breads
  • Blueberry muffin
  • banana
  • Steak and veggies
  • Tea
  • Thinly sliced apple
  • Donuts

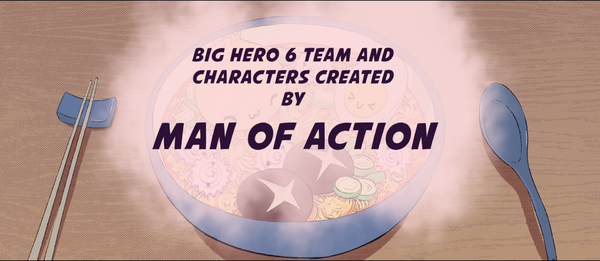
Ramen with Happy Egg

This is shown in the credits.

I have always wanted to make Ramen that wasn’t instant. Sadly, I didn’t do too well. I had to substitute some ingredients, and I must have not done well. Here’s the recipe in its unsubstituted form. Try it, see if you like it better.

Ramen
Serves 4
Write a review
Print
Prep Time
10 min
Cook Time
20 min
Total Time
30 min
Prep Time
10 min
Cook Time
20 min
Total Time
30 min
Ingredients
  1. 4 eggs
  2. 10 oz (285 g) ramen noodles
  3. 1/2 cup (200 g) fresh or canned bamboo shoots, sliced
  4. 1/2 cup (170 g) fresh or canned corn kernels, drained
  5. 1/3 cup (80 g) defrosted frozen or fresh spinach
  6. 8 cups (2 liters) pork or vegetable broth
  7. 2 teaspoons instant dashi granules
  8. 1 tablespoon soy sauce, or to taste
  9. 4 tablespoons fresh miso paste
  10. 1 cup (100 g) fresh bean sprouts
  11. 1 stalk green onion (scallions), finely chopped
  12. 4 teaspoons chili oil (optional)
Instructions
  1. Place the whole, un-cracked eggs in a medium pot and fill with water to cover eggs by 1 inch (2.5 cm).
  2. Turn the heat to high and when boiling, turn the heat off and let the eggs sit in the hot water for 10 minutes.
  3. Promptly use a slotted spoon to remove the eggs and peel the egg under cold running water. Slice each egg in half.
  4. Return the same pot of water to a boil.
  5. Add the ramen noodles and cook according to package instructions (most ramen noodles only take 3 minutes to cook.) Drain and rinse with cold water to stop the cooking.
  6. Divide the noodles, hardboiled eggs, bamboo shoots, corn and spinach among 4 large serving bowls.
  7. In a large pot, add the stock, instant dashi and soy sauce.
  8. Bring to a boil over high heat.
  9. Remove from the heat and stir in the miso.
  10. Taste the soup and add an additional 1 to 2 tablespoons of miso if you’d like.
  11. Ladle soup into each bowl.
  12. Top each bowl with fresh bean sprouts, green onions and a drizzle of chili oil, if desired.
DisneyMeals https://disneymeals.me/

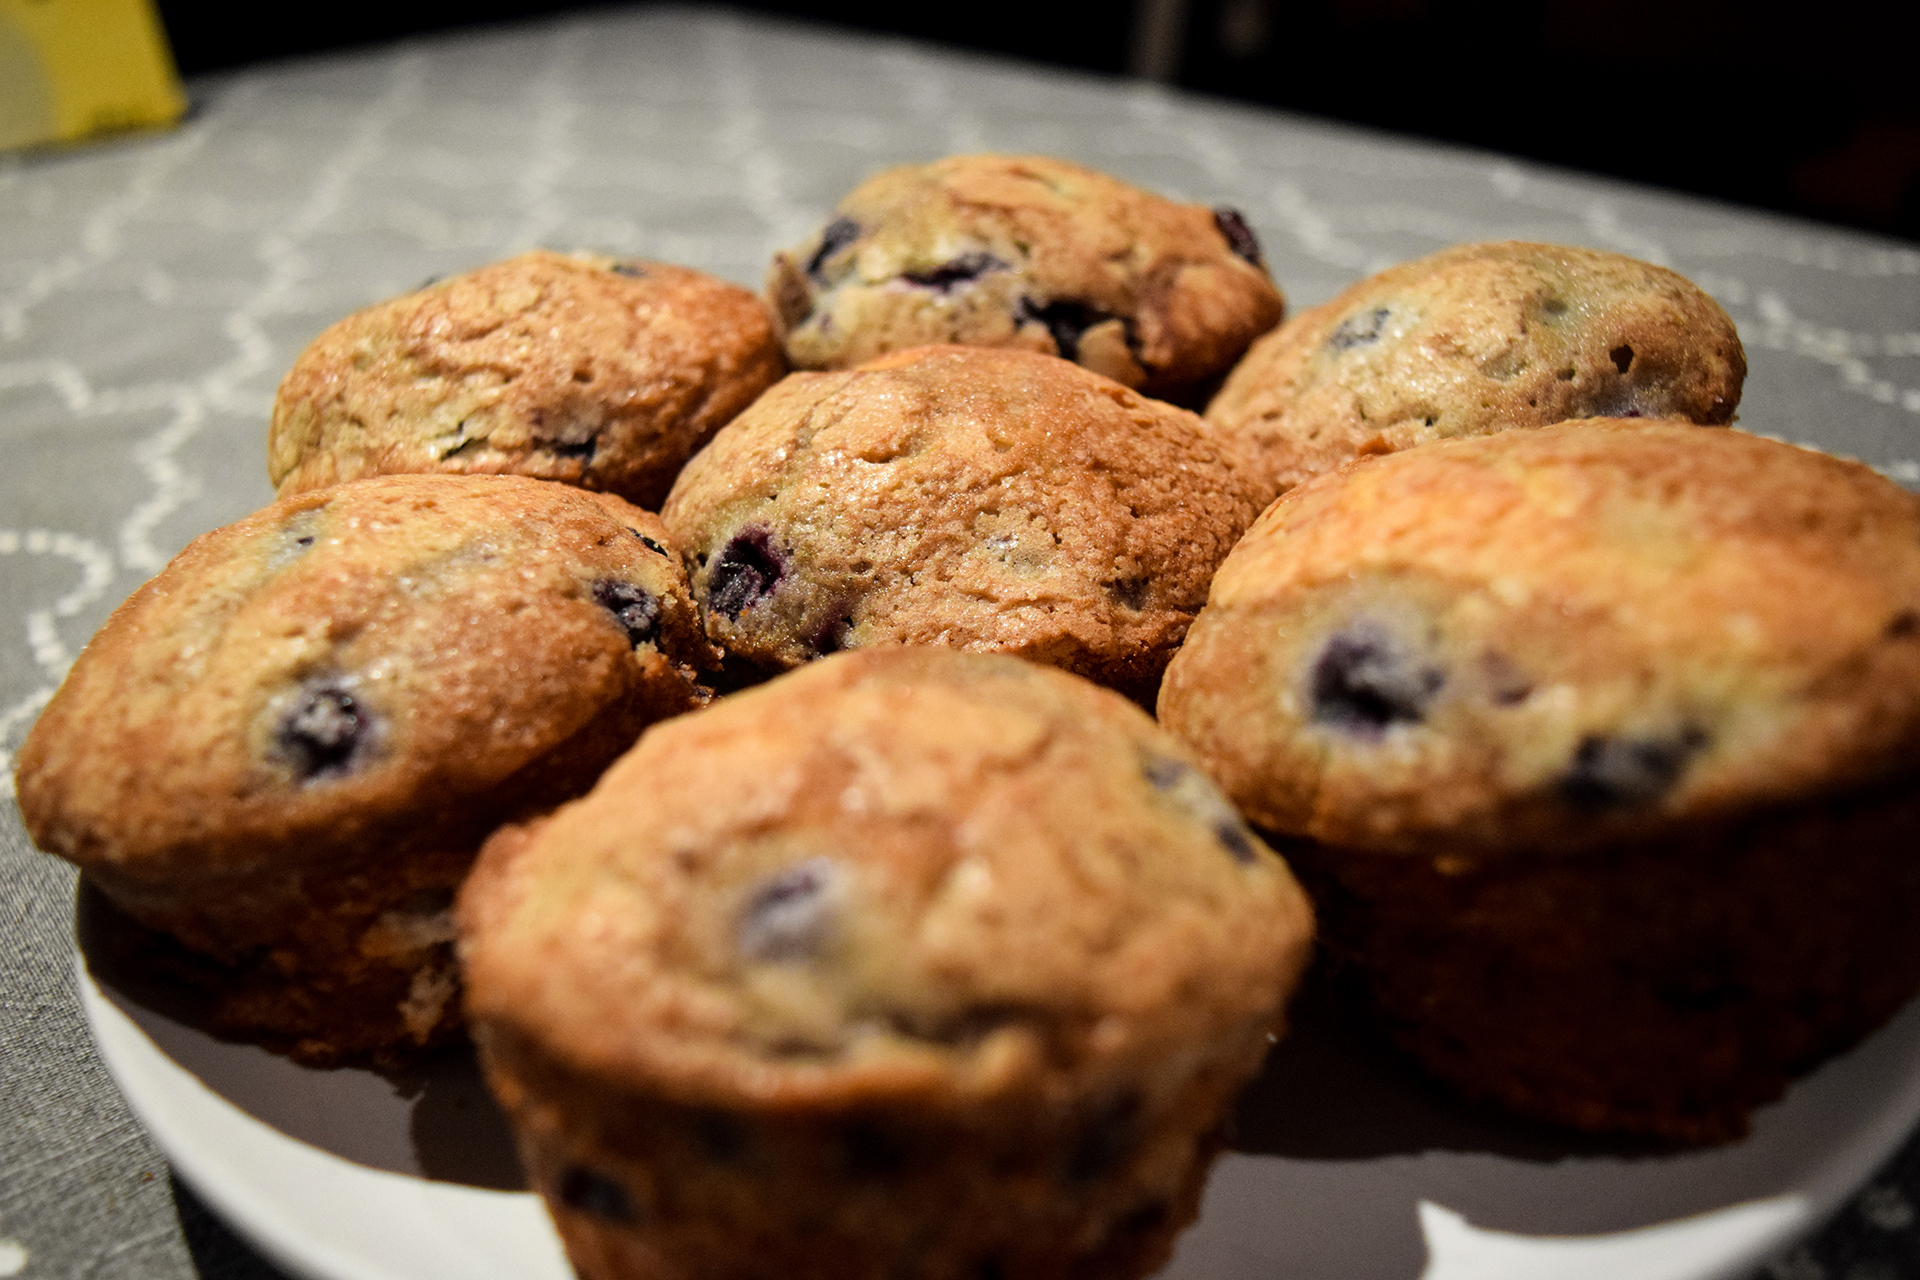
Cass’s Blueberry Muffins

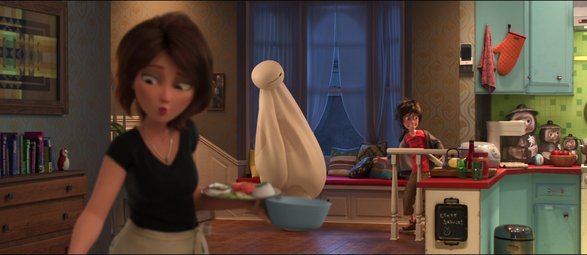
After Tadashi dies, Cass comes in to give a grieving Hiro some breakfast. She owns a cafe, so she brought him a yummy blueberry muffin with fruit.

This blueberry muffin recipe is really good.

Cass's Blueberry Muffins
Yields 12
Write a review
Print
Prep Time
10 min
Cook Time
30 min
Total Time
40 min
Prep Time
10 min
Cook Time
30 min
Total Time
40 min
Ingredients
  1. ½ cup softened butter
  2. 1 ¼ cups sugar
  3. 2 eggs
  4. 1 teaspoon vanilla extract
  5. 2 cups flour
  6. ½ teaspoon salt
  7. 2 teaspoons baking powder
  8. 1 tbs orange juice
  9. ½ cup milk
  10. 2 cups blueberries, washed, drained and picked over
  11. 3 teaspoons sugar
Instructions
  1. Preheat the oven to 375.
  2. Cream the butter and 1 1/4 cups sugar until light.
  3. Add the eggs, one at a time, beating well after each addition. Add vanilla.
  4. Sift together the flour, salt and baking powder, and add to the creamed mixture alternately with the milk.
  5. Add orange juice
  6. Crush 1/2 cup blueberries with a fork, and mix into the batter. Fold in the remaining whole berries.
  7. Line a 12 cup standard muffin tin with cupcake liners, and fill with batter. Sprinkle the 3 teaspoons sugar over the tops of the muffins, and bake at 375 degrees for about 30-35 minutes.
  8. Remove muffins from tin and cool at least 30 minutes.
DisneyMeals https://disneymeals.me/

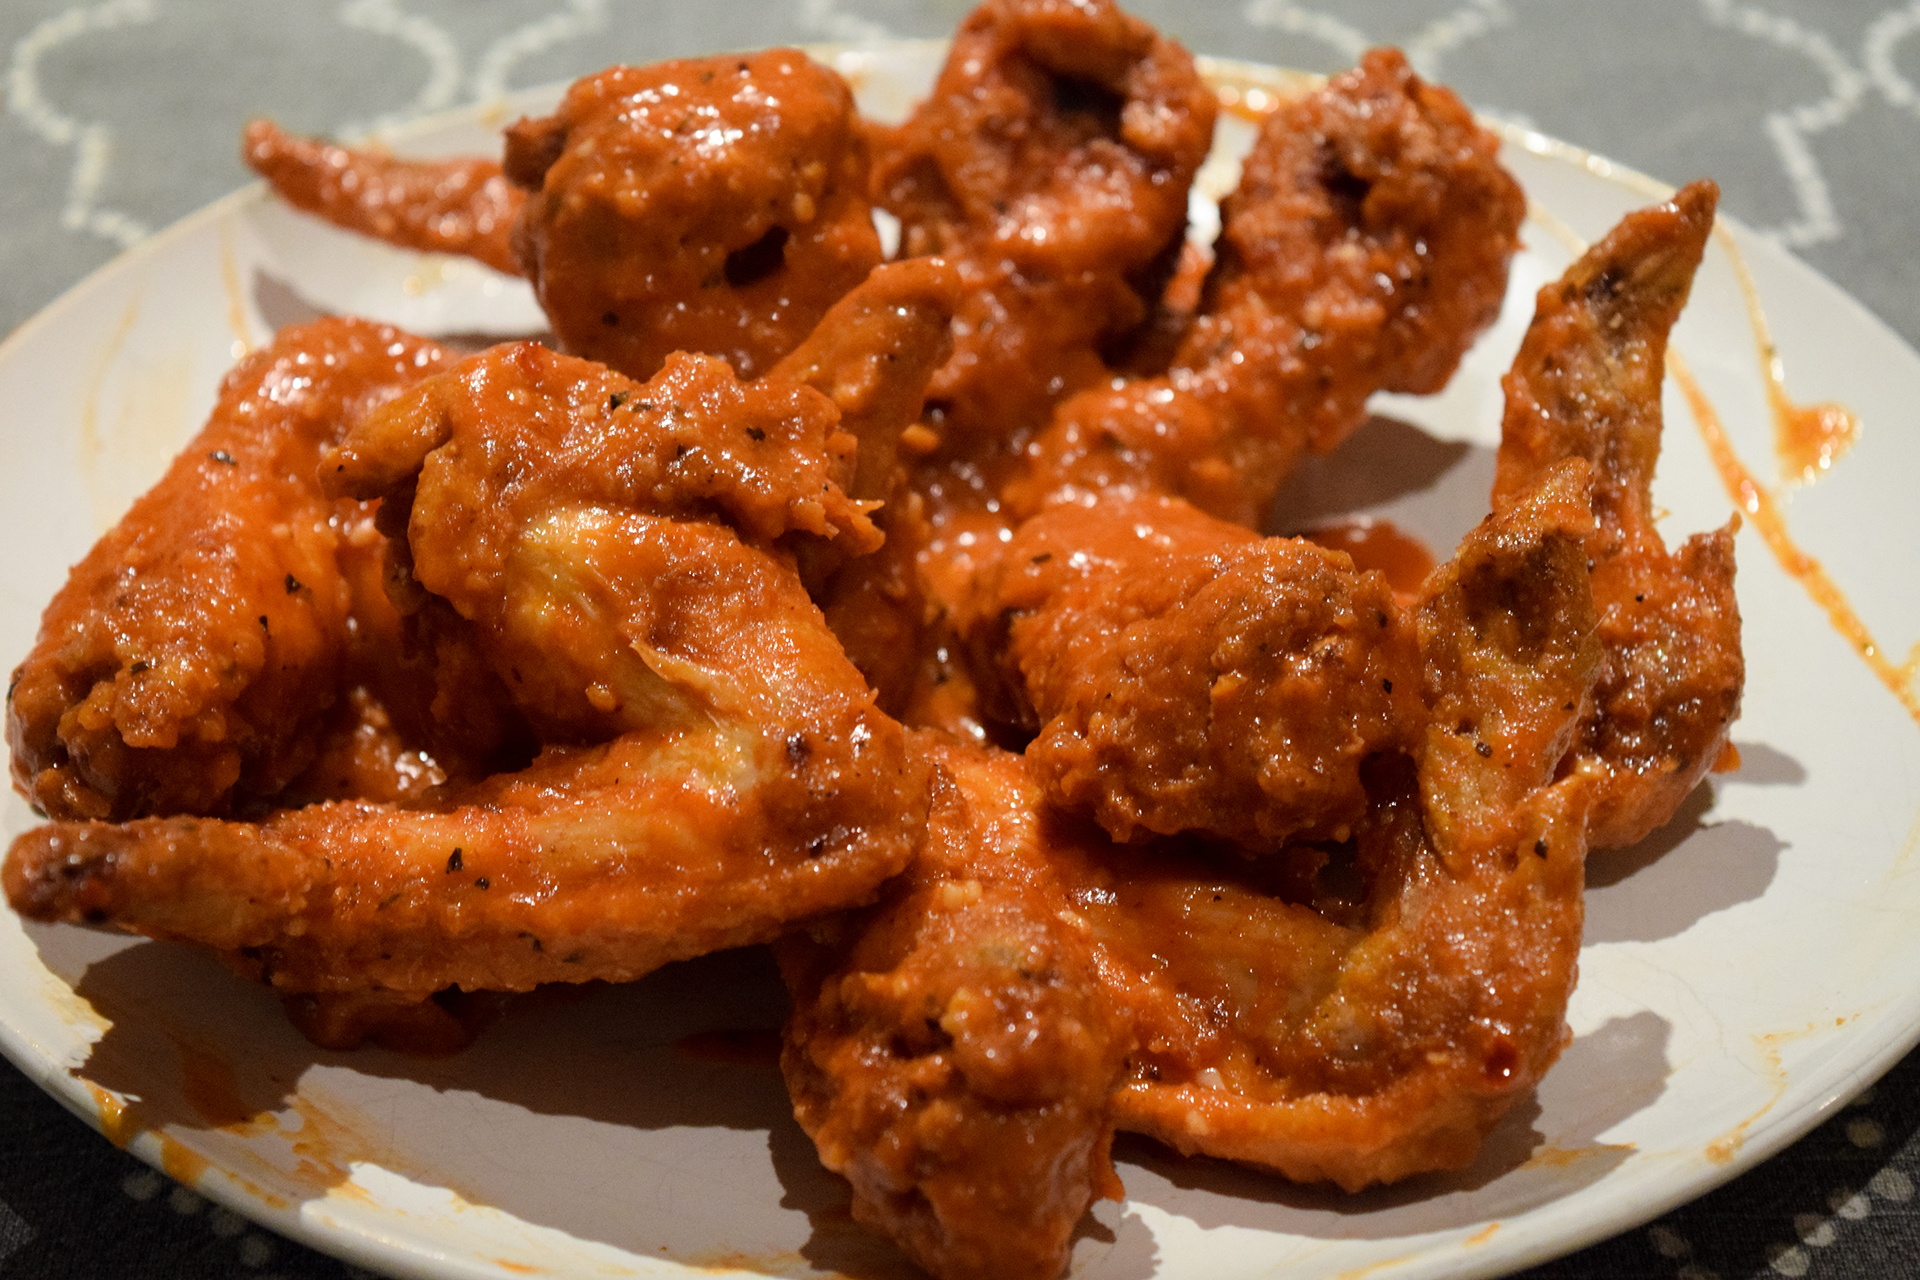
Hot Wings That’ll Melt Your Face Off

After Hiro and Baymax first encounter the masked man, they come back and Cass is making Hiro hot wings, that she promises he’ll feel in the morning.

The following hot wing recipe is spicy, but not super spicy. You can adjust to your own taste based on what kind of hot sauce you use.


Hot Wings
Write a review
Print
Prep Time
1 hr
Cook Time
40 min
Total Time
1 hr 40 min
Prep Time
1 hr
Cook Time
40 min
Total Time
1 hr 40 min
Ingredients
  1. 20 whole chicken wings, washed well and patted dry
  2. 1 cup all-purpose flour
  3. 1 teaspoon salt
  4. 1 teaspoon freshly ground pepper
  5. 1 teaspoon cayenne pepper
Sauce
  1. 1 cup hot sauce
  2. 1 cup (2 sticks) melted butter, at room temperature
  3. 1 teaspoon freshly squeezed lemon juice
  4. 1 tsp honey
  5. 2 teaspoons dried basil leaves
  6. Blue Cheese sauce for dipping
Instructions
  1. Place chicken wings into a large, zip-top plastic bag or large brown paper bag.
  2. In a small bowl, combine the flour, salt, pepper, and cayenne.
  3. Add the seasoned flour to the plastic bag and toss to coat well.
  4. Pour the chicken pieces and excess flour onto a baking sheet and spread evenly.
  5. Allow the chicken to sit on the floured baking sheet to dry out for about 1 hour.
  6. Preheat fryer or a large stockpot filled halfway with vegetable oil to 350 degrees F.
  7. Add chicken to hot oil and fry until cooked through and crispy, about 10 to 13 minutes.
  8. Mix all the ingredients of the sauce together
  9. Place the wings in a large bowl and drizzle with half of the sauce.
  10. Toss to coat well. Serve hot with the remaining sauce and blue cheese.
DisneyMeals https://disneymeals.me/

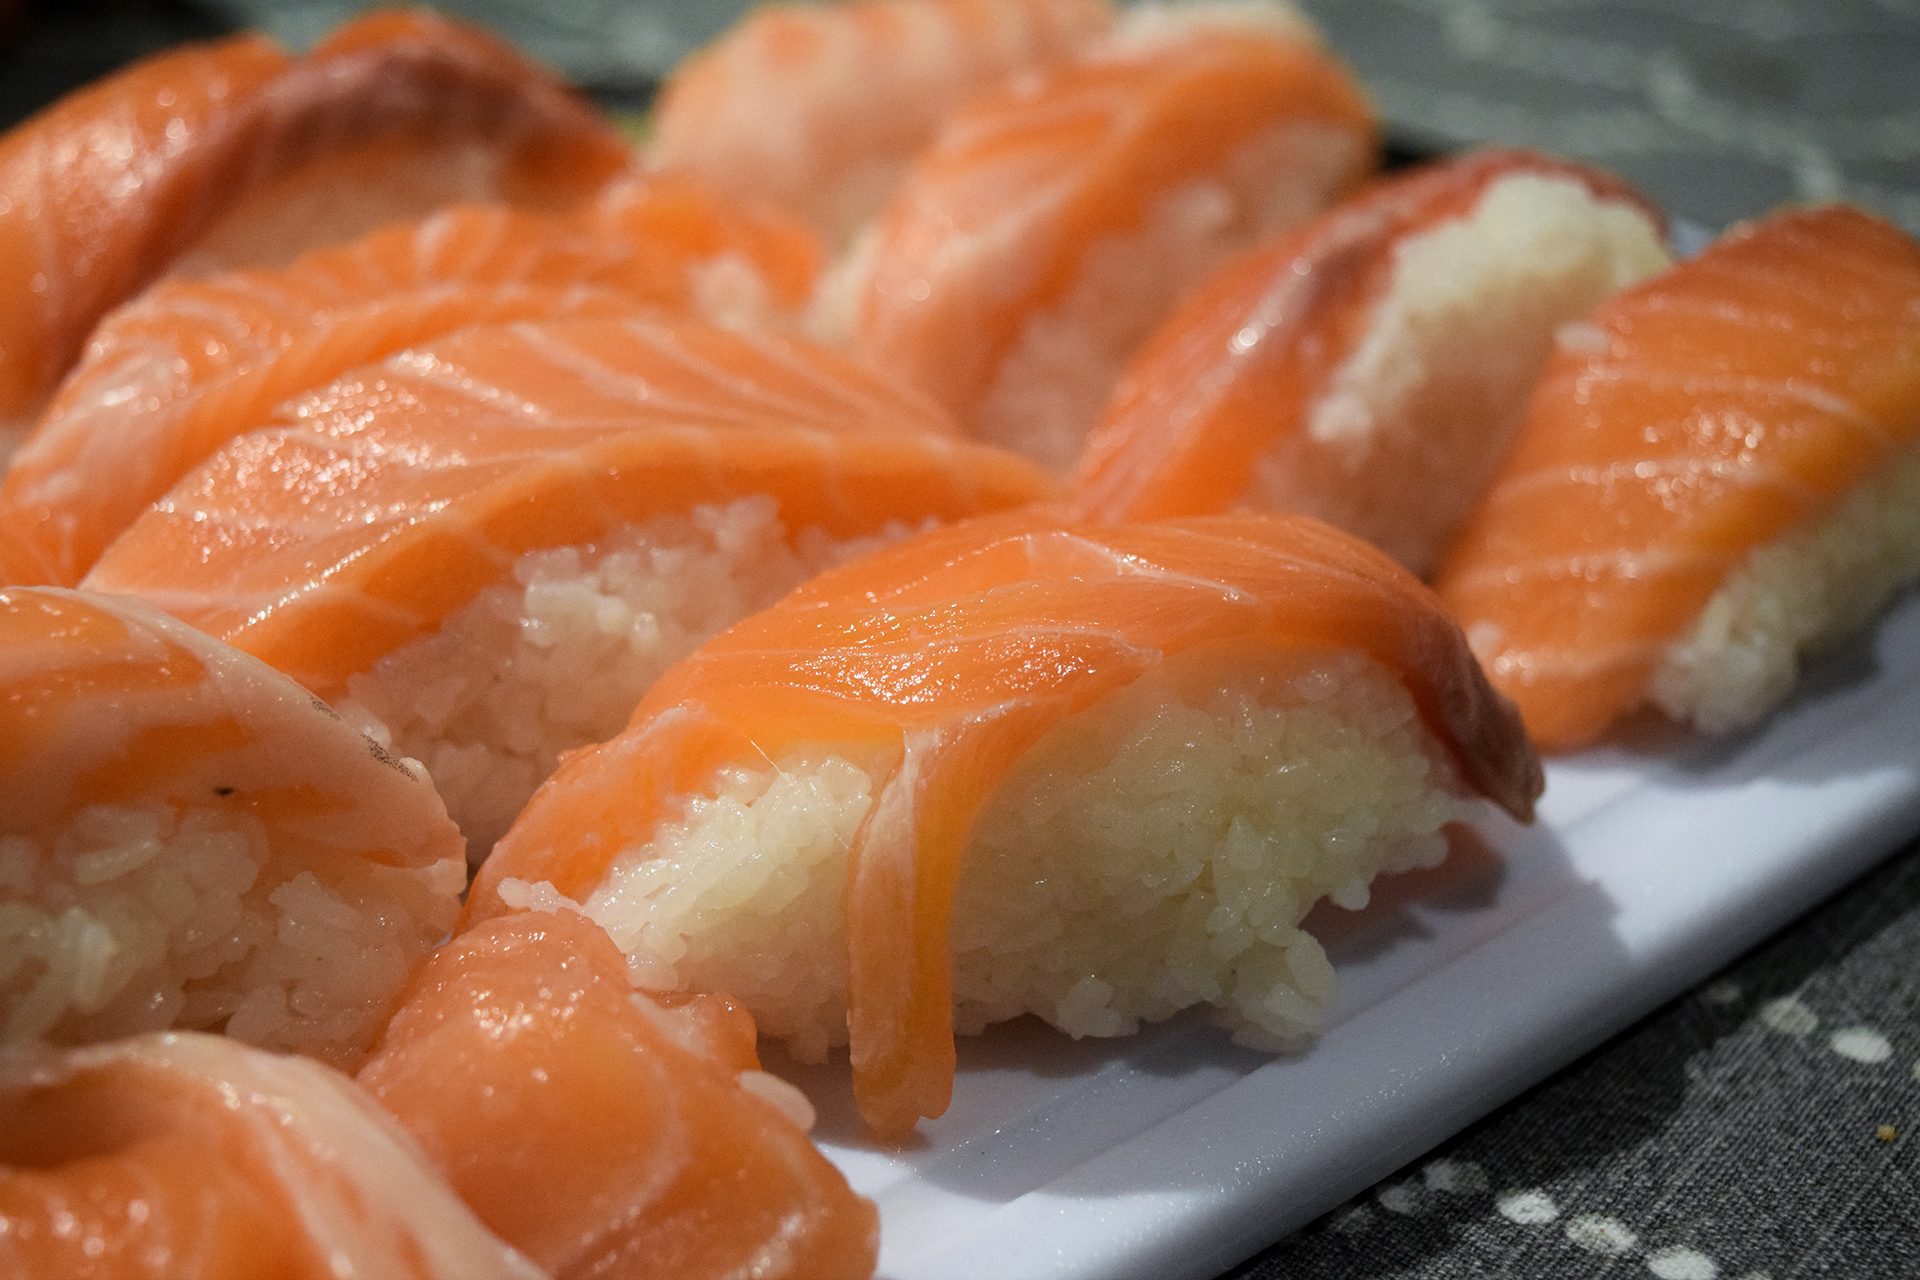
Lucky Cat Nigiri

When Hiro upgrades Baymax and flies through the city, they pass a restaurant with a cat holding a piece of nigiri.

We have made sushi before, but not nigiri. I don’t enjoy nigiri as much, but it is simple and still yummy.

Happy Cat Nigiri
Write a review
Print
Prep Time
4 hr
Cook Time
1 hr
Total Time
5 hr
Prep Time
4 hr
Cook Time
1 hr
Total Time
5 hr
Ingredients
  1. 2 1/3 cup short-grain sushi rice, rinsed
  2. 3 cups water
  3. 5 1/3 tablespoons rice vinegar
  4. 5 tablespoons sugar
  5. 1.5 tablespoons salt
  6. 1 (6 ounce) piece salmon
Instructions
  1. Prepare fish first. Cover fish with salt and leave for 1 hour. Then, rinse off salt and put it into the freezer. Once frozen, defrost and use for sushi.
  2. Wash the rice until the water rinses clear.
  3. Drain the rice in a colander and let it stand for 30 minutes.
  4. Place the rice in a pot or rice cooker, and add 3 cups of water or follow the instructions on a rice cooker.
  5. Remove the cover, place a damp towel over the rice, and let cool for 10 minutes.
  6. You can find sushi vinegar prepared at a grocery story or you can easily make it by pouring the vinegar, sugar and salt into a pan under low heat until the sugar and salt are dissolved.
  7. Pour sushi vinegar over cooked rice and mix it gently. You can do this in a wooden bowl for making sushi rice or in your rice cooker by turning off the cooker and pouring the vinegar and mixing gently and evenly and leaving it until it cools down to room temperature.
  8. Slice the fish very thinly into bite-sized pieces.
  9. Hand-mold fingers of rice and place a thin slices of fish on the top.
  10. Eat with soy sauce and wasabi
DisneyMeals https://disneymeals.me/


Balalalala?

Most of the food was really good. I was happy to be able to make some new types of foods!

Verdict:

Ramen – 6/10

Blueberry Muffins – 8.5/10

Hot Wings – 9/10

Nigiri – 7/10


Thank You!

A big thank you to our Patrons (http://www.patreon.com/disneymeals)
DeAnna
Barbara
Aly (http://www.dreamstobecome.com)

1

Monsters University – Be My Pal Cupcakes, Garbage Pizza

Quick links: Be My Pal Cupcakes | Garbage Pizza | Verdict   I hope everyone had a great Holiday break! This week we have one of the few lackluster Disney/Pixar movies – Monster’s University. It really isn’t a horrible movie, but it is pretty forgettable and the story is just meh. It is kinda like a straight to video…
Continue reading »

1

Frozen – Hazelnut cake, Orange Cake, Bonus Christmas Ribs

Quick links: Hazelnut Cake | Orange CakeChristmas Ribs | Verdict


Its Christmastime! What better way to celebrate Christmas than with some yummy foods from Frozen!  There wasn’t TONS of new food shown…and most of the food in the movie was desserts. So that’s perfect for your Holiday festivities! We’re going to be off for a couple weeks after this. So enjoy and happy Holidays! 
Also, remember to check out our patreon!


Foods Shown

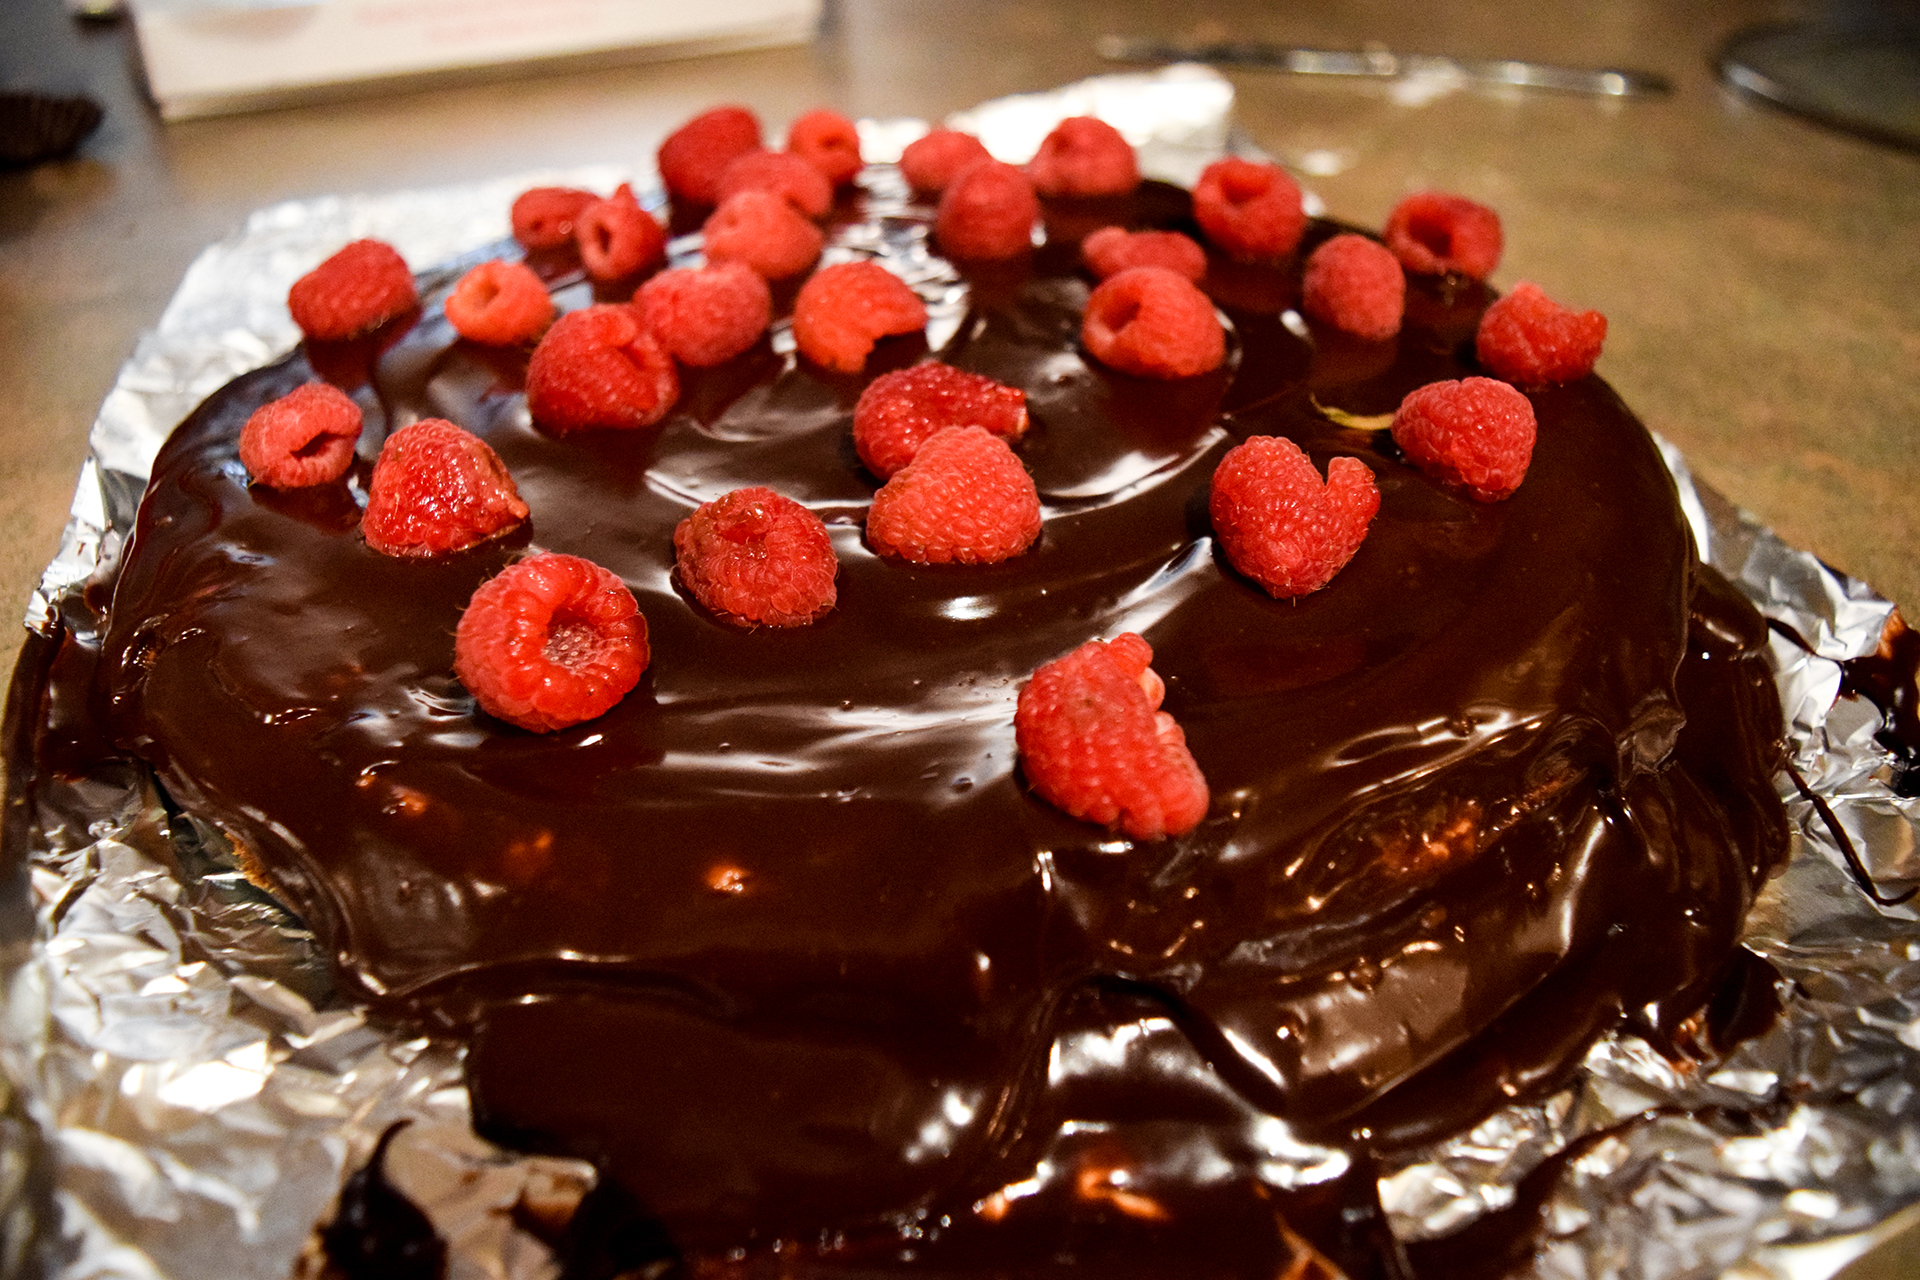
Chilly Hazelnut Cake

While prepping for the festivities, there is a huge pile of treats.

One is a thin cake with a chocolate ganache on top. I looked at some Norwegian recipes and this is a hazelnut cake that looks really similar. It is kinda like a cookie cake, but still awesome.

Chilly Hazelnut Cake
Write a review
Print
Prep Time
25 min
Cook Time
35 min
Total Time
1 hr
Prep Time
25 min
Cook Time
35 min
Total Time
1 hr
Ingredients
  1. 3⁄4 cup hazelnuts
  2. 1⁄2 cup butter
  3. 1 1⁄2 cups white sugar
  4. 1 teaspoon vanilla extract
  5. 2 cups all-purpose flour
  6. 2 teaspoons baking powder
  7. 1⁄4 teaspoon salt
  8. 1⁄2 cup heavy whipping cream
  9. 1 cup semi-sweet chocolate chips (or milk chocolate)
  10. 3 eggs
  11. 1⁄2 teaspoon vanilla extract
  12. Raspberries
Instructions
  1. Preheat oven to 350 degrees F.
  2. Lightly grease the bottom of one 10 inch springform pan.
  3. Reserve 8 whole nuts for garnish.
  4. Pulse the remaining nuts in a food processor until ground, and reserve 1 tablespoon of ground nuts for garnish.
  5. Melt margarine or butter in a small saucepan over low heat, cool.
  6. In a large bowl beat eggs, sugar, and 1 teaspoon vanilla extract until thick and lemon colored (about 2 to 3 minutes).
  7. Add flour, baking powder, salt, and ground nuts, mix well.
  8. Continue to beat mixture while slowly adding the cooled melted butter or margarine until blended (mixture will be thick).
  9. Spread batter into prepared pan.
  10. Bake at 350 degrees F.
  11. for 35 to 40 minutes or until a toothpick inserted in center comes out clean.
  12. Cool in pan for 15 minutes then remove sides of pan.
  13. Remove pan bottom and invert onto a serving plate.
  14. Cover with a cloIn a medium saucepan bring whipping cream just to a boil, take off heat and stir in the semi-sweet chocolate chips (or milk chocolate) until melted and smooth.
  15. Stir in 1/2 teaspoon vanilla extract.
  16. Spread glaze over top of cooled cake, allowing it to run down the sides.
  17. Top with Raspberries
DisneyMeals https://disneymeals.me/

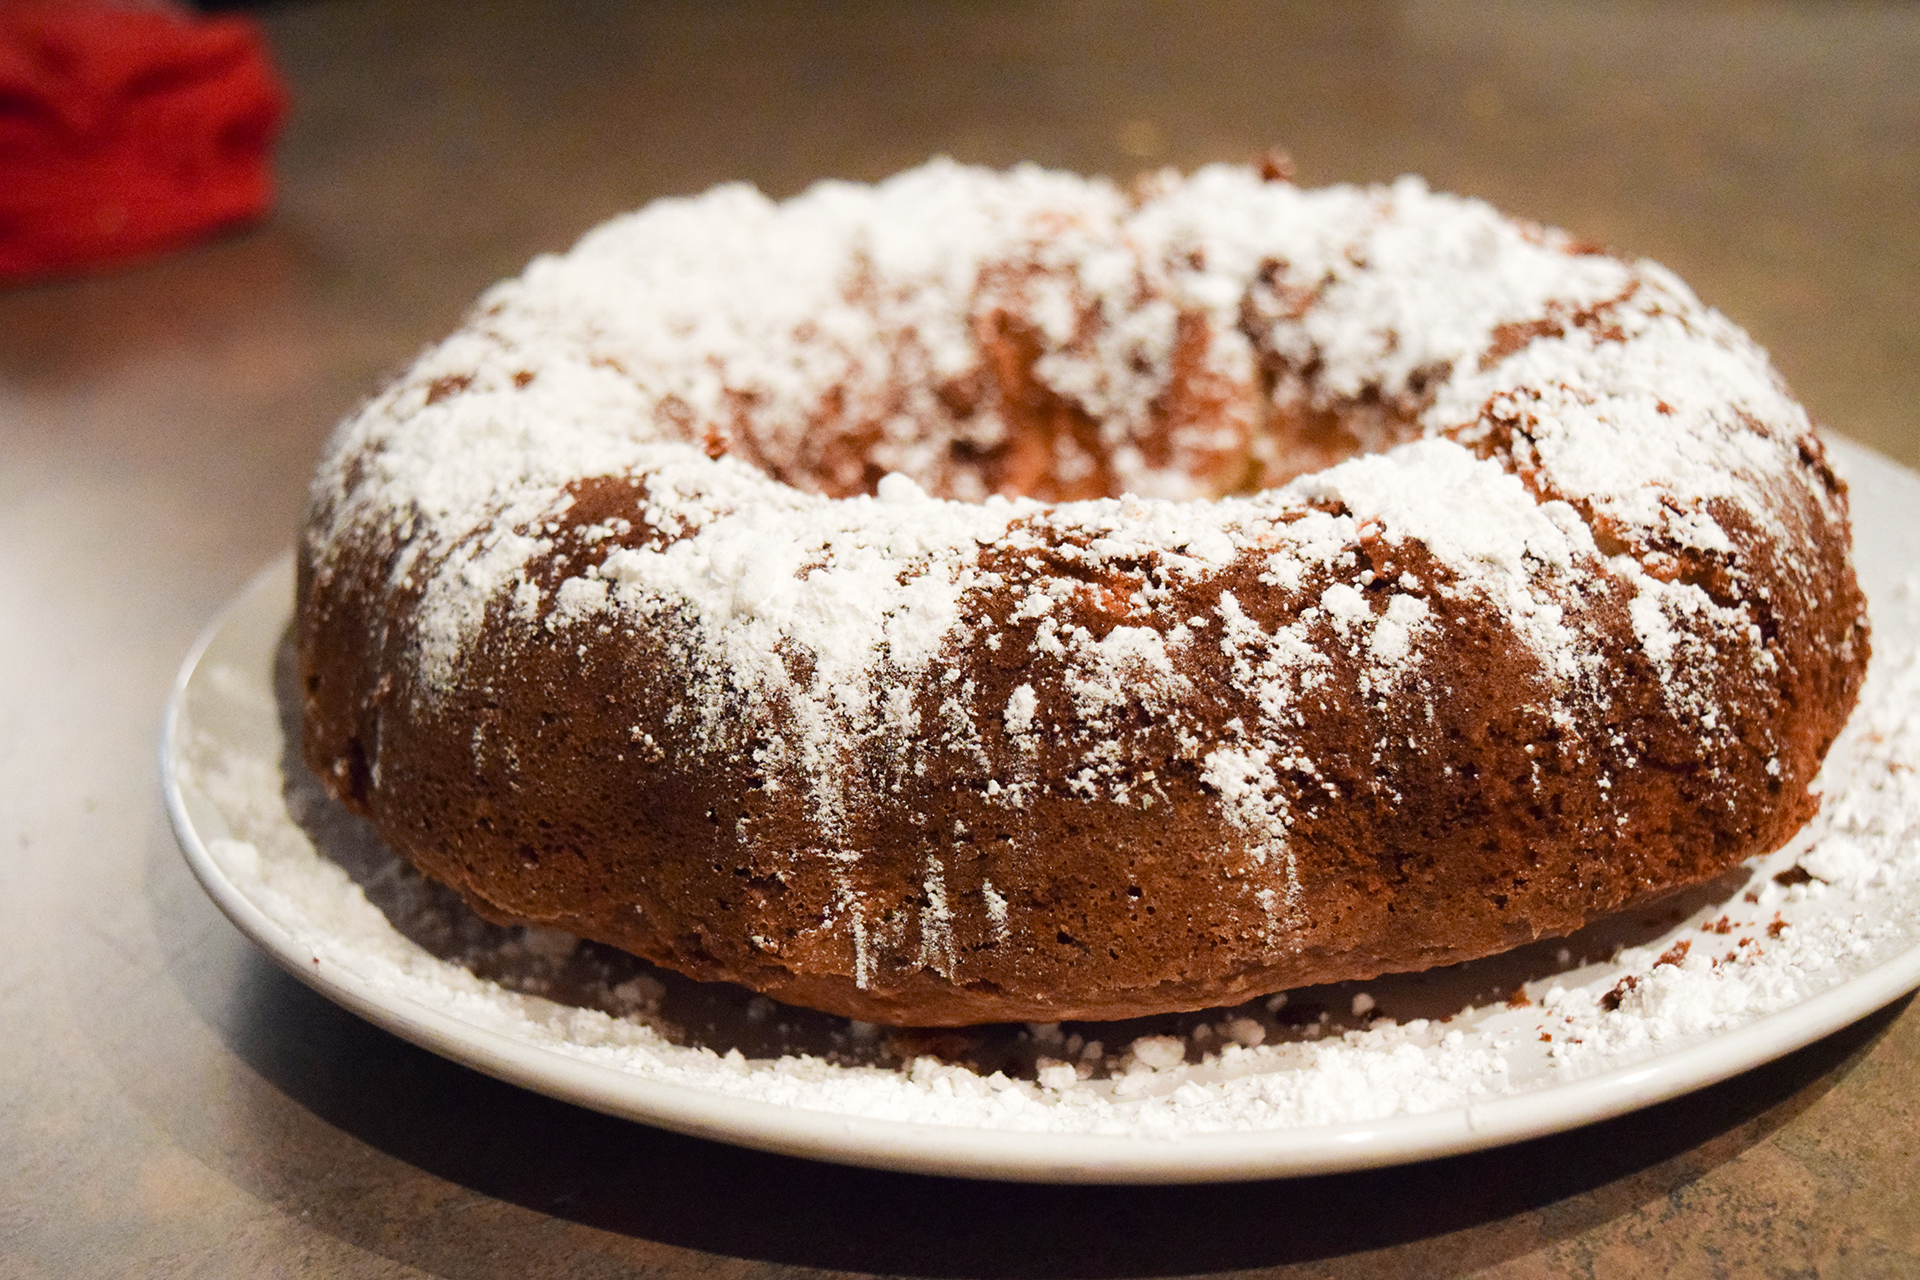
Orange Bundt Cake

A Bundt cake is shown a couple times in the movie. Well turns out there is Norwegian Orange Cake, which is typically made for Easter.

Orange Bundt Cake
Write a review
Print
Prep Time
1 hr 20 min
Cook Time
50 min
Total Time
2 hr 10 min
Prep Time
1 hr 20 min
Cook Time
50 min
Total Time
2 hr 10 min
Ingredients
  1. 160g (1⅓ cups) flour
  2. 1½ teaspoons baking powder180g (3/4 cup) butter, softened
  3. 200g (1 cup) sugar
  4. 3 eggs, at room temperature
  5. Grated zest of 1 orange
  6. 1 teaspoon orange extract
  7. 75ml (1/3 cup) orange juice
Instructions
  1. Heat the oven to 175C/350F degrees. In a medium bowl, sift together the flour and baking powder. Set aside.
  2. In a separate bowl, beat the butter and sugar until light and fluffy. Using a standing or hand mixer, this should take 3 to 5 minutes. One at a a time, making sure they are each incorporated before you add the next, add the eggs to the mixture.
  3. Next, beat in the orange zest, orange extract and orange juice to the butter mixture. The mixture might a look a little odd once you add the orange juice, but it will all come together once you mix in the dry ingredients
  4. Fold the flour mixture into the butter mixture and combine until the cake batter is even and without streaks.
  5. Pour the batter into a greased and floured bundt pan, then bake for 45 to 55 minutes, or until a toothpick inserted in the center comes out clean. Allow the cake to cool into the pan for 45-60 minutes on a cooling rack, then remove from the mold.
  6. Dust with powdered sugar and serve.
DisneyMeals https://disneymeals.me/

Christmas Ribs

So this is an inspired recipe that they would eat at the time and place of Frozen. It is ribs prepared as they do for Christmas in Norway

Norwegian Christmas Ribs
Write a review
Print
Cook Time
2 hr 40 min
Cook Time
2 hr 40 min
Ingredients
  1. 4lbs Ribs (I used back ribs, but spareribs or St. Lewis cut ribs would be better)
  2. 3 tbs salt
  3. 2 tsp pepper
  4. 1 cup water
  5. 2-4 tbs butter
Instructions
  1. Mix the salt and pepper together
  2. Rub the ribs with the salt and pepper, let it sit in the fridge for 4+ hours (can be overnight)
  3. Preheat oven to 450F
  4. Line a cookie sheet with tin foil
  5. Place the ribs on the cookie sheet
  6. Pour the water in the sheet around the ribs
  7. Cover tightly with foil and cook for 40 minutes
  8. Remove foil, lower temp to 400F
  9. Cook for 2 more hours
  10. Remove and serve with gravy made from rib droppings
DisneyMeals https://disneymeals.me/


Will it Let it Go?

All of the food was delicious. The ribs might be the best I’ve ever eaten. They weren’t saucy bbq ribs, but they were tender and mouth-watering

Verdict:

Hazelnut Cake – 9/10

Orange Cake – 9/10

Ribs – 10/10


Thank You!

A big thank you to our Patrons (http://www.patreon.com/disneymeals)
DeAnna
Barbara
Aly (http://www.dreamstobecome.com)

1

Wreck it Ralph [Week 2] – Angel Food Cake, Homemade Whoppers

Quick links: Angel Food Cake | Whopper | Verdict   Wreck it Ralph is back! I’m sorry that we’re not making all the candy shown in the show. My dentist was disappointed that I’m not because he already bought a new boat with the money he was going to make after my Wreck it Ralph post. If you like…
Continue reading »