1

Christmas Medley!

Quick links: Link 1 | Link 2Link 3 | Link 4 | Link 5 | Verdict


We’re doing a special recap of some of our favorite recipes that you can try for your Christmas feast! This will also be our last post of the year! So Merry Christmas and Happy New Year! See you in a couple weeks!


Christmas Goose from The Aristocats

Ingredients:
1 Red Bell pepper
1 Yellow Bell Pepper
1 tbs olive oil
1 Whole Goose/Duck
2 Onions (wedged)
2 Garlic Cloves (minced)
1 cup White Wine
1 small can tomato paste
1 can petite diced tomatoes
1 cup chicken stock
3/4 cup black olives (pitted)
1 cup chestnuts (or hazelnuts as a sub.)
1 stick butter (divided in half)
2 Slices of bread
  salt and pepper to taste
2 tsp crushed bay leaves
8 sprigs thyme
  1. Preheat the oven to 450F
  2. Boil some water and dump it over defrosted goose to tighten up the skin
  3. Rub 4 tbs butter over the entire goose
  4. Stick in a baking dish
  5. Place bell peppers on a baking sheet and roast them in oven for ~15 mins
  6. Place onion in a pan and cook, stirring occasionally over a medium-high, for 5 minutes or until golden.
  7. Add the garlic and cook for 2 minutes or until aromatic.
  8. Add the wine and cook for 2 minutes or until reduced by half.
  9. Add the bell peppers, tomato paste, diced tomatoes, bay leaves, stock and thyme.
  10. Season with salt and pepper.
  11. In a separate pot, melt 4 tbs butter.
  12. Add in chestnuts and 1/4 c. wine.
  13. Bring to boil and let simmer for 15 minutes, until the chestnuts start getting a little soft.
  14. Stir in the shredded bread and olives.
  15. Salt and pepper to taste.
  16. Place the chestnut mix inside the goose
  17. Pour sauce over goose
  18. Place the goose in the oven
  19. Cook for 1 hr 45min (or until goose is brown and meat thermometer reads 175F), flipping the goose over every 35 mins. You may baste the goose with white wine every 30 minutes as well.
  20. Keep covered for first 30 minutes and then only partially covered for the rest

IMG_20150614_182900


Holiday Ham from Pocahontas

Lime Glazed Ham w/ Blueberry Sauce
Write a review
Print
Prep Time
20 min
Cook Time
2 hr
Total Time
2 hr 20 min
Prep Time
20 min
Cook Time
2 hr
Total Time
2 hr 20 min
Ham
  1. 1 fully cooked bone-in ham (6 to 7 lb)
  2. 1 cup water
Glaze
  1. 1 cup packed brown sugar
  2. 1/2 cup Dijon mustard
  3. 1/3 cup Key lime juice
Blueberry Sauce
  1. 1/3 cup(s) preserves, apricot
  2. 1 tablespoon sugar, brown
  3. 2 tablespoon wine, dry red
  4. 4 tablespoon lemon juice
  5. 1 cup(s) blueberries
  6. 1 tablespoon cornstarch
  7. 1/3 cup(s) water
Instructions
  1. Heat oven to 325°F. If shallow roasting pan does not have rack, line with heavy-duty foil. Place ham, fat side up, on rack in pan or in foil-lined pan. Score ham diagonally at 1-inch intervals, cutting 1/4 inch deep; score in opposite direction to form diamond shapes. Pour water into pan. Bake 1 hour.
  2. Meanwhile, in medium bowl, mix glaze ingredients. Pour half of mixture into 1-quart saucepan; set aside for sauce.
  3. Remove ham from oven. Insert meat thermometer so bulb reaches center of thickest part of ham, but does not rest in fat or on bone. Brush ham with some of glaze in bowl.
  4. Bake 2 hours or until thermometer reads 140°F, brushing frequently with pan drippings and remaining glaze in bowl. Let ham stand in pan 15 minutes, spooning pan drippings frequently over top.
Blueberry Sauce
  1. In a small saucepan, combine the cornstarch or arrowroot powder and water.
  2. Stir in the apricot jam, brown sugar, wine, and lemon juice.
  3. Cook over medium-low heat for 5 to 6 minutes until the sauce is thickened and bubbly.
  4. Stir in the blueberries and cook 2 to 3 minutes.
  5. Spoon the sauce over the ham and serve.
DisneyMeals https://disneymeals.me/

Gingersnaps from The Rescuers

Penny's Gingersnaps
Serves 24
Write a review
Print
Prep Time
20 min
Cook Time
10 min
Total Time
3 hr 30 min
Prep Time
20 min
Cook Time
10 min
Total Time
3 hr 30 min
Ingredients
  1. 2¼ cups all-purpose flour
  2. 2 teaspoons ground ginger
  3. 1 teaspoon ground cloves
  4. 1½ teaspoons baking powder
  5. 1/8 teaspoon kosher salt
  6. ½ cup unsalted butter, at room temperature
  7. 1 cup sugar
  8. 1 Extra Large Egg
  9. 1/3 cup dark molasses
  10. 1 1/2 teaspoon vanilla extract
Make the dough (You can do this part up to three days in advance.)
  1. SIFT the flour, ginger, cinnamon, cloves, baking powder and salt together in a medium bowl. Set aside.
  2. PLACE the butter and sugar in the bowl of a stand mixer fitted with the paddle attachment. Beat on medium speed until the mixture is light and fluffy.
  3. SWITCH the mixer to low speed and gradually add the egg, molasses and vanilla extract. Increase the speed to medium and beat until smooth.
  4. SWITCH the mixer to low speed and add the dry ingredients in 3 additions, pulsing the mixer to incorporate each addition before adding the next one.
  5. TURN the dough out onto a lightly floured work surface. Knead a few times to incorporate any crumbs.
  6. DIVIDE the dough in half. Roll each half into a log about 1½ inches in diameter and 12 inches long. As you roll, gently push the ends toward the center to prevent air pockets and to keep the logs at an even thickness.
  7. WRAP the logs in plastic wrap and refrigerate until firm, at least 3 hours or up to 3 days.
Bake the cookies
  1. PREHEAT the oven to 400°F. Line the bottoms of two 12″ x 18″ sheet pans with parchment paper.
  2. REMOVE the logs from the refrigerator and unwrap them. Using a ruler and a sharp knife, cut each log into rounds ¼ inch thick. If the dough crumbles as you cut it, reshape each slice.
  3. PLACE the rounds on the prepared pans, spacing them 2 inches apart. Bake on the middle shelves of the oven, rotating the pans 180° halfway through the baking time, until the cookies are set but soft enough to hold a slight indentation when pressed with a fingertip (about 7 to 10 minutes).
  4. LET cool completely on the pans on wire racks. Store in an airtight container at room temperature for up to 1 week. Yield: 50-60 2-inch cookies.
Notes
  1. Source: http://www.thenibble.com/reviews/main/cookies/cookies2/ginger-snaps-recipe.asp
DisneyMeals https://disneymeals.me/

Pineapple Upside-down Cake from Nightmare Before Christmas

There are many other Christmas recipes you can find there too.

Pineapple Upside-down Cake
Write a review
Print
Prep Time
15 min
Cook Time
35 min
Total Time
50 min
Prep Time
15 min
Cook Time
35 min
Total Time
50 min
Ingredients
  1. 1 (18 ounce) box yellow cake mix
  2. 3 eggs (or as called for by your cake mix)
  3. 1⁄3 cup oil (or as called for by your cake mix)
  4. 1 1⁄3 cups water (or as called for by your cake mix)
  5. 1 cup dark brown sugar
  6. 1⁄4-1⁄2 cup butter
  7. 1 (20 ounce) can pineapple slices
  8. 1 (8 ounce) jar maraschino cherries (optional)
Instructions
  1. Follow instructions on cake box for making an oblong single layer cake.
  2. Prepare cake batter and set aside.
  3. Cut up butter in small pieces and place all over the bottom of the oblong pan specified on cake box.
  4. Sprinkle brown sugar generously over the butter.
  5. Place pan on the stove (or in the oven) and heat slowly until butter and sugar melt to a liquid then remove from heat.
  6. Evenly space the pineapple slices around the bottom of pan in the heated sugar and butter.
  7. Place the cherries and nuts between the pineapple slices (Tho the cherries and nuts look nice and taste great, they are optional).
  8. Pour cake batter on top of the pineapple/cherry/nut mixture.
  9. Place in oven and bake as directed on cake box.
  10. As soon as cake is done place a plate over the cake and turn upside down and carefully remove pan.
  11. If you wait too long the sugar will harden and be difficult to remove.
DisneyMeals https://disneymeals.me/

Plum Christmas Pudding from Make Mine Music

Ingredients:

Pudding

1 cup flour
3/4 teaspoon cloves
3/4 teaspoon nutmeg
1/2 teaspoon baking soda
1 teaspoon baking powder
1/2 teaspoon cinnamon
1/2 teaspoon salt
1 cup ground, raw potato (shredded works, too)
1 cup ground, raw carrot (again, shredded works)
1/2 cup raisins *gold or brown
1 cup mixed dried fruit *preferrably with plums
1/2 teaspoon lemon extract
3 tablespoons melted butter
   
1/4 cup sugar
1/4 cup flour
1/4 teaspoon salt
1 teaspoon vanilla extract or rum flavoring
  water
  butter or heavy cream

Sauce

   
1/4 cup sugar
1/4 cup flour
1/4 teaspoon salt
1 teaspoon vanilla extract or rum flavoring
  water
  butter or heavy cream
Pudding:
  1. Sift spices with flour and other dry ingredients.
  2. Add potatoes, carrots, raisins and mixed fruit, lemon extract, and butter.
  3. Mix well until batter is moistend through (this will take a few minutes).
  4. Put in buttered mold, fill about 2/3 full.
  5. Three 3″ fluted pans will hold the mixture.
  6. Steam for 3 hours.
  7. You can use a crockpot with steaming capabilities or put the molds in a larger baking dish, fill larger dish with boiling or very hot water, cover with foil and steam in the oven at about 300 degrees for 3 hours.
  8. Let sit 10 minutes before removing puddings from molds.
Sauce:
  1. Combine sugar, flour, salt, and vanilla/rum flavoring.
  2. Add enough cold water to make a thin paste.
  3. Cook over low heat until paste thickens up.
  4. Add butter or cream until desired thickness is reached.

IMG_20150315_185215


Will it Make you have a Merry Christmas?

I hope all you Disney Mealer’s out there have a great Christmas!


1

Hunchback of Notre Dame – Croissants, Sausages, Grapes and Cheese

Quick links: Croissant | SausagesGrapes and Cheese | Verdict


Food for a Guy Like You. Oh man, the music in Hunchback is amazing. The story is great, even though it is pretty dark, and Esmeralda is pretty sexy, haha. There are lots of french dishes shown, aka bread and cheese. But we did get to make homemade croissants! Yay! So ring some bells and eat some great food from Hunchback of Notre Dame.


Foods Shown

Ok, this is a new section. I want to start listing all the food shown in the movie. Sometimes I don’t list all the food shown. I exclude foods that are commonplace and don’t have recipes (like individual fruits and veggies) and/or foods that we’ve made before. But here are all the foods shown in Hunchback.


Quasi Croissant

Part of the Guy Like You song, the gargoyles mention that Quasimodo has the shape of a croissant.

(Credit: Disney)

(Credit: Disney)

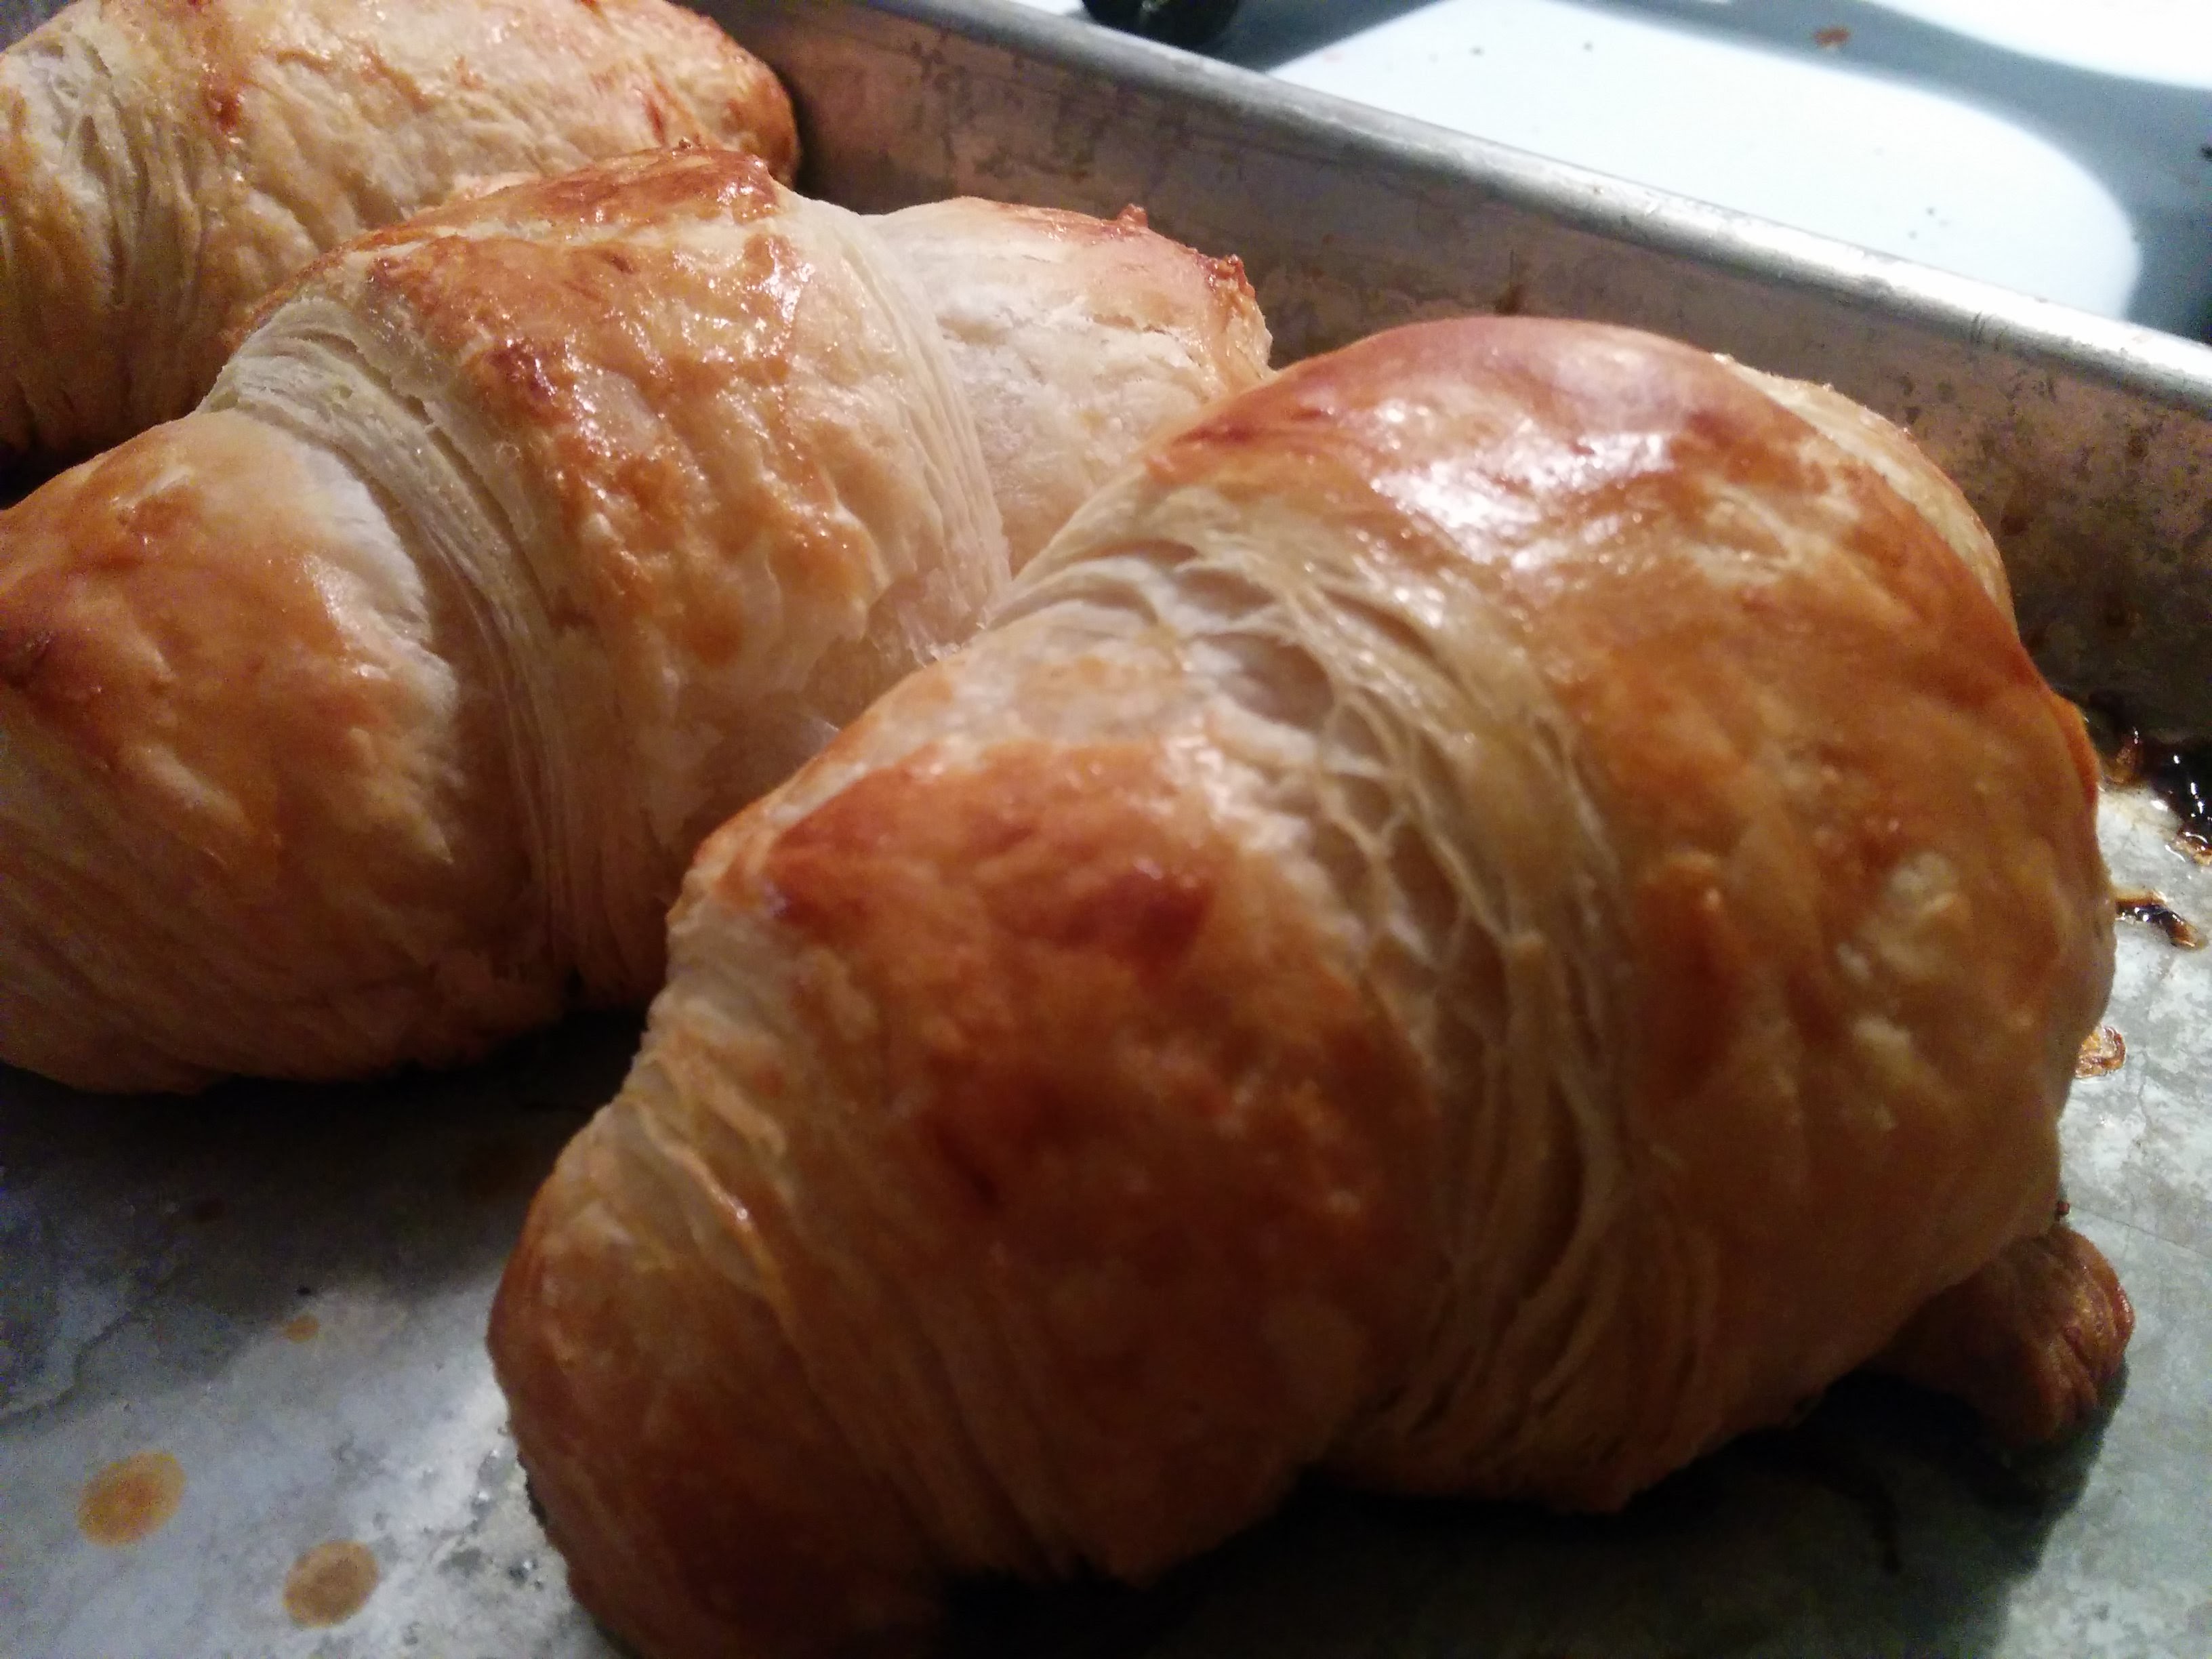
.I never have made croissants from scratch….and come to find out, its is pretty dang intense. It takes 3 days to make. I referenced this site for the recipe. I recommend checking it out for picture references. Sadly, when I was on the final rollout, somehow my dough got moist, even though I floured the counter…and the dough stuck to the counter…badly.  I managed to scrape a couple soggy croissants together, and they were still really really good. I just wish I would have found out what the perfect croissant was like.


Quasi Croissant
Yields 15
Write a review
Print
Prep Time
72 hr
Cook Time
20 min
Total Time
72 hr
Prep Time
72 hr
Cook Time
20 min
Total Time
72 hr
Ingredients for the Croissant Dough
  1. 500 g French Type 55 flour or unbleached all-purpose flour / plain flour (extra for dusting)
  2. 140 g water
  3. 140 g whole milk (you can take it straight from the fridge)
  4. 55 g sugar
  5. 40 g soft unsalted butter
  6. 11 g instant yeast
  7. 12 g salt
Other Ingredients
  1. 280 g cold unsalted butter for laminating
  2. 1 egg + 1 tsp water for the egg wash
Day 1
Making the Croissant Dough
  1. Combine the dough ingredients and knead for 3 minutes until the dough comes together and you’ve reached the stage of low to moderate gluten development. You do not want too much gluten development because you will struggle with the dough fighting back during laminating.
  2. Shape the dough like a disc, not a ball, before you refrigerate it, so it will be easier to roll it into a square shape the following day.
  3. Place the disc on a plate, cover with clingfilm and leave in the fridge overnight.
Day 2
Laminating the Dough
  1. Cut the cold butter (directly from the fridge) lengthwise into 1,25 cm thick slabs.
  2. Arrange the pieces of butter on waxed paper to form a square of about 15 cm x 15 cm.
  3. Cover the butter with another layer of waxed paper and with a rolling pin pound butter until it’s about 19 cm x 19 cm.
  4. Trim / straighten the edges of the butter and put the trimmings on top of the square.
  5. Now pound lightly until you have a final square of 17 cm x 17 cm.
  6. Wrap in paper and refrigerate the butter slab until needed.
  7. Use just enough flour on your work surface to prevent the dough from sticking.
  8. However keep the amount to a minimum, otherwise too much flour will be incorporated between the layers and this will show in the end result.
  9. Take the dough out of the fridge.
  10. With a rolling pin roll out the dough disc into a 26 cm x 26 cm square.
  11. Try to get the square as perfect as possible and with an even thickness.
  12. Get the slab of butter from the fridge.
  13. Place the dough square so one of the sides of the square is facing you and place the butter slab on it with a 45 degree angle to the dough so a point of the butter square is facing you.
  14. Fold a flap of dough over the butter, so the point of the dough reaches the center of the butter.
  15. Do the same with the three other flaps.
  16. The edges of the dough flaps should slightly overlap to fully enclose the butter.
  17. With the palm of your hand lightly press the edges to seal the seams.
  18. Now the dough with the sealed in butter needs to be rolled out.
  19. With a lightly floured rolling pin start rolling out, on a lightly flour dusted surface, the dough to a rectangle of 20 x 60 cm.
  20. Start rolling from the center of the dough towards the edges, and not from one side of the dough all the way to the other side. This technique helps you to keep the dough at an even thickness. You can also rotate your dough 180 degrees to keep it more even, because you tend to use more pressure when rolling away from you than towards yourself. You can use these techniques during all the rolling steps of this recipe. Aim at lengthening the dough instead of making it wider and try to keep all edges as straight as possible.
  21. Fold the dough letter style, cover with clingfilm and refrigerate for 30 minutes (fold one third of the dough on top of itself and then fold the other side over it).
  22. Repeat the rolling and folding two more times (ending up with 27 layers in total), each time rolling until the dough is about 20 cm x 60 cm.
  23. After each fold you should turn the dough 90 degrees before rolling again. The open ‘end’ of the dough should be towards you every time when rolling out the dough.
  24. After the second turn, again give it a 30 minute rest in the fridge.
  25. After the third turn you leave the dough in the fridge overnight until day 3, the actual croissant making day!
Summary
  1.  Roll out to 20 cm x 60 cm
  2.  Refrigerate 30 minutes
  3.  Rotate 90 degrees
  4.  Roll out to 20 cm x 60 cm
  5.  Refrigerate 30 minutes
  6.  Rotate 90 degrees
  7.  Roll out to 20 cm x 60 cm
  8.  Refrigerate until day 3
  9.  Rotate 90 degrees
  10.  Day 3 - Roll out to 20 cm x 110 cm
  11. Each laminating step should not take more than a few minutes.
  12. However if, due to initial inexperience for example, it should take you longer, you can fold your dough letter style, cover it and refrigerate it for 20 minutes and continue the rolling process after this rest. It is very important the butter stays solid.
Day 3 - Dividing the Dough
  1. Take the dough from the fridge.
  2. Lightly flour your work surface.
  3. Now very gently roll the dough into a long and narrow strip of 20 cm x 110 cm.
  4. If the dough starts to resist too much or shrink back during this process you can fold it in thirds and give it a rest in the fridge for 10 to 20 minutes before continuing.
  5. Do not fight the dough, when the dough refuses to get any longer, rest it in the fridge!
  6. It is such a shame to ruin two days of work. (Also, make sure that there is no moisture around. Error on too much flour on the surface instead of too little.)
  7. When your dough has reached its intended shape, carefully lift it a few centimeters to allow it to naturally shrink back from both sides. This way it will not shrink when you cut it. Your strip of dough should be long enough to allow you to trim the ends to make them straight and still be left with a length of about 100 cm.
Shaping the Croissants
  1. For the next stage you will need a tape measure and a pizza wheel.
  2. Lay a tape measure along the top of the dough.
  3. With the wheel you mark the top of the dough at 12,5 cm intervals along the length (7 marks total).
  4. Now lay the tape measure along the bottom of the dough and make a mark at 6,25 cm.
  5. Then continue to make marks at 12,5 cm intervals from this point (8 marks total). So the bottom and the top marks do not align with each other and form the basis for your triangles.
  6. Now make diagonal cuts starting from the top corner cutting down to the first bottom mark.
  7. Make diagonal cuts along the entire length of the dough.
  8. Then change the angle and make cuts from the other top corner to the bottom mark to create triangles.
  9. Again repeat this along the length of the dough. This way you will end up with 15 triangles and a few end pieces of dough.
  10. Using your pizza wheel, make 1.5 cm long notches in the center of the short side of each dough triangle.
  11. Now very gently elongate each triangle to about 25 cm.
  12. This is often done by hand, but we have found that elongating with a rolling pin, very carefully, almost without putting pressure on the dough triangle, works better for us.
  13. You can try both methods and see what you think gives the best result.
  14. After you cut a notch in the middle of the short end of the triangle, try and roll the two wings by moving your hands outwards from the center, creating the desired shape with a thinner, longer point. Also try and roll the dough very tightly at the beginning and put enough pressure on the dough to make the layers stick together (but not so much as to damage the layers of course).
Proofing and Baking
  1. Arrange the shaped croissants on baking sheets, making sure to keep enough space between them so they will not touch when proofing and baking.
  2. Combine the egg with a teaspoon of water and whisk until smooth.
  3. Give the croissants their first thin coating of egg wash.
  4. Proof the croissants draft-free at an ideal temperature of 24ºC to 26.5ºC (above that temperature there is a big chance butter will leak out!).
  5. The proofing should take about 2 hours.
  6. You should be able to tell if they are ready by carefully shaking the baking sheet and see if the croissants slightly wiggle. You should also be able to see the layers of dough when looking at your croissants from the side.
  7. Preheat the oven at 200 ºC / 390 ºF convection or 220 ºC / 430 ºF conventional oven.
  8. Right before baking, give the croissants their second thin coat of egg wash.
  9. We bake the croissants in our big convection oven for 6 minutes at 195ºC, then lowering the temperature to 165ºC, and bake them for another 9 minutes.
  10. Hamelman suggest baking the croissants for 18 to 20 minutes at 200ºC, turning your oven down a notch if you think the browning goes too quickly.
  11. But you really have to learn from experience and by baking several batches what the ideal time and temperature is for your own oven.
  12. Take out of the oven, leave for a few minutes on the baking sheet, then transfer to a cooling rack.
  13. Best eaten while warm and fresh of course. Croissant we don’t eat or share within a day we freeze. We put them in the preheated oven (180 ºC / 355 ºF) for 8 minutes straight from the freezer. Nothing wrong with that, croissants eaten nice and warm, almost as good as the fresh ones…almost!
DisneyMeals https://disneymeals.me/

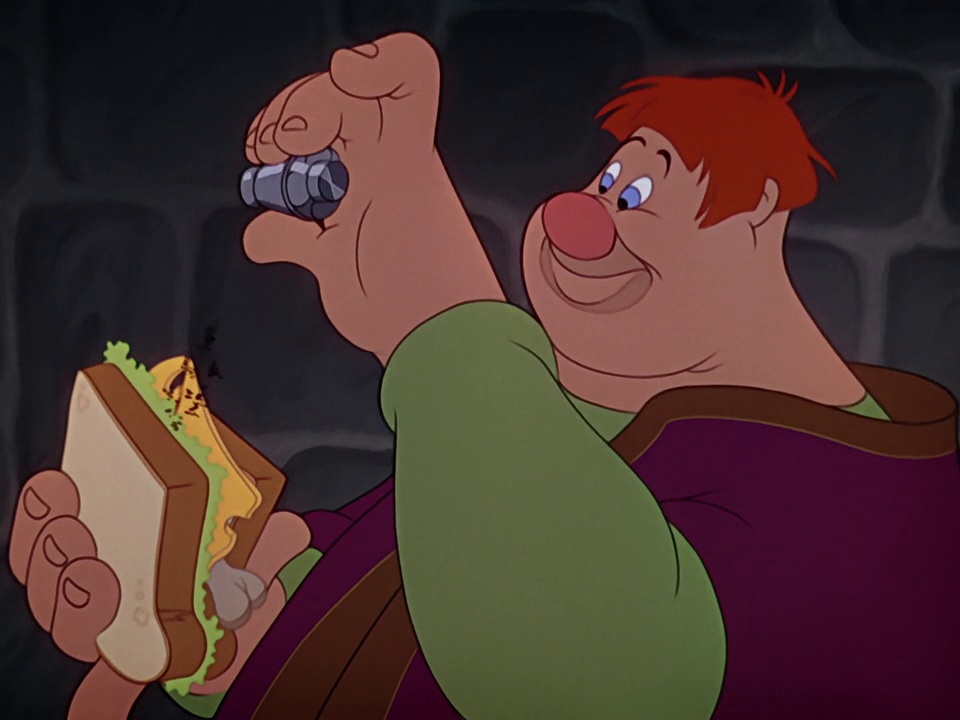
Gargoyle Sausage

At the beginning of the the Guy Like You song, Hugo roasts a sausage over and open flame.

(Credit: Disney)

(Credit: Disney)

No recipe here, I just got some nice sausages and roasted them over the only open flame in my house, the gas stove. They still came out well.

IMG_20151201_174649

IMG_20151201_175111

Frolo’s Grapes and Cheese

Another no-recipe section. There is just a lot of grapes and cheese featured.

(Credit: Disney)

(Credit: Disney)

So go get some grapes, mind the seeds, and eat with some yummy cheese.

IMG_20151201_175908

Will it Make the Bells of Notre Dame Ring?

All of it was good. I wish that the croissants turned out better. It sucks to work at something for 3 days, only to have it get semi-ruined at the end. But don’t get me wrong, they were still really really good.

Verdict:

Croissants – 9/10

Sausage – 8/10

Grapes and Cheese – 8/10

5

Lion King – Zebra (kinda), Bug Grub (& Gummy Worms), Baobab Fruit, Hawaiian Pig

Quick links: Zebra | Bug GrubBaobab Fruit | Hawaiian Pig | Verdict


Lion King is my all-time favorite Disney movie. It is even in my top 5 movies of all time, any genre. That said, I was not super excited to eat the food from the movie. I don’t have the strong will that Simba has to slurp down a giant grub. But Hakuna Matata! I highly recommend everyone rewatching Lion King, even if it’s only been a week since your last viewing.
We also had to do some substitutions. Eating like a lion is fairly hard to do as a human and living in the United States. But I did eat bugs…oh did I eat bugs


Zebra (it’s actually beef because Zebra meat is expensive and illegal I think)

Too bad I don’t have my own personal Scar around to bring me Zebra meat like he did the hyenas.

(Credit: Disney)

(Credit: Disney)

It is surprisingly hard to come by in the USA, and I think it is illegal too.  So, I had to settle on regular ol’ beef. But I found a good Kenyan recipe called Nyama Choma. 

Nyama Choma
Write a review
Print
Prep Time
1 hr
Cook Time
10 min
Total Time
1 hr 10 min
Prep Time
1 hr
Cook Time
10 min
Total Time
1 hr 10 min
Ingredients
  1. 1 -2 kg beef (or zebra), suitable for roasting
  2. 2 garlic cloves, minced
  3. 1 -2 lemon, juice of
  4. curry powder, to taste
  5. turmeric, to taste
  6. coriander, to taste, fresh finely chopped
  7. paprika, to taste
  8. salt and black pepper, to taste
Instructions
  1. Combine the lemon juice, garlic and spices (to suit your taste) into a large glass dish and mix very well.
  2. Add the meat and stir to coat the meat with the marinade and allow to marinade for at least one hour.
  3. Preheat the oven to 450F
  4. Set meat on a hot pan over the stove and sear the outside. Do not cool long, maybe only 30 seconds to a minute each side.
  5. Transfer the meat to the oven.
  6. Cook the meat for 3 minutes, flip it and cook it for 3 more minutes.
  7. The meat should be done when it has a temp of 135F
DisneyMeals https://disneymeals.me/

Slimy, yet Satisfying Grub

I don’t get why Simba chose the biggest fattest bug in the pile. But I commend him for eating the bugs.

(Credit: Disney)

(Credit: Disney)

Also, I did it, I ate some bugs. I had some shipped from Thailand and I ate them just to appease all of you.  Spoiler: It wasn’t slimy OR satisfying.

IMG_20151018_151827 IMG_20151018_151732


But to further appease all of you, I made something that is actually slimy and satisfying. Some home-made gummy worms!

Slimy Yet Satisfying Gummy Worms
Write a review
Print
Prep Time
40 min
Total Time
3 hr 40 min
Prep Time
40 min
Total Time
3 hr 40 min
Ingredients
  1. 2 pkg 3 oz raspberry jello (or other flavored)
  2. 2-3 oz unflavored gelatin
  3. 3/4 c whipping cream
  4. 3 c boiling water
  5. 1 tbs lime juice
  6. 4 tbs sugar (divided)
  7. 1 tbs lemon rind (fine) (or 1 1/2 tsp lemon juice)
  8. 15 drops green food coloring
  9. 100ish flexible straws
  10. 1 tall container
Instructions
  1. Combine gelatin and 1 tbs sugar in bowl
  2. Add boiling water.
  3. Let it cool to lukewarm and then add the whipping cream, lime juice and 15 drops green food coloring.
  4. Flex out the straws and place them in a tall, tight container. It helps to place a rubber band around.
  5. Pour the gelatin mixture into the straws
  6. Refrigerate for 3+ hours
  7. Use a rolling pin to squeeze the gummy worms out, or you can try holding the straw under warm water.
  8. Once all worms have been taken out of the straws, place into a container.
  9. Mix the remaining sugar and lemon rind until they make a uniform mixture
  10. Sprinkle the worms
  11. Enjoy
DisneyMeals https://disneymeals.me/

Baobab Fruit (Pomegranate)

No recipe here, but just for your info, the fruit that Rafiki has is called a Baobab fruit.

(Credit: Disney)

(Credit: Disney)

I couldn’t come by one. So I ate pomegranate, because it looks similar to the fruit in the movie.
IMG_20151018_182336

Dress in Drag and do the Hula

Luau! If you’re hungry for hunk of fat and juicy meat,
Eat my buddie Pumbaa here cuz he is a treat! A hundred dollar dine, a tasty swine,
all you gotta do is get in line. Are ya achin’?
Yup Yup Yup
For some bacon?
Yup Yup Yup
He’s a big pig, You can be a big pig too! Oy!

This may be morbid, but I actually cooked some nice Hawaiian-style pork. No regrets. It was one of, if not the best meal that I’ve made.


Mr. Pig
Write a review
Print
Cook Time
4 hr 30 min
Total Time
4 hr 40 min
Cook Time
4 hr 30 min
Total Time
4 hr 40 min
Ingredients
  1. 1 bone-in pork shoulder butt roast (4-5 pounds)
  2. 4 teaspoons liquid smoke
  3. 4 teaspoons soy sauce
  4. 2 unpeeled ripe bananas
  5. 1/2 cup water
Instructions
  1. Place the roast on a 22x18-in. piece of heavy-duty foil;
  2. Sprinkle with liquid smoke and soy sauce.
  3. Wash bananas and place at the base of each side of roast.
  4. Pull sides of foil up round meat; add water.
  5. Seal foil tightly; wrap again with another large piece of foil.
  6. Place in a shallow baking pan; refrigerate overnight, turning several times.
  7. Place foil-wrapped meat in a roasting pan.
  8. Bake at 400° for 1 hour.
  9. Reduce heat to 325°; continue baking for 3-1/2 hours.
  10. Drain; discard bananas and liquid. Shred meat with a fork.
  11. Serve over rice
DisneyMeals https://disneymeals.me/


Will it Make you Part of the Circle of Life?

The recipes this week went all over the place. I had some of the best food and worst food and some medium food in there. I definitely don’t want to eat bugs again, but I’m sure there will come another movie with bugs. Sigh….

Verdict:

Nyama Choma – 7/10

Bugs – 1/10

Gummy Worms – 7/10

Hawaiian pork – 10/10

0

Rescuers Down Under – Pea Soup, Boiled Eggs, [Bonus] Hedgehog Slice

Quick links: Pea Soup | Boiled Eggs[Bonus] Hedgehog Slice | Verdict


Rescuer’s Down Under was one of my very favorite movies as a kid. I really wanted to be Cody and scale giant walls in Australia to save HUGE eagles. Watching it again made me relive all my childhood fantasies. I always remembered the food in this. PEA SOUP! I quote this line too often.


Pea Soup!

Right after Cody gets caught, we see a fancy restaurant for humans, then on the chandelier, there’s a rodent section, complete with cricket waiters. One of the humans drop a pea, which is picked up by one of the bugs and given to the bug chef.

Pea soup is now on the menu. 
I had never made pea soup before. We don’t see what is already in the thimble the chef uses to make the pea soup, so I took some liberties in this recipe, assuming that he got some other items that humans might have dropped.

PEA SOUP!
Write a review
Print
Prep Time
10 min
Cook Time
15 min
Total Time
25 min
Prep Time
10 min
Cook Time
15 min
Total Time
25 min
Ingredients
  1. 1 teaspoon olive oil
  2. 1 large onion, sliced (about 1 1/2 cups)
  3. 2 1/2 cups low-sodium chicken broth
  4. 1/4 teaspoon dried rosemary
  5. 1/4 teaspoon dried oregano
  6. 1/2 teaspoon salt
  7. Freshly ground black pepper
  8. 1 (10-oz) bag frozen peas
  9. 4 teaspoons plain greek yogurt or sour cream (optional)
Instructions
  1. In a large pot, heat the olive oil over moderately-low heat.
  2. Add the onion, cover and cook, stirring occasionally, until softened, about 5 minutes.
  3. Add the broth, spices, salt and a few turns of freshly ground black pepper and bring to a boil. Add the peas and cook just until defrosted.
  4. In a blender, puree the soup in 2 batches until very smooth.
  5. If serving hot, return the soup to the pot and bring just to a simmer.
  6. If serving cold, transfer to the refrigerator to chill.
  7. Ladle into bowls.
  8. Stir the yogurt so that it is smooth and top each serving with a swirl of yogurt.
DisneyMeals https://disneymeals.me/
 

Not Joanna Eggs

One of the best scenes in the movie is when Joanna is stealing the poacher’s eggs.

To make this super realistic, I would have to swallow a whole uncooked egg. I’m not sure if I can physically do that, so I opted to make a hardboiled egg and eat that.

To make good hardboiled eggs, put the eggs in a pot and cover with about an inch of water. Make sure you don’t overcrowd the pot with eggs. Bring the water to a roaring boil. Once it reaches the boil, turn the heat to a low and let it simmer, covered for 10-12 minutes. Strain the water and let the eggs sit in cold water for at least another 10-12 minutes before serving.  I also found this handy chart of what the eggs look like at certain cook times.


[Bonus] Hedgehog Slice

Joanna is also shown eating animal crackers.

(Credit: DIsney)

(Credit: DIsney)

Animal crackers aren’t really a recipe, but it prompted me to make an Aussie dessert. Hedgehog Slice. It’s basically a fudge-type food with biscuits (or animal crackers) inside.

Hedgehog Slice
Write a review
Print
Prep Time
10 min
Total Time
40 min
Prep Time
10 min
Total Time
40 min
Ingredients
  1. 250g animal crackers or other biscuit cookie such as Maria cookies or Biscoff cookies (crushed into small pieces)
  2. ½ cup soft brown sugar
  3. ¼ cup cocoa
  4. 100g dark or milk chocolate, chopped
  5. 1 Tbsp golden syrup (can be made with 2 tsp light corn syrup and 1 tsp dark molasses)
  6. 100g butter
  7. 1 egg
  8. (optional: ½ cup desiccated coconut)
Chocolate topping
  1. 200g dark chocolate, chopped
  2. 50g butter
Instructions
  1. Lightly grease a 20cm (8in) square cake tin and line the base and sides with baking paper or grease.
  2. In a large bowl combine animal crackers, brown sugar, (coconut), and cocoa.
  3. In a small saucepan, over a gentle heat stir chocolate, golden syrup and butter until mixture is melted and combined.
  4. Cool slightly.
  5. Whisk in egg.
  6. Pour mixture into the dry ingredients and mix well to combine.
  7. Spoon into prepared tin and press firmly into the tin with the back of the spoon.
  8. Chill while preparing the chocolate topping.
Chocolate topping
  1. Melt chocolate and butter in a heatproof bowl over hot water until melted.
  2. Stir to combine. Spread over the chilled slice.
  3. Refrigerate until topping is set.
  4. Cut into small squares to serve
Notes
  1. I found it tastes better when refrigerated overnight.
DisneyMeals https://disneymeals.me/


Will it make you Soar with Marahute?

So, I think I overseasoned the pea soup. The recipe provided is less seasoned. Needless to say, I wasn’t too happy with it. However, I LOVED the hedgehog slice. It was delicious and probably VERY fattening.

Verdict:

Pea Soup – 5/10

Joana’s Egg – 6/10

Hedgehog Slice – 9/10

0

Black Cauldron – Apple Porridge, Toad Soup, and Call-back Medieval Recipes

Quick links: Apple Porridge | Toad SoupCall-Back Medieval Recipes | Verdict


I’d say that this is probably one of the most unknown Disney movies ever made. I think Disney has even forgotten they made it. Good thing too, it is probably one of the worst Disney movies. It’s enjoyable at times, but ultimately falls pretty flat. It’s a shame too, because I really liked the books on which it was based growing up. Most of the food featured in this movie we have made before (they aren’t very creative when it comes to medieval-type dishes usually).
Despite the horribleness of the movie, it had lots of firsts. It was the first Disney animated movie to receive a PG rating and it almost got a PG-13 rating, it’s the first not to feature any songs, it’s the first to use computer technology and it’s the first not to feature credits at the beginning of the movie.


Apple Porridge

The first thing shown at the beginning of the movie is some kind of porridge the pig farmer is making for his oracular pig. Although, it apparently isn’t very tasty porridge.

(Credit: Disney)

(Credit: Disney)

(Credit: Disney)

(Credit: Disney)

It doesn’t say exactly what’s in it, so I took some liberties of course. Later in the movie, the annoying but charming Gurgi steals an apple from Taran.

(Credit: Disney)

(Credit: Disney)

So I decided to make some apple-infused porridge. And unlike the film, it turned out pretty good.

Apple Porridge
Serves 2
Write a review
Print
Prep Time
5 min
Cook Time
8 min
Total Time
13 min
Prep Time
5 min
Cook Time
8 min
Total Time
13 min
Ingredients
  1. 1 cup oats
  2. 2/3 cups water
  3. 2/3 cups milk
  4. 1 apple (sliced into small chunks)
  5. 1/4 cup brown sugar
  6. 1 clove (crushed)
  7. 1/4 tsp salt
  8. 1/8 tsp cinnamon
  9. 1/8 tsp nutmeg
  10. 1/4 tsp vanilla
Instructions
  1. Mix the water and milk and bring to a boil
  2. Add the oats and salt
  3. Reduce heat to medium
  4. Cook uncovered for 5 minutes, stirring occasionally
  5. Add the apple and the rest of the ingredients and cook covered for 3 minutes
  6. Serve hot
DisneyMeals https://disneymeals.me/


Toad Soup

Toward the end of the movie, the group meets a couple of witches. One of them turns Fflewddur Fflam (awesome name, I know) into a frog and tries to stick him in a pot of boiling water. 

(Credit: Disney)

(Credit: Disney)

I looked everywhere for a place that sold frog meat, but couldn’t find any. However, I did see that a local Chinese restaurant (and a pretty famous and good one at that) called Lao Sze Chaun has some frog dishes. So I went there and ordered some frog soup.

IMG_20150728_122342 IMG_20150728_122409

Frog, unsurprisingly, tastes a lot like chicken, but very bony. I actually wasn’t able to eat much of the dish because it was UNBELIEVABLY spicy. One of the spiciest things I have ever tried. But if you’re ever in Chicago, I recommend you go to Lao Sze Chaun. Just try one of their other dishes.

Call-Back food

Being a movie set in the middle-ages, they showed the staple cooked ham and turkey.

(Credit: Disney)

(Credit: Disney)

We have made a couple of different recipes of ham and turkey. So I’ll leave the links to those recipes here.

Willie’s Medieval Chicken from Mickey and The Beanstalk

Ichabod Crane’s Ham


Will it Raise an Army of the Dead?

The porridge was really really good. I guess I didn’t make it exactly to the specification of the movie…unless people in the movie just don’t like sweet porridge. 

Frog tastes like dark-meat chicken. Not bad. 

Verdict:

Porridge – 8/10

0

The Rescuers – Moonshine and Gingersnaps

Quick links: Luke’s Moonshine (non-alcoholic) | Penny’s Gingersnaps |  Verdict

It had been a LOOOONG time since I had seen The Rescuer’s. One of my favorite Disney movies as a kid was The Rescuer’s Down Under, but I never had a huge affinity toward the original Rescuer’s movie. Watching it again made me like it a bit more. It was a very charming movie. It’s also on Netflix right now if you want to [re]watch it.


Luke’s Moonshine (Non-Alcoholic)

Louisiana Muskrats make the best moonshine. That’s a well-known fact. And if it weren’t for Luke’s moonshine, Evinrude the dragonfly would have failed. Luke’s moonshine actually helped out a few people. Giving them insane energy with a spicy kick.

Keeping with this family-friendly blog, I tried to find a good base to start off with for making a non-alcoholic moonshine that would produce the desired effects of Luke’s moonshine. Through my searching, I found a recipe based on one of my absolute favorite non-disney franchises, Harry Potter. Firewhiskey. I found a recipe and tried making it. It didn’t turn out the greatest. I modified it to fit more of a Rescuer’s theme. This recipe will definitely take some reworking though.

Luke's Moonshine (Non-Alcoholic)
Write a review
Print
Prep Time
20 min
Total Time
12 hr
Prep Time
20 min
Total Time
12 hr
Ingredients
  1. 1 (2 liter) bottle ginger ale
  2. 3 (1 inch) pieces fresh ginger root
  3. 1/2 cup cinnamon red hot candies
  4. 2 cinnamon sticks, or more to taste
  5. 2 habanero (or cayenne) peppers, cut into large pieces
  6. 1 tsp Louisiana Hot Sauce
  7. 1/2 tsp Chili Powder
  8. 1 can Red Bull
  9. 1 Package Kool-aid (I used grape)
  10. 8 cups water
  11. 1 cup sugar
  12. A few drops of red food coloring
Instructions
  1. Combine the ginger ale, ginger, red hot candies, hot sauce, chili powder and cinnamon sticks in a large container (I used a milk jug)
  2. Refrigerate until the candies dissolve completely, 8 hours or overnight.
  3. Mix the Kool-aid as directed with the water and sugar (I used less water for a stronger flavor). Set aside.
  4. Add the habanero (cayenne) peppers, Red Bull, and 2 cups of the Kool-aid mixture to the ginger ale mixture for 4 hours or desired time.
  5. Remove and discard peppers.
  6. Serve in small glasses.
DisneyMeals https://disneymeals.me/
<
>


Penny’s Gingersnaps

The first food we see is when Penny is in the orphanage in Rufus’s flashback. Penny feeds Rufus a gingersnap. 

He licks it and thinks its a catnip snap. We might have to make those sometime too, for all you cat-lovers out there.

(Credit: Disney)

(Credit: Disney)

We’ve made some delicious (one of our favorite recipes) gingersnaps before in our Sleeping Beauty post. Here’s the recipe.

Penny's Gingersnaps
Serves 24
Write a review
Print
Prep Time
20 min
Cook Time
10 min
Total Time
3 hr 30 min
Prep Time
20 min
Cook Time
10 min
Total Time
3 hr 30 min
Ingredients
  1. 2¼ cups all-purpose flour
  2. 2 teaspoons ground ginger
  3. 1 teaspoon ground cloves
  4. 1½ teaspoons baking powder
  5. 1/8 teaspoon kosher salt
  6. ½ cup unsalted butter, at room temperature
  7. 1 cup sugar
  8. 1 Extra Large Egg
  9. 1/3 cup dark molasses
  10. 1 1/2 teaspoon vanilla extract
Make the dough (You can do this part up to three days in advance.)
  1. SIFT the flour, ginger, cinnamon, cloves, baking powder and salt together in a medium bowl. Set aside.
  2. PLACE the butter and sugar in the bowl of a stand mixer fitted with the paddle attachment. Beat on medium speed until the mixture is light and fluffy.
  3. SWITCH the mixer to low speed and gradually add the egg, molasses and vanilla extract. Increase the speed to medium and beat until smooth.
  4. SWITCH the mixer to low speed and add the dry ingredients in 3 additions, pulsing the mixer to incorporate each addition before adding the next one.
  5. TURN the dough out onto a lightly floured work surface. Knead a few times to incorporate any crumbs.
  6. DIVIDE the dough in half. Roll each half into a log about 1½ inches in diameter and 12 inches long. As you roll, gently push the ends toward the center to prevent air pockets and to keep the logs at an even thickness.
  7. WRAP the logs in plastic wrap and refrigerate until firm, at least 3 hours or up to 3 days.
Bake the cookies
  1. PREHEAT the oven to 400°F. Line the bottoms of two 12″ x 18″ sheet pans with parchment paper.
  2. REMOVE the logs from the refrigerator and unwrap them. Using a ruler and a sharp knife, cut each log into rounds ¼ inch thick. If the dough crumbles as you cut it, reshape each slice.
  3. PLACE the rounds on the prepared pans, spacing them 2 inches apart. Bake on the middle shelves of the oven, rotating the pans 180° halfway through the baking time, until the cookies are set but soft enough to hold a slight indentation when pressed with a fingertip (about 7 to 10 minutes).
  4. LET cool completely on the pans on wire racks. Store in an airtight container at room temperature for up to 1 week. Yield: 50-60 2-inch cookies.
Notes
  1. Source: http://www.thenibble.com/reviews/main/cookies/cookies2/ginger-snaps-recipe.asp
DisneyMeals https://disneymeals.me/

Will your Eyes Spiral and your Mouth Smoke?

The firewhiskey was kinda disappointing. I was hoping for something a lot tastier…or at least with more of a kick. 

The gingersnaps were great, as always. I highly recommend those.

Verdict:

Moonshine – 5/10
Gingersnaps – 10/10

3

Make Mine Music/Fun and Fancy Free – Chocolate Pot-roast & Pistachio Gravy, Old Fashion Chicken, Coconut Cake, White Cake, Chocolate Cake, Plum Pudding, Raspberry Lemonade, Candied Beets, Ice Cream Boat, Fish Sandwich, Avocado Spread and Dumplings

Quick links: ‘Murican Ice Cream | Stacked Fish Sandwich & Avocado Spread | Luana’s White Cake | A Cricket’s Chocolate Delight Cake | Slim Bean Sandwich | Willie’s Medieval Chicken | Coconut cake | Raspberry Lemonade | Fe-fi-fo-plum Pudding | Candied Beets | Donald Duck Dumplings | MMM, Chocolate Pot-roast | Smishmashio Green(ish) Gravy |  Verdict [twitter-follow screen_name=’DisneyMeals’] “Fe-Fi-Fo-Fum I smell the blood of an anthropomorphic rodent!” – Willie the Giant (paraphrasing…kinda)….
Continue reading »

5

Bambi – Red Currant, Acorns, Grapes, Red Clover, Bark, Grass, Thumper Salad

Quick links: Red Currant | Acorns | Grapes | Red Clover | Bark | Grass | Thumper Salad | Verdict [twitter-follow screen_name=’DisneyMeals’] This week, we’re featuring venison! Say goodbye to Bambi’s mom! Ok,not really. The food featured in Bambi isn’t the tastiest, probably because it’s not really meant for human consumption. However, most of the animal food featured in Bambi…
Continue reading »

0

Dumbo – Roasted Peanuts

I seem to always block out how sad Dumbo really is. I could say it was cutting up onions while watching Mrs. Jumbo cradled little Dumbo in her trunk, but there weren’t any onions featured in this heartbreaking movie. Only peanuts and the reoccurring early Disney theme of getting kids drunk.

5

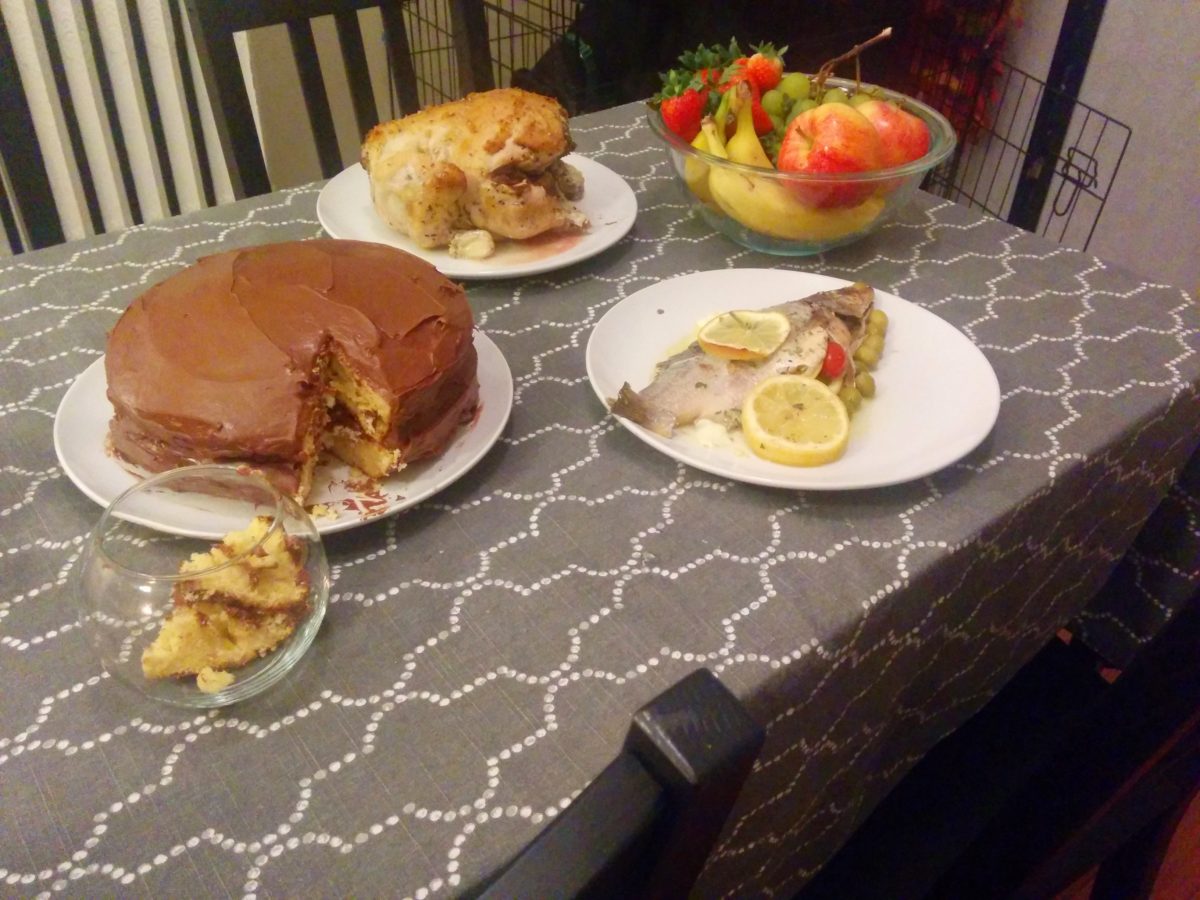
Pinocchio – Lemon Roasted Fish, Yellow Cake, Roasted Chicken, Homemade Bread, and Strawberry Pie

Quick links: Figaro’s Fish | Princess Cleo’s Cake | Geppetto’s Chicken | Stromboli’s French Bread | Pleasure Island Pie | Verdict [twitter-follow screen_name=’DisneyMeals’] One of the saddest parts of Pinocchio is that Geppetto made a huge mouthwatering feast that no one got to eat! The Fish Figaro Failed to Eat So as it goes, Pinocchio gets turned into a living puppet that’s…
Continue reading »